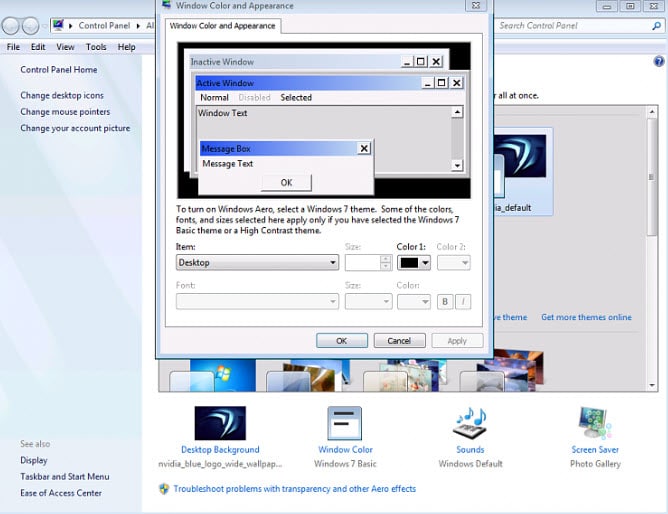
The Aero theme is probably the most loved in Windows history. The success of Windows 7 was due to many different factors and the Aero theme was definitely one of them. The Aero theme gave a glass-like look to the title bar and the start menu. The Aero theme was the signature look of Windows 7.
Those users who have only used Windows 8 and onwards are probably wondering why they haven’t seen this amazing theme in Windows 8 or 10. Well, it’s not your fault because Microsoft removed this theme for Windows 8 onwards.
In Windows 10, Aero theme is not available even though it’s the most requested theme. It doesn’t look likely that Microsoft will bring back this theme in Windows 10 anytime soon. However, there are other ways you can experience the Aero Glass for Windows 10.

In this article, we have those other methods that you can use to enable Windows Aero in Windows 10.
You may also like to check out this article on minimize maximize close buttons not working on Windows 10 .
Why In Windows 10 Aero Was Removed By Microsoft?
Contents
Before we discuss the methods to enable Aero in Windows 10, it’s important to understand the reason Microsoft removed it for Windows 8 onwards and still hasn’t brought it back even after facing such criticism from the userbase.
Microsoft removed the Aero theme as a way to create a unified UI for battery-powered devices like smartphones, tablets, and laptops. The target was to create the Windows more battery efficient for such devices. This way all the different Microsoft devices can be run on the same Windows.
How To Enable Windows Aero In Windows 10?
Now, coming back to the main topic on how to enable the Aero Windows 10 title bar, frames, etc. Bringing back the Aero theme is not just about the nostalgia of using it again but the simple reason that it was just a good and well-optimized theme.
To enable and enjoy Aero in Windows again, try the methods given below.
1) Use The Registry Editor
Some users got specific updates from Microsoft for testing the Aero glass in Windows frames and title bars as a way to get feedback from users. However, only very few users got this update and the majority of the users didn’t get it.
If you are one of those users who got this update, you can try this method for enabling the Aero Glass for Windows 10 transparent theme. Just follow the steps given below to do it:
- Open the Run utility by pressing the Windows + R keys.
- Type regedit and click on Enter. The Registry Editor will open on your screen.
- Navigate to the following folder:
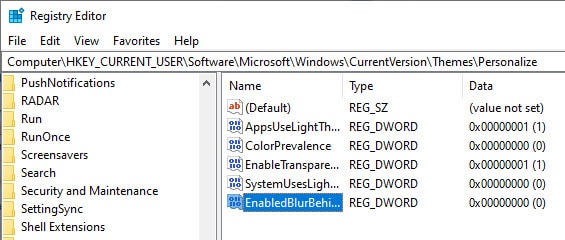
HKEY_CURRENT_USER\SOFTWARE\Microsoft\Windows\CurrentVersion\Themes\Personalize
Or just copy-paste it on the address bar of Registry Editor.

- Now, locate the DWORD entry EnabledBlurBehind. If the DWORD doesn’t exist, then create a new one of 32 bit and name it EnabledBlurBehind.
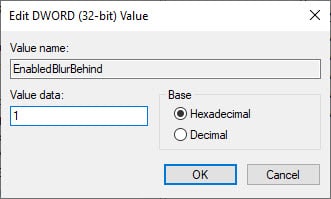
- Double-click on the DWORD and enter 1 in the Value data section.

- Finally, press OK to save the changes and restart your computer.
After the computer restarts, the Aero glass theme should be enabled. However, if this doesn’t work, then try the next method.
2) Use Aero Glass For Win 8.X+
Before you try this step, you should create a system restore point so that you can return the state of your computer if case of a mishap. To download and install the Aero glass them for Windows 10, follow the steps given below.
- Visit this website and download the Aero glass theme for your Windows.
- Now, install the app. During the installation, make sure to check the Install Aero Glass theme box.
- Keep following the instructions on your screen to finish the installation.
- After the application has installed, right-click on the Desktop and select the Personalize option.
- Select the Go to Themes option in the Preview your changes section.
- Click on the unsaved Desktop theme and activate it.
Now, the Aero Windows 10 transparent theme should be active on your computer. However, you have probably noticed the watermark that somewhat takes away the feeling of using the Aero theme. You can pay to remove the watermark, or you can try the next method.
3) Use Glass 2k
Another method you can use to experience the Aero glass theme in Windows 10 is to use the Glass 2k application. To use the Glass 2k application, follow the steps given below:
- Download Glass 2k from this website and open it. No installation is required for this application.
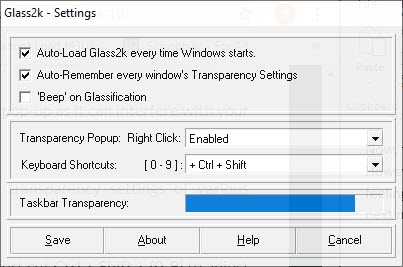
- After opening Glass 2k, check the Auto-Load Glass 2k every time Windows starts box and select the Taskbar Transparency as you prefer.

- You may want to disable the Transparency Popup also as it can interfere when you use the right-click menu.
- Finally, click on Save.
After saving the settings, you will have full control over the different transparency settings of the separate elements of your device. To adjust the transparency, press the Ctrl + Shift + (0-9) keys on your keyboard on any Window.
We liked using the Glass 2k app as it provides in Windows 10 Aero glass-like theme pretty well. Also, the option to customize the transparency is a great addition.
Wrapping Up
So, there you have it. Now you know how to enable the Windows 10 Aero theme on your computer. Although these methods are great, who doesn’t want the original Aero theme back from Microsoft? Hopefully, shortly we will get an official update on the Aero theme in Windows 10. Leave your comments below sharing your views on this article and also mention if the above methods worked for you or not.
Please provide me with some information about a topic. That is, can Windows 10 slow down if I change it to use this type of theme?