All the latest Windows 10 versions have .NET framework 4.8 pre-installed. But those apps that were developed in the Vista and Windows 7 days will not run without the .NET 3.5 framework. To run these apps, users have to install .NET framework 3.5 on their PC.
In this article, we have given instructions on how to install .NET 3.5 on Windows 10 and 11. After following these instructions you will be able to install .NET framework 3.5 easily.
How To Install .NET 3.5 On Windows 10/11?
Contents
There are many methods that you can use to install the .Net 3.5 Framework on Windows 10. Most of these methods will require a stable and fast enough internet connection. Only the last method can be done offline.
Method 1: Let Windows Update Download It For You
If you apply this method, then the Windows update will download and install the 3.5 .NET Framework automatically. To do it, follow the steps given below:
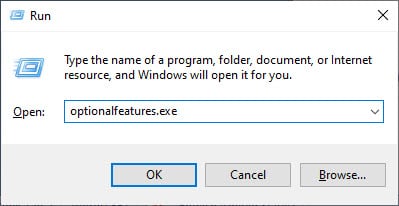
- Press the Windows + R keys on your keyboard to open the Run utility.
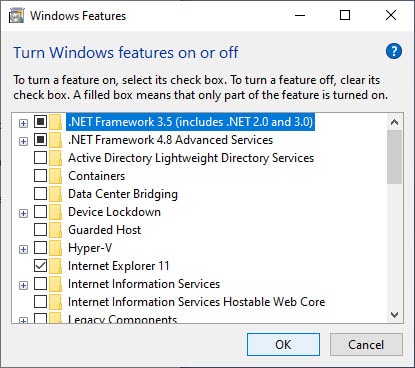
- Type optionalfeatures.exe and press Enter. The Windows Features dialog will open on your screen.

- Locate and check the .NET Framework 3.5 (includes .NET 2.0 and 3.0) box and click on OK.

- Next, select the Let Windows Update download the files for you option.
- Now, the latest version of the .NET 3.5 Framework will be downloaded and installed automatically.
Method 2: Use The Command Prompt To Download And Install
You can also use the Command Prompt to download and install the 3.5 .Net Framework. To do it, follow the steps given below:
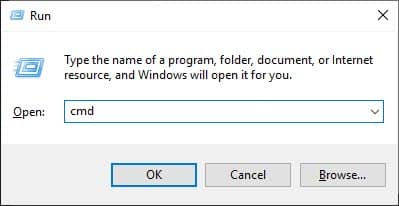
- Open the Run utility again.
- Type cmd and press Ctrl + Shift + Enter to open an elevated Command Prompt.

- Now, type Dism.exe /online /Enable-Feature /FeatureName:”NetFx3” and press Enter.
- Windows will now download and install the NET Framework 3.5.
Method 3: Download And Install Manually
In the 3rd method, we have given the instructions to download and install the NET Framework 3.5 manually. To do it, follow the steps given below:
- First of all, open this website.
- Next, download the .NET Framework 3.5.
- After the download is complete, run it.
- Finally, click on the Download and install this feature option to let Windows install it.
Method 4: Install Offline Using DISM And Windows 10 Bootable Disc
If you don’t have the internet on your PC or if the connection is slow, then you can use this method to install .NET Framework 3.5 on Windows 10 offline. To do it, follow the steps given below:
- First of all, you will have to insert a Windows 10 bootable disc or flash drive.
- Then, you have to check the drive letter for the disk or flash drive by opening This PC.
- Now, open the elevated command prompt again and write the following code:
Dism /online /enable-feature /featurename:NetFX3 /All /Source:G:\sources\sxs /LimitAccess
Where G: is the drive letter of the bootable disc in my case. - Finally, press Enter.
Now, the .NET Framework will install offline on your PC.
Check out this article if no boot disk was detected.
Wrapping Up
So, there you have it. Now you know how to install .NET 3.5 on Windows 10 and 11. Remember that method 1 2 and 3 require internet connections to download the .NET framework but method 4 doesn’t. Leave your comments below sharing your views on this article.
Leave a Reply