Windows 10 users can decide which device should be set for audio input or output by default. But there is another feature that allows users to change the audio output for specific programs. If you didn’t know about this, then it isn’t surprising as this feature is fairly unknown by many users.
Assigning an application to different sound outputs is very useful. Gamers can set their headphones to listen to music while setting their speakers to play the game sound. In this article, I have discussed how to change audio output for specific programs.
Also, check out:
How To Change Audio Output On Windows 10?
Contents
Before I discuss how to change what audio device a program uses, you need to know how to change audio output on Windows 10 first. You can change the audio input and output devices using 3 different methods. The audio output device can be changed from the Control Panel, Settings app, or the taskbar notification tray.
Change Audio Output Device From Taskbar Notification Tray
Changing the audio output from the taskbar notification tray is the easiest and fastest way to do it. To change the audio output device from the taskbar notification tray, follow the steps given below:
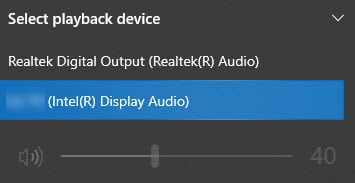
- Click on the speaker icon on the notification tray. You will see the volume slider pop up.
- Above the volume slider, you will see the name of the current audio output device. Click on it.
- From the menu, select the audio output device that you want to use.

Change Audio Output Device From Settings
You can also change the audio output device from the Settings app. To do it, follow the steps given below:
- Right-click on the start button and select the Settings option from the pop-up menu.
- Next, click on the System option and then click on the Sound option.
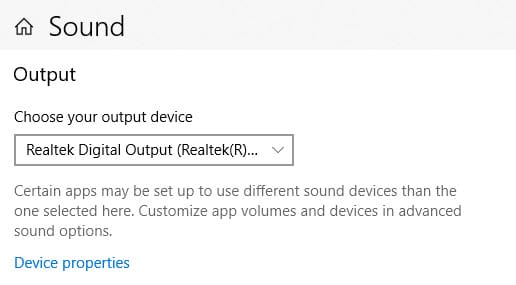
- In the Output section, click on the Choose your output device menu.
- Select the audio output device you want to set from the list.

Change Audio Output Device From Control Panel
Another way to change the audio output device is from the Control Panel. To do it, follow the steps given below:
- Type Control Panel in the search menu and select the appropriate option.
- After Control Panel opens, click on the View by option and select the Small icons option.
- Next, locate and select the Sound option in Control Panel. The Sound dialog will open on your screen.
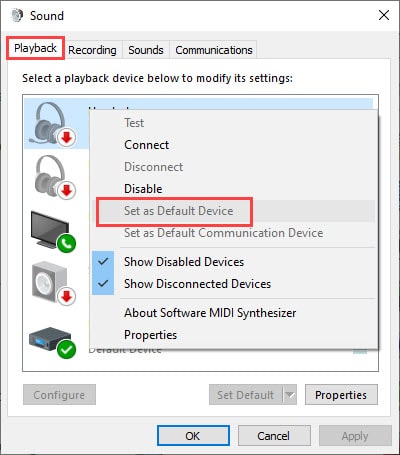
- Click on the Playback tab and select the output audio device that you want to use.
- Select the Set Default option.

- Finally, click on Apply and OK to save the changes.
How To Change Audio Output For Specific Programs?
Assigning an application to different sound outputs is a very useful feature. It allows customization in the sound output for users. They can set different audio output devices for specific programs to get the best experience. So, how to change what audio device a program uses? It is very easy to do, simply follow the steps given below to do it:
- Open the Sound settings from the Settings app as shown above.
- Next, click on the App volume and device preferences option in the Advanced sound options section.
- In the App section, you will see the different apps listed that outputs audio. Beside it, you will see 2 drop-down menus. Click on the top menu and select the output device you want to assign that app.

You can also assign different audio input devices for specific programs from following the same steps shown above and then clicking on the 2nd menu in step 3. The 2nd menu beside the listed apps has the input audio devices.
Wrapping Up
So, there you have it. Now you know how to change audio output for specific programs on Windows 10. If you have any questions related to this topic, ask them in the comment section below.
Leave a Reply