Have you noticed any unknown folder named “Removable Storage Devices” on your desktop? Recently, many users have reported of the Removable Storage Devices folder on desktop that has appeared out of nowhere.
This folder is basically a Windows bug that has likely been triggered by incorrect Windows Registry entries or incorrectly configured system settings. In this article, I have discussed how you can delete the Removable Storage Devices folder from your desktop.
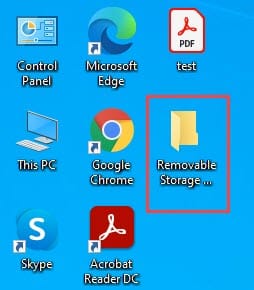
Removable Storage Devices Folder
Contents
After working on your computer for some time, like editing photos or transferring files from your flash drive, you may notice the Removable Storage Devices folder on your desktop. If you open this folder, you can find available devices and drives on the computer or the folder may even be empty.
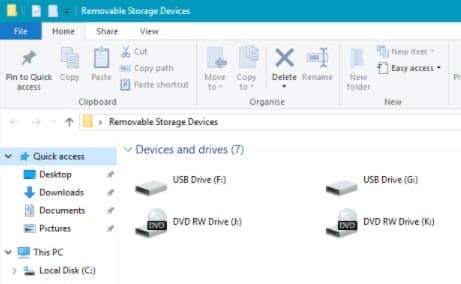
When you try to remove it by using the delete option, you may find it is not working. Exactly why this folder appears remains unknown, but it is definitely a bug. Also, incorrect Windows Registry entries or incorrectly configured system settings, seems some of the likely causes of this bug.
This folder is useless and serves no purpose. You can remove it with some simple methods as mentioned below.
How To Delete The Removable Storage Devices Folder On Desktop?
Here are some simple methods that you can use to remove this folder from your desktop.
Method 1: Restart Your PC
Restarting your PC fixes most minor bugs and errors, including this one. After you restart your computer, you will likely find that the folder has been removed from desktop. This likely happens as restarting clears the system cache of Windows 10.
However, restarting each time this bug appears on your screen is definitely not the most feasible solution. If restarting isn’t a viable option for you, check out the other methods mentioned below.
Method 2: Refresh Desktop
Another method to get rid of this folder is refreshing the desktop. Refreshing the desktop has removed this bug folder for many users. As you know, it is also very easy to perform in Windows 10. The only reason I haven’t made this the 1st method is that it is not foolproof. The bug folder tends to reappear after sometime.
Even though there is a chance that the folder will reappear, it is still a easy temporary solution. To refresh your desktop, follow the steps given below:
- Right-click on the desktop.
- Select the Refresh option from the right-click context menu.
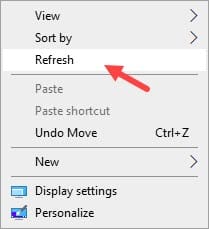
Refresh a couple of times if refreshing the first time doesn’t remove the bug folder.
Method 3: Run SFC And DISM Scan
Another likely cause of this bug folder is corrupted system and Registry files. In this case, restarting or refreshing your computer will only remove the folder temporarily. A more permanent solution would be to run the SFC and DISM scan to fix the corrupted system and Registry files.
To run the SFC and DISM scan, follow the steps given below:
- Type cmd in the Start menu and right-click on the Command Prompt option.
- Select the Run as Administrator option to open an elevated Command Prompt.
- Now, type sfc /scannow and press Enter to run the SFC scan.
- The SFC scan will take some time to complete so, don’t close it prematurely. After it finishes, restart your computer.
- Now, open the elevated Command Prompt again and type the following command:
DISM /Online /Cleanup-Image /RestoreHealth, and press Enter.
This will run the DISM scan.
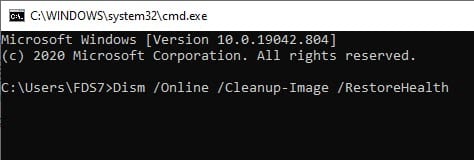
- Wait for the DISM scan to finish and then restart the computer.
After running both the SFC scan and DISM scan, you should get rid of the Removable Storage Devices folder on desktop permanently.
Method 4: Run Antivirus Scan
If running the SFC scan and DISM doesn’t remove this bug folder permanently, it is possible that this error folder is being triggered by a virus or malware. If your PC has been infected by a virus or malware, you can try running an antivirus scan to remove it.
Malwarebytes is a powerful anti-malware and antivirus software that you can use in this situation. If you don’t want to install any 3rd party antiviruses, then you can always run the Windows Defender Offline scan, which is very thorough in its removal of malware and viruses.
To run the Windows Defender Offline scan, follow the steps given below:
- Type Windows Security in the Windows search bar and select the top result.
- Click on the Virus & Threat Protection option.
- Select the Scan options in the Current Threats section.
- Scroll down and check the Microsoft Defender Offline scan and select the Scan now option.
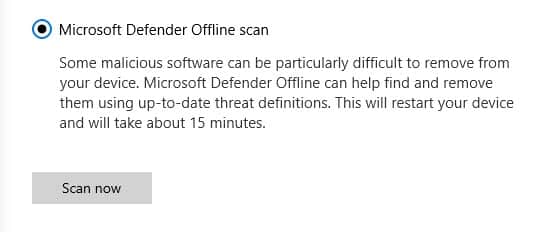
- The scan will start now and will approximately take 15-20 minutes. Wait for the scan to finish and don’t close it prematurely. After the scan finishes, Windows will restart automatically.
When Windows boots into the desktop, you will likely find the Removable Storage Devices folder removed from the desktop.
Wrapping Up
So, there you have it. Now you know how to delete the Removable Storage Devices folder on desktop. One or a combination of a couple of the above methods should delete this bug folder from your desktop permanently. If you have any other questions related to this article, ask them in the comment section below.

Leave a Reply