Notifications are important, they can act as a reminder to certain important tasks, like updating Windows. However, some notifications can be distracting and some can be downright infuriating. Advertisement and unnecessary website notifications definitely fall in the latter section. Not to forget the unwanted birthday notifications on social media sites like Facebook.
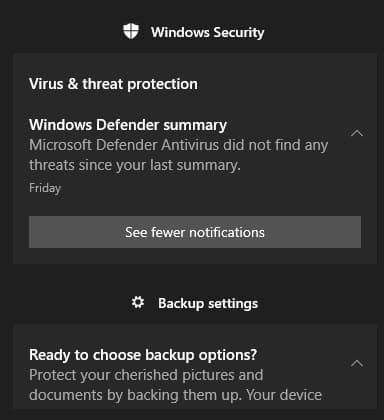
In Windows 10 you can easily block these unnecessary notifications. If you have ever wondered how do I get rid of the pop in the bottom right corner, then don’t worry as in this article I have discussed how to block notifications on Windows 10.
How To Block Notifications?
Contents
Windows 10 provides plenty of customizability when it comes to notifications. Users can disable all notifications, or certain specific notifications like advertisement, website, live tiles in the Start menu, lock screen notifications, Windows Firewall and many more. The pop-up notifications can be extremely annoying and disturbing sometimes.
So, how do I get rid of the pop in the bottom right corner you ask? Here I have shown the step by step process needed to disable all these notifications on Windows 10.
How To Disable All Notifications On Windows 10?
If you are displeased with all Windows 10 notifications in general, then there is a way to disable it. This is how to block notifications of all types in Windows 10:
- Right-click on the Start menu and select the Settings option from the pop-up menu.
- After the Settings app opens on your screen, select the System option.
- Next, click on the Notifications & actions option.
- Turn off the Get notifications from apps and other senders toggle in the Notifications section.
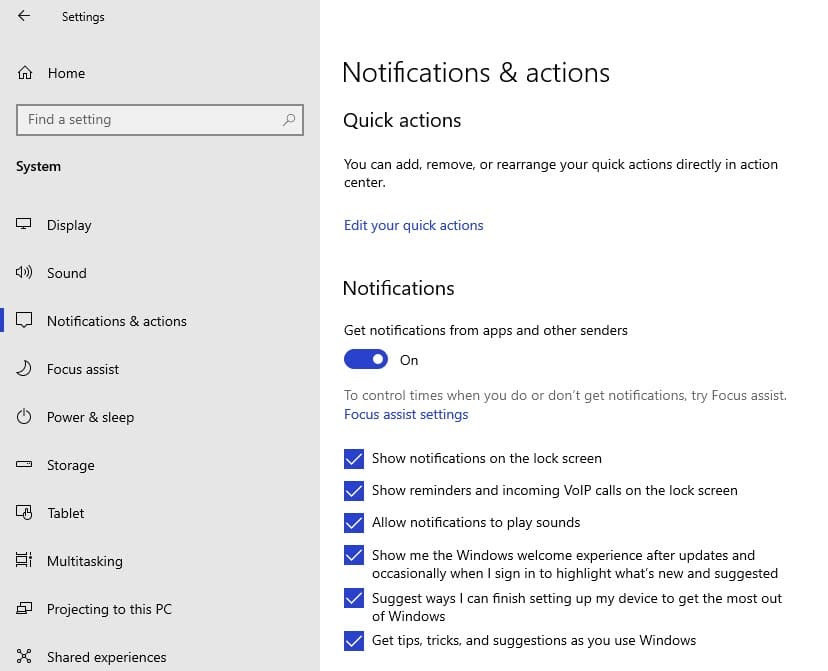
Remember that after you have completed the above steps, all notifications for both the Windows 10 store and classic desktop will get disabled.
How To Disable Notifications For Individual Apps?
Disabling all notifications isn’t likely to be the solution for all users. Most users are probably looking to disable notifications of specific apps. To disable notifications of specific apps, follow the steps given below:
- Open the Notification & actions settings.
- Scroll down to find the list of apps in the Get notifications from these senders section.
- Locate the program that you want to disable notifications and turn off the toggle next to it.
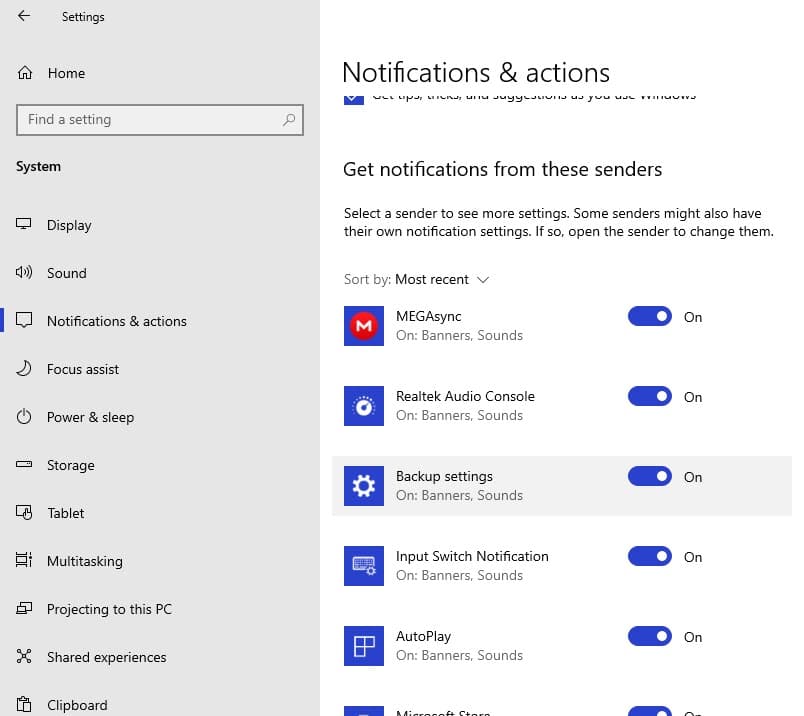
The above steps will only disable the notifications of apps that use the Windows notification method. If you don’t find a 3rd party app listed here, it means that the app doesn’t use Windows notification for showing you notifications. In this case, if you want to disable the notification of that app, you will have to do it from inside the app’s settings.
How To Enable Focus Assist To Only Allow Prioritized Notifications?
Focus Assist is an amazing feature of Windows 10 that allows users to set their priority notifications list so that only the priority notifications get shown. This feature was introduced so that unimportant notifications don’t disturb the user when they are trying to focus.
To enable Focus Assist, follow the steps given below:
- Open the Notifications & actions settings.
- Click on the Focus assist settings option.
- Check the Priority only circle and click on the Customize your priority list option.
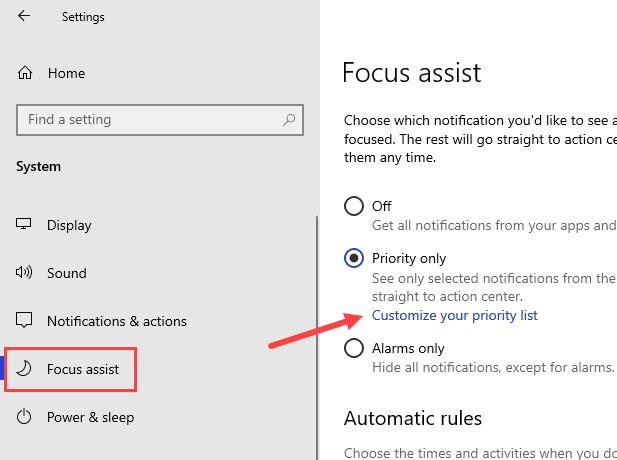
- Configure the priority list as you want.
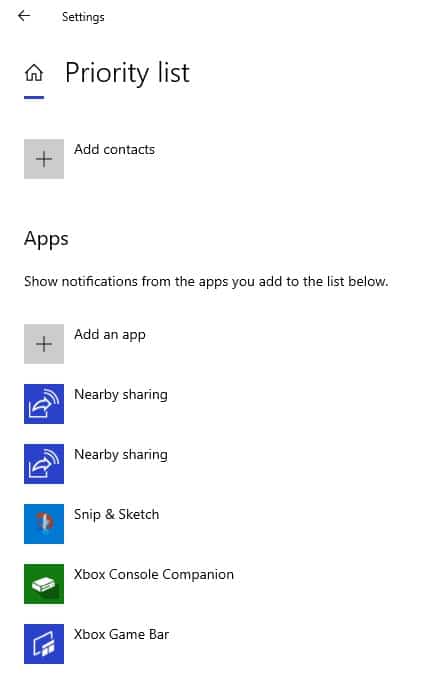
With the custom priority list, users can also choose to only show alarm notifications and decide when to show these notifications and when not to. In the Automatic rules section, turn on or off when you want to get notifications and when don’t want to be disturbed.
How To Disable Lock Screen Notifications?
Windows 10 has updated the lock screen over the years and made it much more useful. Users can now read notifications, read the news, and watch slide shows on the lock screen. If you want to disable the lock screen notifications, follow the steps given below:
- Open the Notifications & action settings.
- Uncheck the Show notifications on the lock screen option.
- Here you can further decide to disable reminders and incoming VoIP calls on the lock screen by unchecking the Show reminders and incoming VoIP calls on the lock screen box.
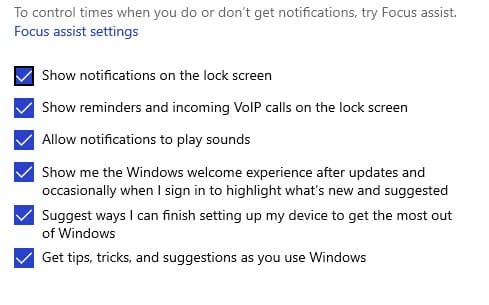
You can also disable Windows suggestions and the Windows welcome experience by unchecking the relevant boxes.
How To Remove Notifications On Windows 10 From Action Center?
One of the primary reasons that users are irritated from the notifications on Windows 10 is the fact that all the notifications stack up in the Action Center. Rather than disabling the notifications, you can also remove notifications on Windows 10 to clean up the Action Center. To do it, follow the steps given below:
- Click on the Action Center icon (message icon) in the system tray.
- Here you will find all the notifications stacked together.
- You can manually clear each notification by moving the cursor on top of it and clicking on the cross (X) icon. Or you can click on the Clear all notifications option to remove all notifications.
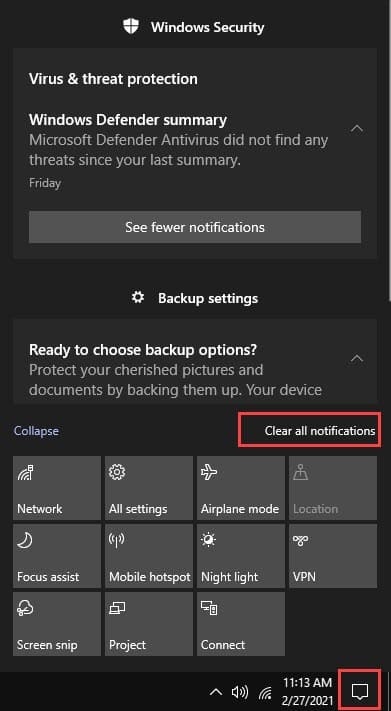
Action Center can also be used to disable specific notifications. Simply, right-click on the notification on Action Center and select the Turn off notification from “name of the program or app” option. This is a quicker way to disable notifications for certain programs.
How To Turn Off Live Tiles In The Start Menu?
When you open your Start menu, you will find notifications about news, mail, or apps like Facebook. The live tiles won’t pop on your screen but if it disturbs you when using the Start menu, then you can also disable them. To disable live tiles, follow the steps given below:
- Open Start Menu.
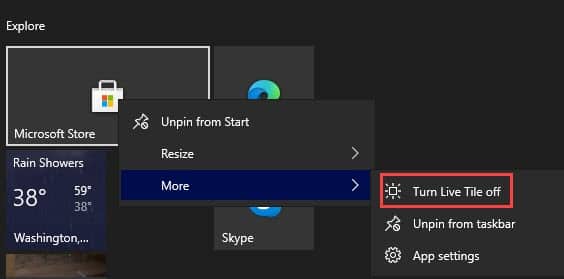
- Right-click on the Live Tile.
- Select the More option from the right-click context menu.
- Click on the Turn Live Tile off option.
How To Block Notifications From Websites?
Aren’t you tired of unknown websites asking you to allow notifications from them? If you have actually allowed them by mistake, then don’t worry as you can disable it from your internet browsers. Here is how to turn off notifications from a website on Chrome and Firefox.
For Google Chrome:
- Open Chrome and click on the menu button (3 dots) in the top right corner of the screen.
- From the pop-up menu, select the Settings option.
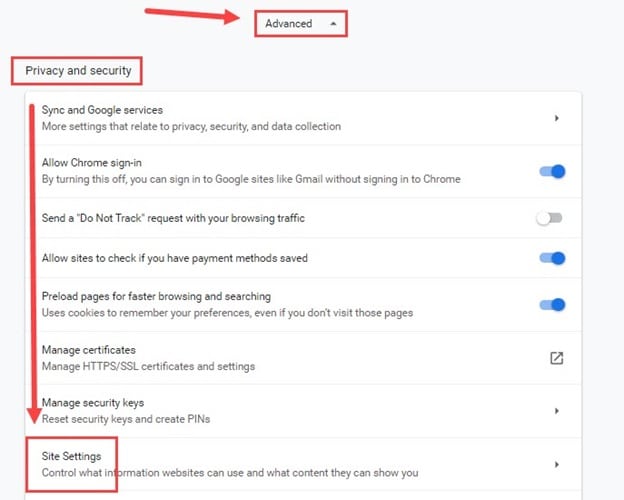
- Scroll down to the Privacy and Security section and click on the Site Settings option.
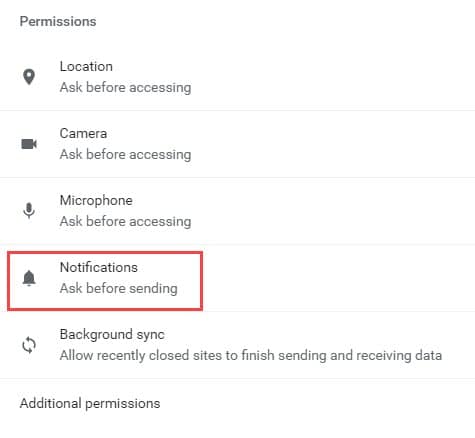
- In the Permissions section, click on the Notifications option.
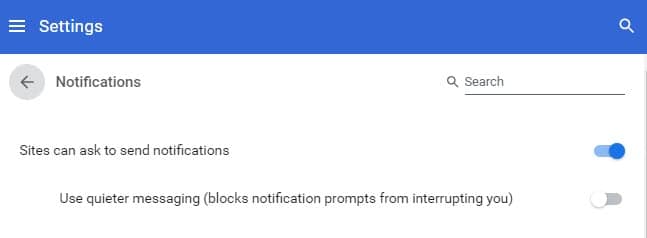
- Turn off the Sites can ask to send notifications option. This will block all sites from asking you to send notifications.
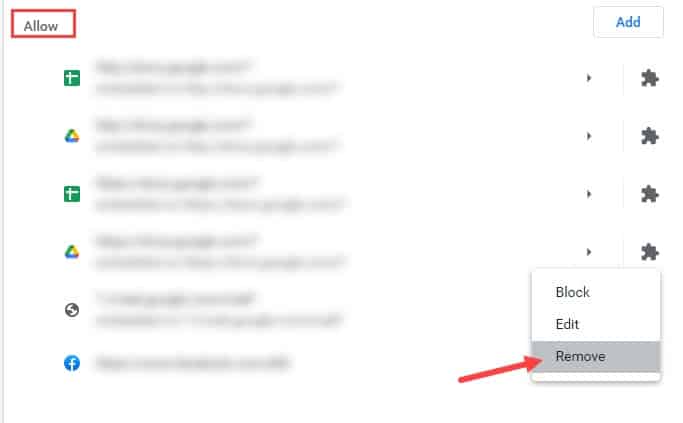
- In the Allow section, check for the site that you have already allowed to send the notification. Once you have located it, click on the 3 dot icon beside it and select the Remove option.
For Mozilla Firefox:
- Open Firefox and click on the menu button (3 horizontal bars) in the top right part of the screen.
- Click on the Options button from the pop-up menu.
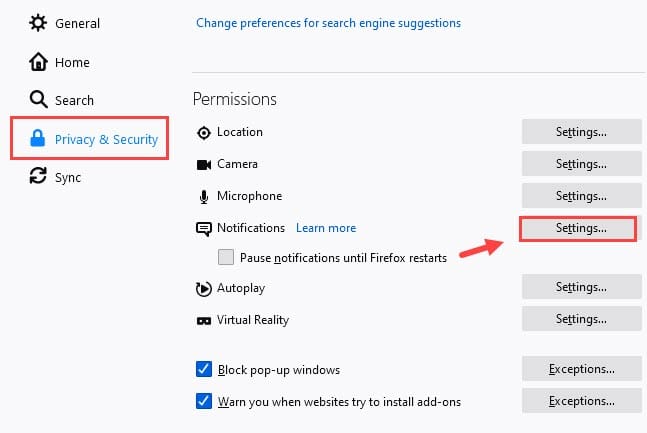
- Select the Privacy and Security option from the left panel.
- Scroll down to the Permissions section and click on the Settings option beside Notifications. This will open the Notification Permissions Settings dialog.
- Check the Block new requests asking you to allow notifications box.
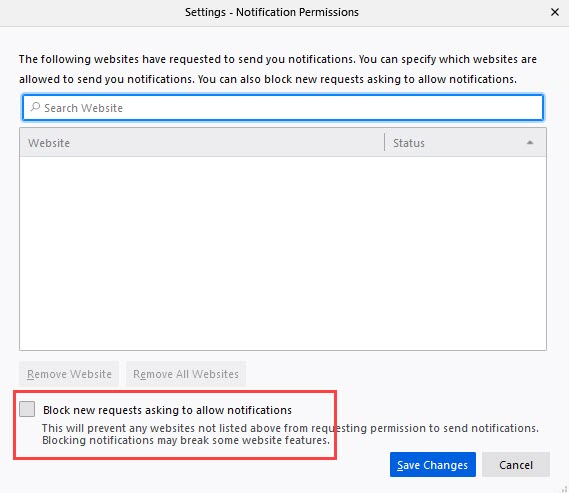
- Select the website that you have mistakenly allowed notifications and click on the Remove Website option. Otherwise, click on the Remove All Websites option if you want to block all the allowed websites that you have approved to send notifications.
- Finally, click on Save Changes.
This is how to block notifications from websites on Chrome and Firefox. Now, no website will disturb you with notifications and you can surf online with peace.
Also, learn how to disable slow charging notifications on Windows 10.
Wrapping Up
So, there you have it. Now you know how to block notifications on Windows 10. If you have any further questions related to this article, ask them in the comment section below.
Leave a Reply