Hosts files are text files, which is used by the OS to map IP addresses to hostname on the local computer. As you may know, DNS translates domain names into IP addresses, but it does that after Windows checks the Hosts file to see if the domain has been already mapped.
You can edit the host file to map specific domain names to the IP addresses that you choose. This means that you can override the DNS from translating the domain names to IP addresses. In this article, I have discussed how to edit host file in Windows 10.
Why Edit Host File?
Contents
So, you may be wondering why edit the host file? By modifying the host file, you can override the DNS for a domain in your PC.
This is useful for testing your site without the test link before going live with SSL, check whether an alias site works before DNS change, block other websites, and other reasons related to DNS. When you modify the host file, your PC directly addresses the IP, which you have specified.
Also, check out this article on what to do when your DNS server is not responding.
How to Edit Host File In Windows 10?
The host file is stored as a text file in the system folder of Windows 10. To edit the host file you need to open it in a text editor, like Notepad.
But you would need to open it as an administrator. If you don’t open it as an administrator, you won’t be able to save the edited host file. The following error will likely pop on your screen: “You don’t have permission to save in this location. Contact the administrator to obtain permission”
Make sure that you are logged in as an administrator before following the steps given below to edit the host file:
- Type Notepad in the Windows search bar.
- Right-click on the Notepad app from the search menu and select the Run as administrator option. Notepad will now run as an administrator.
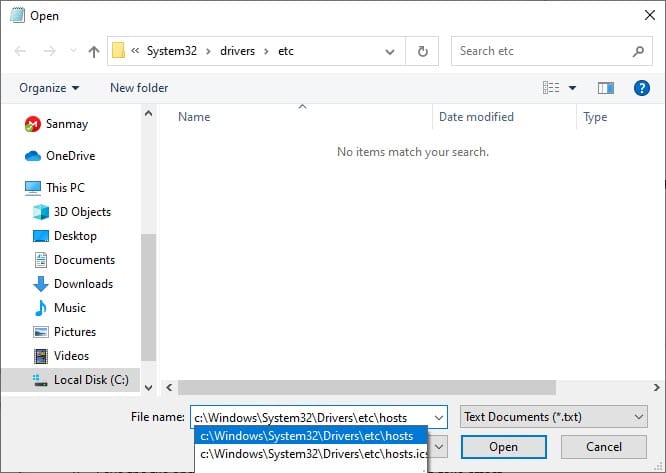
- Click on the File tab and select the Open option from the pop-up menu.
- Type or copy-paste the following path in the File name section:
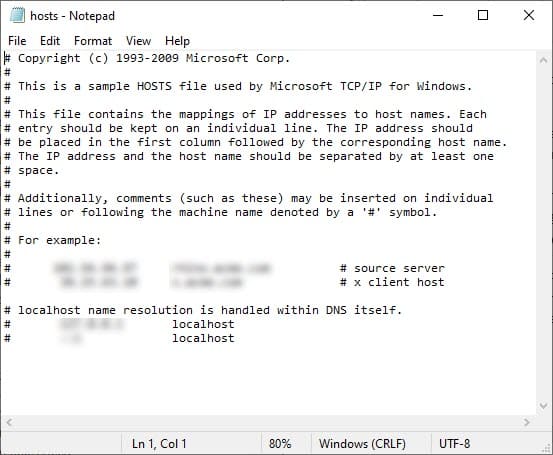
c:\Windows\System32\Drivers\etc\hosts - Click on Open to open the hosts file in the Notepad.

- Add the domain name and the IP address you want to use for that domain at the end of the text as the examples of other domain names are written there.
Write the IP address first and then add a space. After that add the Domain name. - If you want to block a website, route it to the 0.0.1 IP address.
- Save the file and restart the computer for the changes to take effect.

How to Edit Host File In Linux?
To edit the host file in Linux, follow the steps given below:
- Press the Super key (Windows key) and click on type Terminal in the search area.
- Open the Terminal Emulator application from the search results.
- Type the following command for opening the host file in a text editor:
sudo nano /etc/hosts - Make the necessary changes and press the Ctrl + X keys.
- When asked whether you want to save the changes, enter y.
How to Edit Host File In MacOS?
To edit the host file in macOS, follow the steps given below:
- Press the Command + Spacebar keys to open the Spotlight.
- Type Terminal in the search area and select the Terminal option from the results.
- In the Terminal window type the following command and press Return.
sudo nano /private/etc/hosts - You will have to enter your admin password. After you have done that, the hosts file will open in the Nano editor.
- Edit the file as you want, by adding the domain name and IP address.
- Press the Ctrl + O keys to save the changes.
Wrapping Up
So, there you have it. Now you know how to edit the host file in Windows 10, Linux, and macOS. Remember to be careful while editing the host files. If you have any further questions regarding this article, ask them in the comment section below.
Leave a Reply