Updating the BIOS is important as it handles all the input and output operations and provides your PC with the necessary instructions to do so. However, updating BIOS is not easy and if not done correctly, it can damage the motherboard and make it not run.
Many forums are filled with queries asking why their Windows 10 won’t boot after BIOS update. In this article, I have discussed what you can do when your computer won’t boot after BIOS update.
Also read: What To Do When Computer Won’t Boot After Power Outage
Why Computer Won’t Boot After BIOS Update?
Contents
There are various causes that can prevent your PC from booting after a BIOS update. Here are some of the potential causes of the issue:
- You flashed BIOS with an unsupported version.
- You used the unsupported third-party software to perform this procedure.
- Or, you interrupted the flashing procedure.
If you have done one of the above three things while updating BIOS, then that should likely be the cause of this issue.
What To Do When Windows 10 Won’t Boot After BIOS Update?
Now that you know the causes of this issue, it is time to troubleshoot it. Read the solutions provided below carefully before you execute them.
Solution 1: Reset CMOS
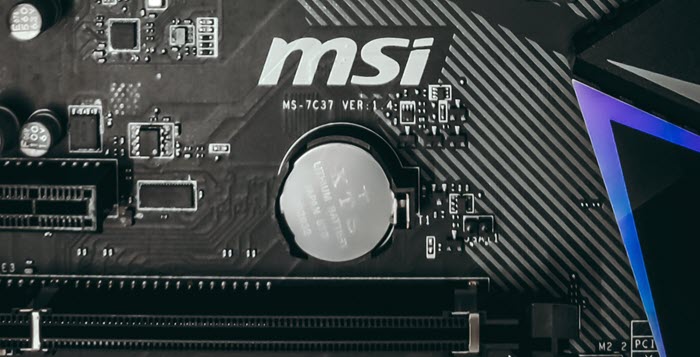
The CMOS battery stores the boot configuration data and is responsible for keeping your time, date and hard disk configuration intact after each boot. Resetting the CMOS battery can fix the PC not booting issue after a BIOS update.
However, this solution does require you to possess the necessary hardware knowledge of handling a motherboard and removing the CMOS battery and re setting it.
If you don’t have the required knowledge, either skip to the next solution or have a local PC technician do it for you. Now, if you are using a desktop, simply open the cabinet to access the CMOS battery on the motherboard.
In case you are using a laptop, you will have to remove the necessary covers before you can do it. All of this is supposed to be done with the PC turned off ofcourse.
Remove the CMOS battery and wait for some time (10-15 minutes) and put it back in place. This will reset the CMOS and should fix this issue.
Solution 2: Enter Safe Mode
If your PC is turning on and you are able to see the BIOS page but not boot into Windows 10, then you can likely open the Advanced Startup options and enter Safe Mode using it. To do that, follow the steps given below:
- First, insert your Windows 10 installation disk or recovery drive while starting your computer.
- Select your language and other preferences as given on-screen. Once done, click on Next.
- Now, click on the Repair your computer option located on the bottom left side of your screen. This will open the Repair options.
- Click on the Troubleshoot option and then select the Advanced options.
- Select the Startup Settings option and click on the Restart option.
- After that, press F4 on your keyboard to restart your computer and boot in Safe Mode.
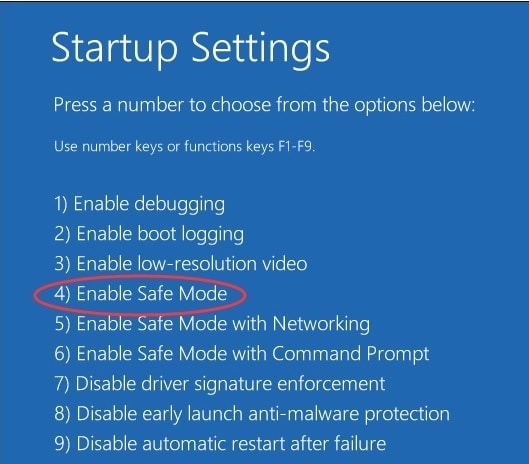
After you have boot into Safe Mode, restart your PC normally and it should boot into Windows normally after the restart.
Solution 3: Run Advanced Startup Repair
The automatic Startup repair tool fixes any booting related issues of Windows. In this situation, running the Automatic Startup option should fix the Windows 10 not booting after bios update issue. To run the Automatic Startup Repair tool, follow the steps given below:
- Open the Startup Repair options.
- Select the Troubleshoot option.
- Click on the Advanced options button.
- Select the Automatic Repair option.
- Follow the on-screen instructions to complete the process.
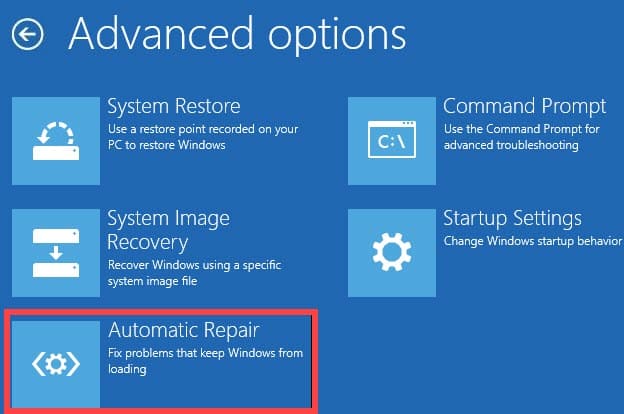
After the Automatic Startup Repair tool finishes running, the issue should be fixed.
Solution 4: Rebuild BCD
One effective solution to this error is to rebuild the BCD and repair the MBR file using command lines. BCD or Boot Configuration Data contains the boot configuration parameters for starting Windows. If it gets corrupted, then Windows can face unbootable situations.
The MBR is a special type of boot sector that holds the executable code to function as a loader for the installed operating system. When MBR gets corrupted, Windows boot related issues can occur.
To rebuild BCD and repair the MBR file, follow the steps given below:
- Open the Startup Repair options.
- Select the Troubleshoot option.
- Click on the Advanced options button.
- Select the Command Prompt option. This will open an Command Prompt on your screen.
- Type the following commands and press Enter after finishing each one:
a) bootrec.exe /rebuildbcd
b) bootrec.exe /fixmbr
c) bootrec.exe /fixboot - Wait for the commands to finish running.
After the above commands finish running, the boot sector problem should be fixed.
Solution 5: Run Chkdsk Scan
Memory corruption is another reason why this error may occur. If there are corrupted sectors in the memory, then it can lead to such errors. To check and fix corrupted sectors in memory, you can use the Chkdsk tool. To run the Chkdsk tool, follow the steps given below:
- Open the Command Prompt again.
- Type the following command and press Enter after finishing it:
chkdsk c: /f /r /x
Here C: is the letter of the system drive. If your system drive has another letter, then use that in place of C. - Wait for the scan to finish as it will take some time. Do not close the Command Prompt prematurely.
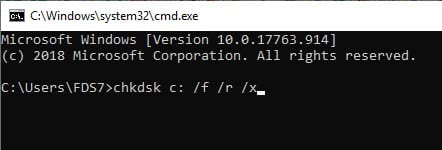
After running the Chkdsk scan, you should at least know whether there are bad sectors in your hard drive. But the tool should be able to fix any minor corruption in the sector.
Solution 6: Tweak Your BIOS Settings
This solution is completely depends on you as the BIOS for each motherboard is different. What you would need to do is check the necessary settings of your BIOS in the manufacturer’s website and try to change the settings to that. So, you will have to open the BIOS after opening your PC and ne by one change all the BIOS settings to what is said appropriate in your motherboard’s manufacturer’s website.
If you are unsure about meddling with BIOS settings then you should skip this solution or ask for professional support to do it for you.
Solution 7: Flash The BIOS Again
If nothing works, try flashing the BIOS once again. If you were forcefully flashing a BIOS update and it got interrupted due to some reason, try flashing the BIOS again. Using the correct version of the BIOS, repeat the steps you were using the first time. If you get the loading screen, you should be able to flash the correct version and boot into Windows in no time.
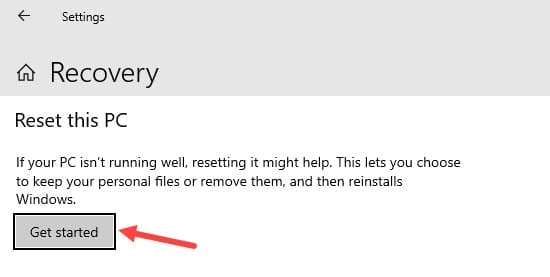
Solution 8: Reset The PC
If disabling the Startup repair also doesn’t work, then you can try resetting the PC. To reset the PC, follow the steps given below:
- Open the Repair options again.
- Click on the Troubleshoot option.
- Click on the Reset this PC option.
- Follow the on-screen instructions to complete the process.
Solution 9: Reinstall Windows
If resetting also doesn’t work, try reinstalling Windows. To reinstall Windows, follow the steps given below:
- Insert your DVD or USB installation device and restart your computer.
- When it boots up, press F10 to access the Boot Override Menu.
- In the boot section, change the boot order to put the device you want to boot from at the top.
- Find and select the Save and Restart option. Your computer should now boot into the Windows 10 setup program.
- Now, select your language, time and currency format, and input method. Then, click on the Next option.
- Click on the Install Now button and enter your Windows activation key.
- Select the Custom Install Windows only (advanced) option.
- You will see various disks called Drive 0, Drive 1, and so on. Delete all these partitions by selecting each one and clicking Delete.
- Finally, select the Drive you want to install your Windows and click on the Next option.
Wrapping Up
So, there you have it. Now you know what to do when Windows 10 won’t boot after bios update. The above troubleshooting solutions should help you fix this issue. If you have any questions regarding this topic, ask them in the comment section below.
Leave a Reply