Boosting your Microphone is an easy task. Windows provides an in-built program to improve internal or external microphone levels.
You can also use third-party programs to enhance the levels.
In this article, I provide you an in-depth detail about how to boost Windows 10 microphone.
How To Boost Your Windows 10 Microphone?
Contents
Here I have mentioned the methods for boosting Windows 10 microphone level in detail.
1. Using Windows Settings
As mentioned before, Windows provides in-built operation to enhance the level of internal and external microphones.
By tweaking some settings anyone can easily improve the microphone sound.
Follow the steps to do so:
- Press Windows + I keys from the keyboard to open the Windows Settings.
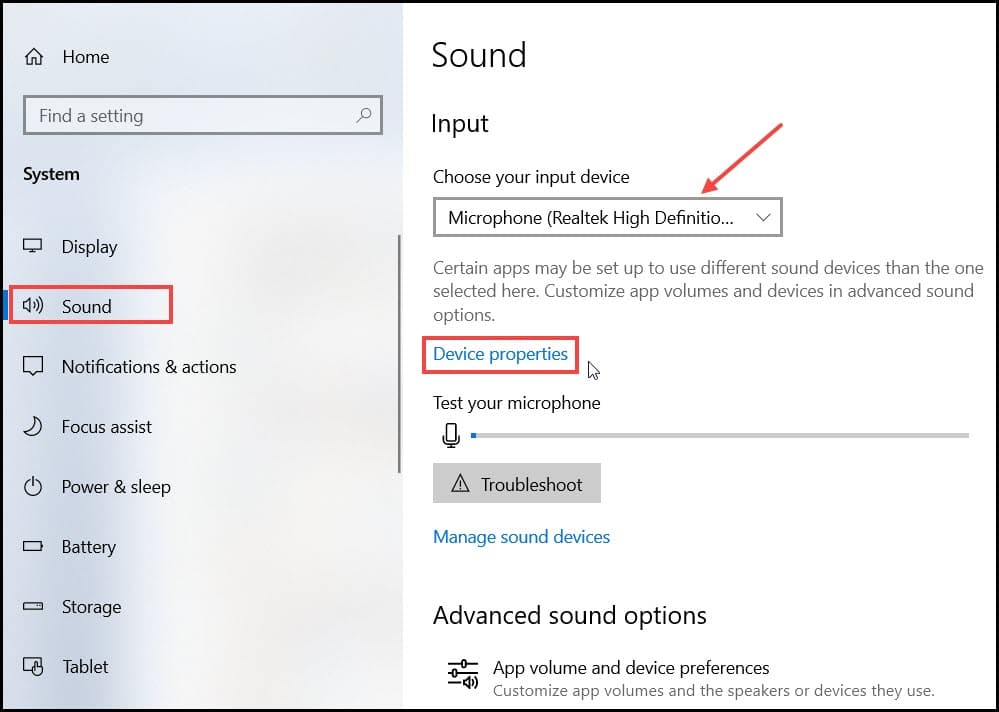
- Select the System option and from the left panel and choose Sound.
- Now, from the Input menu on the right panel, select the Microphone from the drop-down menu.
- Select the Device properties option now.
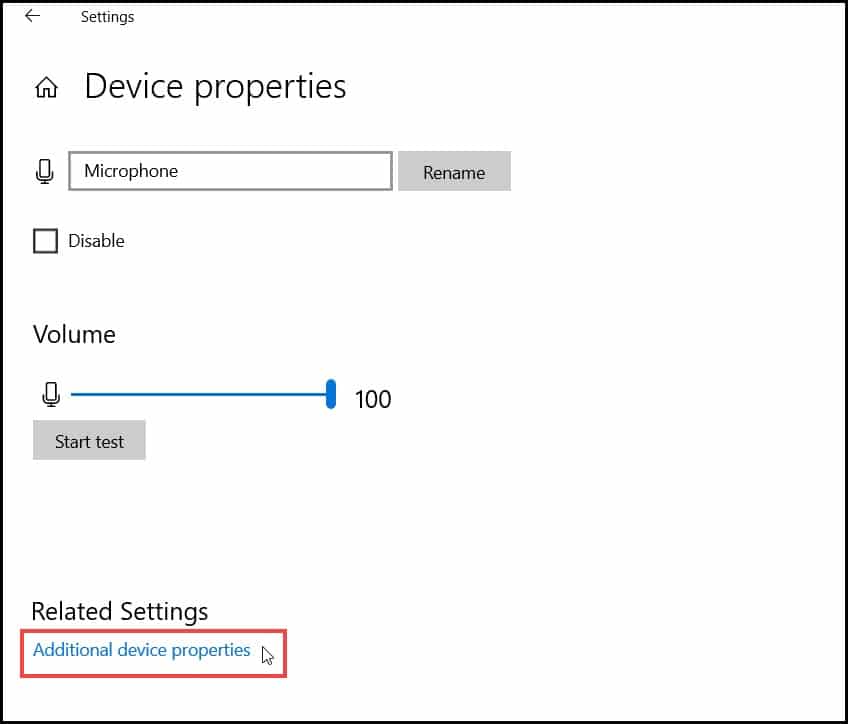
- Next click on the Additional device properties option.
- In the Microphone Properties Window, click on the Levels tab and adjust the microphone level using the slider as shown below.
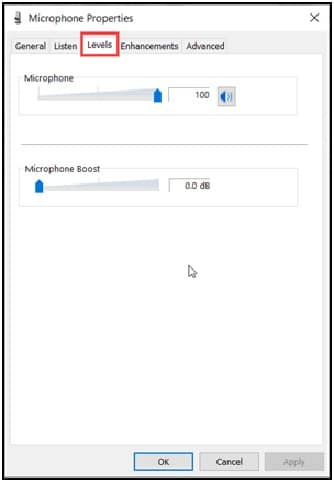
- Finally, click on Apply and then OK to save the changes.
2. Using Various Third-Party Tools
If you’re not satisfied with Windows’ in-built settings performance then you can use third-party software programs.
There are various free third-party software available in the market.
Here, I have listed the best 5 microphone boosters.
1. Audacity
It is an open source free software for sound editing, which is compatible with Windows, Mac, and Linux.
You can also use it as a sound boosting software.
Simply when recording your sound using a microphone, use the Recording Volume slider to increase your microphone sound.
Follow the steps to boost your microphone sound using Audacity:
- Open your software, and start the recording by pressing the Recording option.
- Move the Recording Volume slider to the right side to boost the sound.
- Stop the recording and play the sound.
- There are plenty of editing tools to adjust the audio level.
- Finally, you can export the audio in MP3, M4A, OGG, FLAC, and WAV.
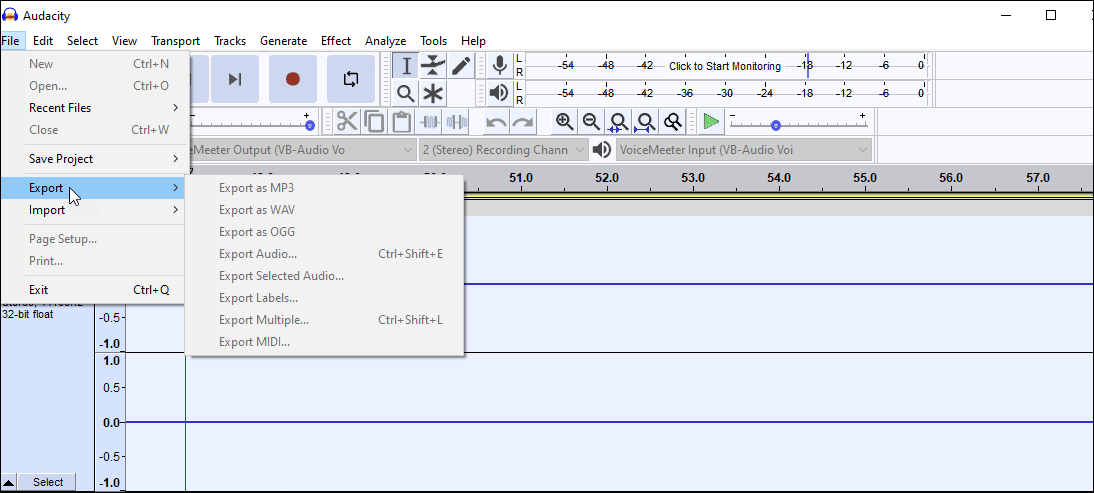
You can easily download the Audacity software from here.
2. Kazi Sound Recorder
This software also boosts the microphone audio during recording or playback.
Using this application you can monitor the sound during recording.
This application is only available for Windows and can import files in MP3, RAW, G276, OGG, etc.
To boost the sound using this application, follow the steps below:
- Launch the application and click on the Record button or simply press the Ctrl + R buttons to start the recording.
- During recording, you can monitor the sound decibel by following the chart provided.
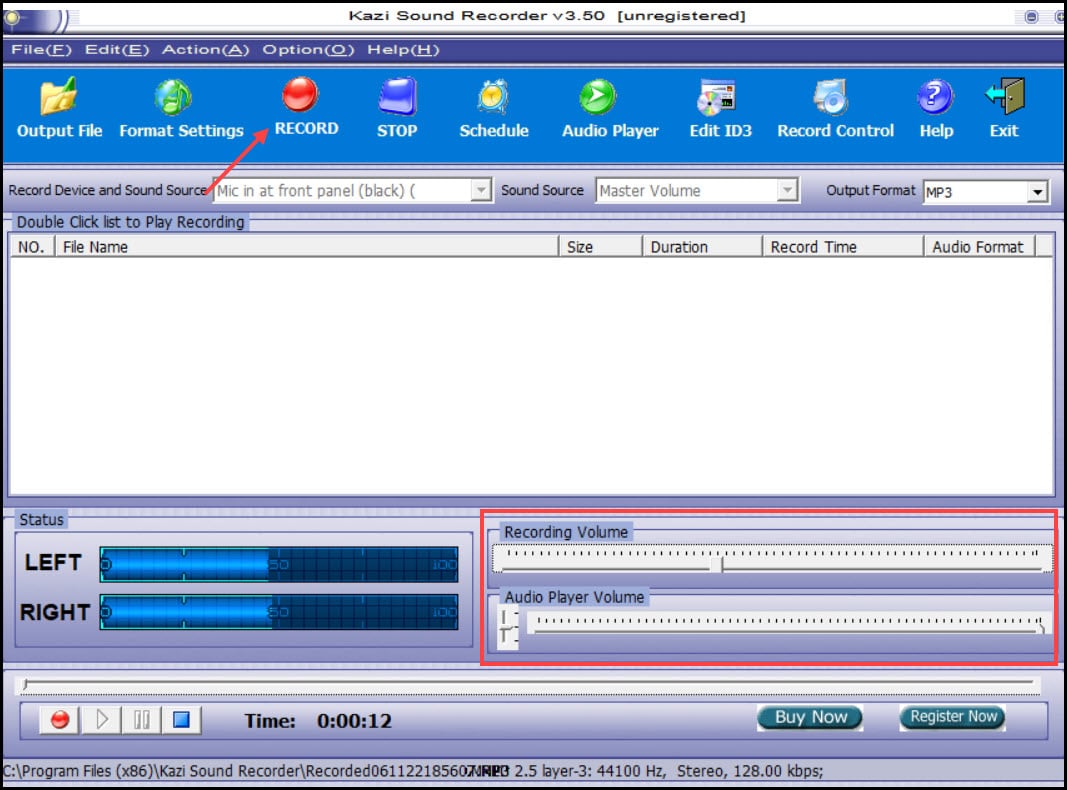
- If you want to edit the recorded sound, go to the Action tab on the Upper tab.
There are various features like bandpass, lowpass to enhance the sound of the recorded file.
You can download it from here.
3. Voicemeeter
This free–source virtual audio mixer can also be used as a microphone booster.
This software cannot record audio. Its strictly an editor, so you can edit the recording using Voicemeeter.
The best feature of this software is that it has a virtual sound source.
Follow the steps to know how to operate Voicemeeter:
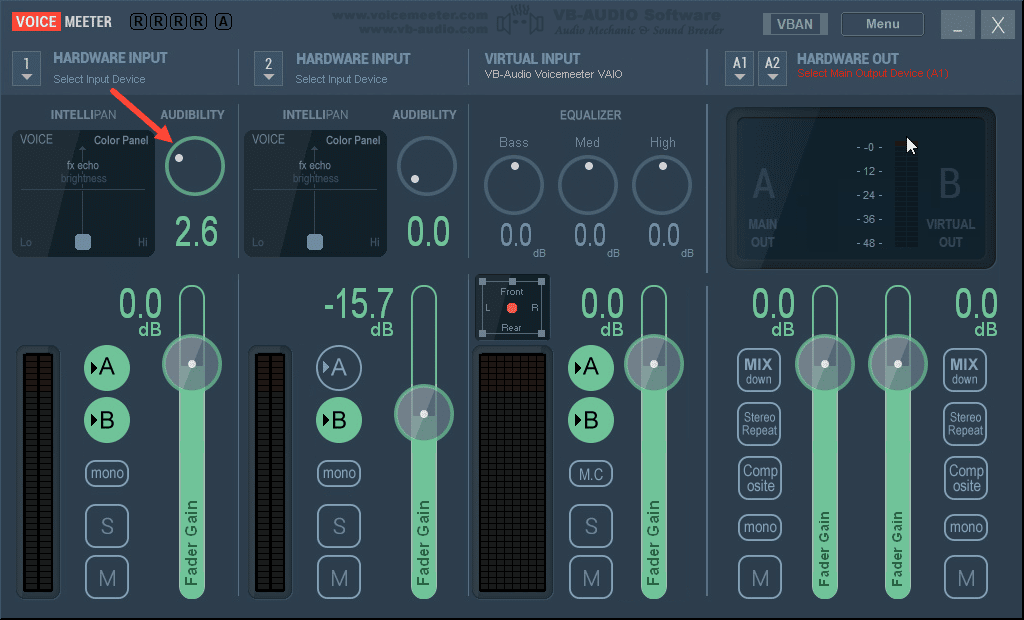
- Open the Software UI and select the Hardware Input section and choose the internal microphone.
- Launch the third-party recording software to record the sound.
- To increase volume, move the Fader Gain slider upwards.
- Finally, click on the Save option from the Menu tab to save the file.
To download the software, click on the link.
4. Expstudio Audio Editor
Expstudio is one of the best free open-source sound editing software.
Besides audio editing, it is also capable of boosting the sound levels.
This software has a dedicated Recording section where you can boost the sound while recording the audio.
It also has a Playback section from where you can boost any of the previously recorded sounds.
Follow the steps below to do so:
- Open the software and click on the Recording section.
- From the Upper menu, select the recording device and click on the Record button.
- Increase the sound by moving the Master volume knob clockwise.
- Stop the recording whenever you want and proceed with the editing. There are plenty of tools for editing purpose.
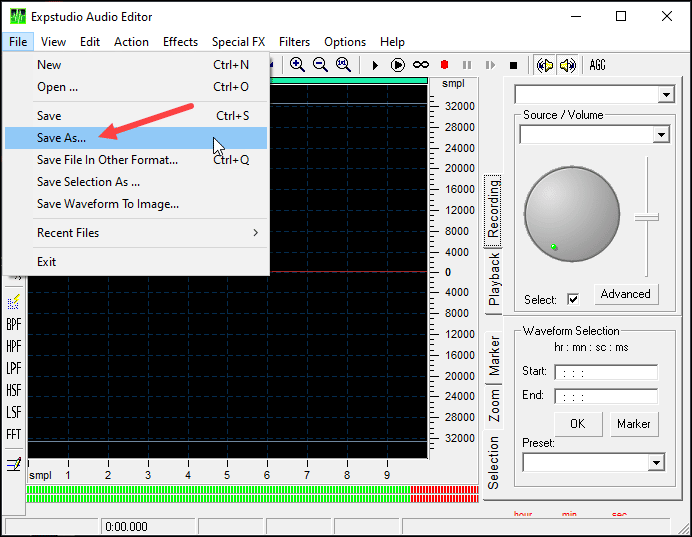
- To extract the file go to the File menu and then click on the Save as option.
You can download the ExpStudio software from here.
5. Equalizer APO
Equilizer Apo is also a free-source microphone audio enhancing software.
This application requires low space and can function well in low end PCs.
The application has virtual sound effects like drum roll and panning.
The changes made using this application are applied to all the audio files including the virtual ones.
The best thing is that the application has a preamplification tool that modifies the weak input audio signals.
To boost the audio using this application, follow the steps below:
- Launch the application, and select the New button to start a new project.
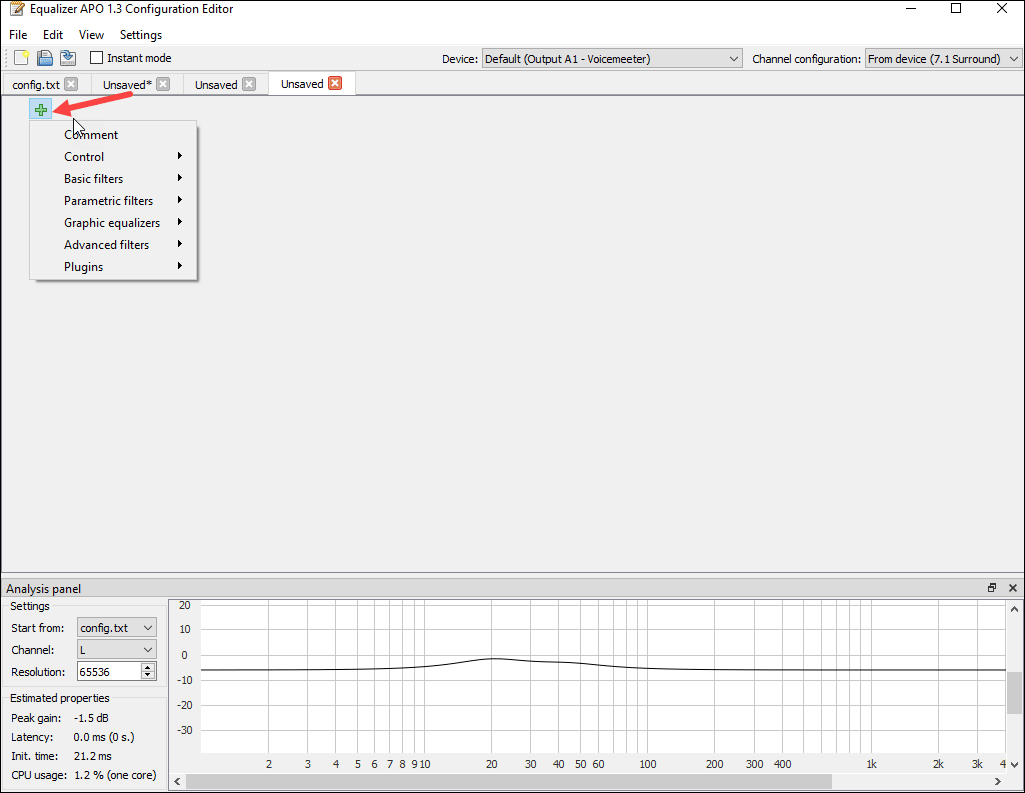
- Click on the Add Filter option and jump to the Control menu.
- Choose the Device option and add a Device panel from the application.
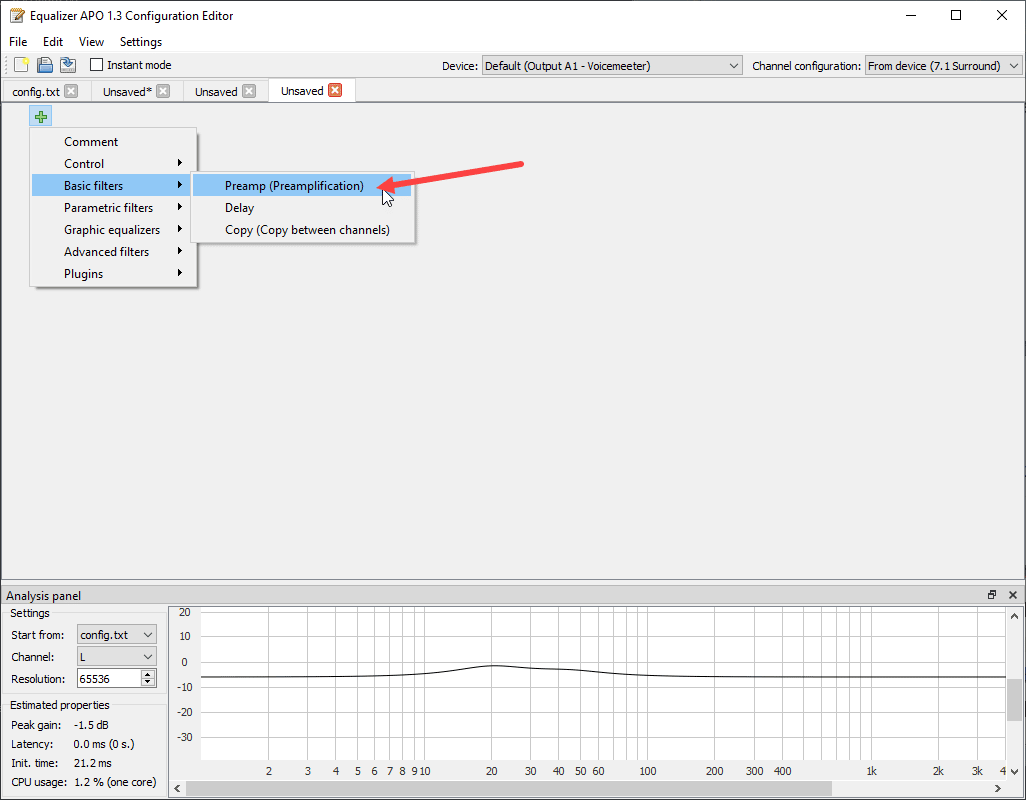
- Now, again click on the Add filter button and select the Basic Filters option.
- Choose the Preamp option to add the pre-amplification tool on the UI.
- Now, add the external device from the Device panel, by viewing the Selected Devices option.
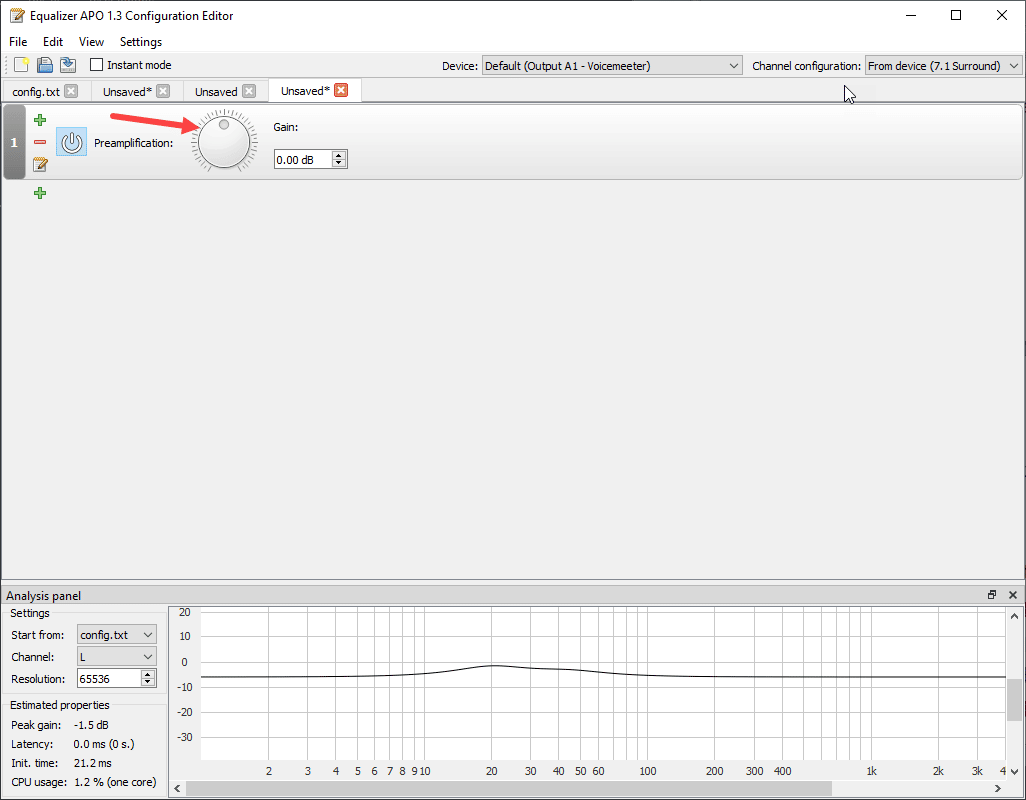
- Use the Gain Knob button from the pre-amplification panel to boost the microphone audio.
- Finally, save the file using the Save option, also you can save the profile as a text file.
Download the file from here.
Conclusion
Hope you could understand how to boost the microphone audio using the third party audio boosting software and Windows in-built tool.
If you still have questions regarding this issue, ask us in the comments section below.
Leave a Reply