NVIDIA driver won’t install is an error that has plagued the gaming community for some time now. It can be extremely hard for someone when they buy a highly priced NVIDIA graphics card and then see that the graphics drivers are not installing on their computer.
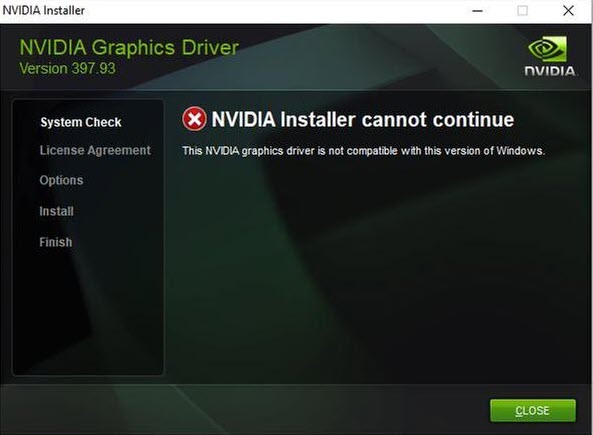
This problem can also appear in various ways like can’t install GeForce experience or GeForce experience driver download failed but essentially, they occur due to the same reason.
This error has still not been addressed by NVIDIA, but there are some other fixes for this error that can be used to fix this error. In this article, we will discuss the various troubleshooting methods that you can use to fix this error.
What To Do When The NVIDIA Driver Won’t Install
Contents
The first thing that you need to do when you face this error, is to check if the NVIDIA folder where the driver should have been installed in the system drive still exists.
Even if the installation failed, still the folder should be there as NVIDIA extracts its files in the folder before installing. The address of the folder should be:
C:\NVIDIA\DisplayDriver\XXX.XX\WinX\International\Display.Driver
Where XXX.XX is the version number of the drivers, WinX is the version of Windows and if its 32-bit or 64-bit. The C:\ is the system drive of your computer where Windows is installed.
If the NVIDIA folder is not there, then run the installer again (even if it fails) and make sure that the folder gets created. Now, it’s time to troubleshoot this error.
Solution 1.1: Delete All NVIDIA Related Programs
Many users were able to fix this error by deleting everything related to NVIDIA from their computer first and then manually installing the drivers. This solution has worked for most of the users and may also work for you.
To delete everything related to NVIDIA, follow the steps given below:
- Open the Run utility by pressing the Windows + R keys.
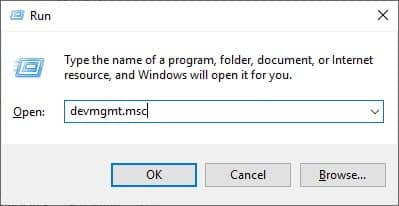
- Type devmgmt.msc and press Enter.
The Device Manager will open on your screen.
- Locate the NVIDIA graphics card driver which will be in the Display adapters and right-click on it.
- Select the Uninstall device option and follow the instructions on your screen to complete the process.
- After the device has uninstalled, restart your computer.
- Now, after the computer restarts, open the Run utility again.
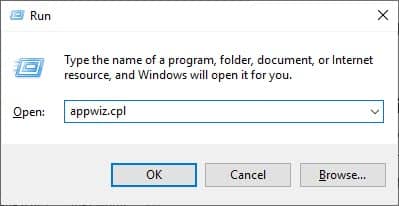
- Type appwiz.cpl and press Enter.
This will directly open the Uninstall a program section in the Programs and Features.
- Locate all the NVIDIA related programs and right-click on them. Next, click on the Uninstall option.
- You may have to restart the computer each time you uninstall an NVIDIA program.
Solution 1.2: Install The NVIDIA Drivers Manually
Now, that your computer is clean of any NVIDIA related programs, it’s time to install the driver manually. To install the drivers manually, follow the steps given below:
- After you have uninstalled all the NVIDIA programs and the driver, make sure to restart your computer.
- Open the Device Manager again and right-click on the NVIDIA graphics card driver in the Display adapters section (the driver should be there if you have restarted the computer after uninstalling it).
- Select the Update Driver option from the pop-up menu.
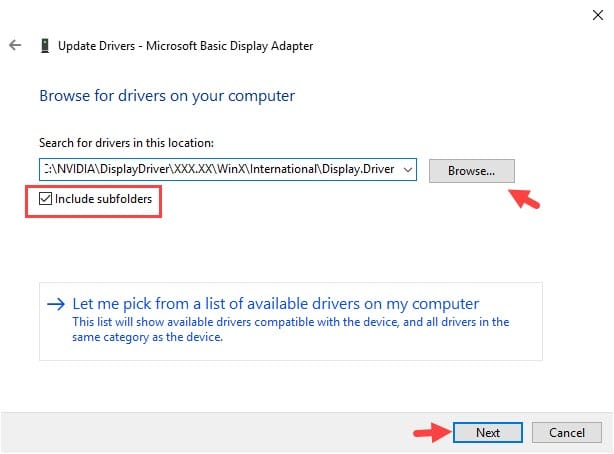
- Now, select the Browse my computer for driver software option and browse the location of the NVIDIA folder.
- Make sure that the Include subfolders box is checked and then click on Next. Wait for the driver update to finish.
- Restart your computer.
- Now, after the computer restarts run the .exe setup file of the NVIDIA driver and make sure to select the Custom install option and then select the Perform a clean install box.
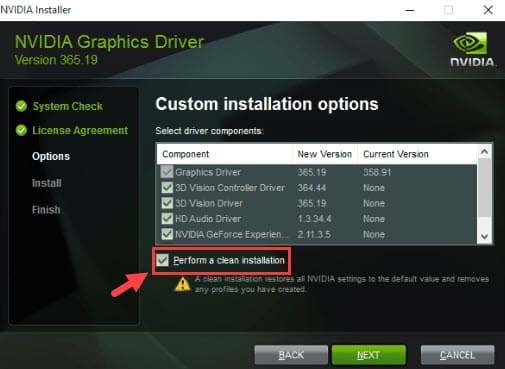
Now, the NVIDIA driver won’t install error should be resolved.
Solution 2: Disable Antivirus During Installation
If the above solution didn’t work, there is a possibility that your Antivirus is causing this problem. Antiviruses are known instigators when it comes to errors involving installation fails or program fails, as they can stop any program that they consider a “threat” to the computer.
Sometimes your Antivirus can misunderstand what is “threat” and what’s not. In this scenario, disabling the Antivirus and then installing the driver should fix this problem.
Remember to not download or install any 3rd party software or visit any unsecured websites as long as your Antivirus is disabled. It may expose your computer to potential threats like malware and viruses.
To disable Windows Defender, follow the steps given below:
- Press the Windows + S keys to open the Windows search bar and type Windows Security.
Select the appropriate option. - Select the Virus and threat protection option and then click on the Manage settings option in the Virus and threat protection settings section.
- Turn off the Real-time protection toggle.
- Follow the solution 1 to install the driver manually.
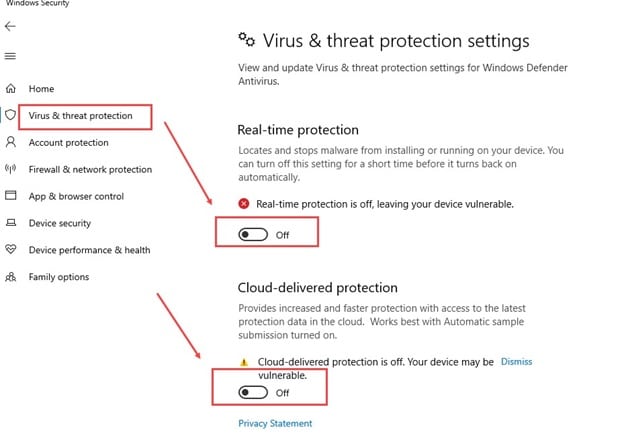
Check if you still can’t install GeForce experience. Disabling the antivirus should fix this problem.
Solution 3: Rename NVIDIA’s Folder
If none of the above solutions has worked, then you can try this workaround method. Many users have reported that renaming the NVIDIA’s folder fixed this problem for them. This solution may sound absurd, but it definitely has worked for many users and may also work in your case.
To rename the NVIDIA’s folder, follow the steps given below:
- Open This PC and then double-click on the system drive (the drive that has the Windows installed).
- Double-click on the Program Files folder and locate the NVIDIA Corporation folder.
- Right-click on the NVIDIA Corporation folder and click on the Rename option from the pop-up menu.
- Change the name to NVIDIA Corporation1 and press Enter to save it.
- Now, try to run the setup and check if you face any problem.

Check if the NVIDIA driver won’t install error happens again.
Solution 4: Delete Extra Files
If even renaming the NVIDIA corporation folder didn’t work, then try deleting some of the extra files of NVIDIA and then try to run the setup.
Navigate to the following links and delete the files and folders:
- C:\Windows\System32\DriverStore\FileRepository\nvdsp.inf document
- C:\Windows\System32\DriverStore\FileRepository\nv_lh document
- C:\Windows\System32\DriverStore\FileRepository\nvoclock document
- C:\Program Files\NVIDIA Corporation
- C:\Program Files (x86)\NVIDIA Corporation
Once all these files are deleted, try installing the driver again. This solution should resolve the GeForce experience driver download failed error.
Wrapping Up
So, now you know what to do if the NVIDIA driver won’t install in Windows 10 again. The above troubleshooting methods should fix this problem. Try the above solutions in various combinations and read and execute them carefully. Feel free to share your thoughts on this article in the comment section below.
I applied all the methods one by one, and at last one method (Rename NVIDIA’s Folder) resolved the issue.