HP OfficeJet Pro 6830 printer is known for good quality prints but sometimes it shows a ‘Printhead failure’ or ‘problem with the printhead’ error.
If you are facing the same error, then follow this article to know how to fix the issue.
Related: Missing Or Failed Printhead Errors In HP Printers – Easy Fixes
How To Fix HP OfficeJet Pro 6830 Print Head Problem?
Contents
Follow the instructions given below when the HP printer shows a print head error.
1. Check The Print Nozzle Patterns
By checking the printing nozzle patterns, you can easily find out the colors that are causing the problem with the HP OfficeJet Pro 6830 printhead.
To do the test, follow the steps below:
- Tap on Setup from HP OfficeJet Pro 6830 Printer control panel.
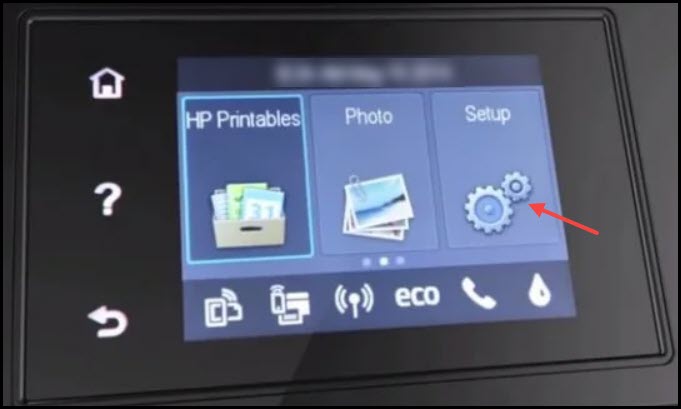
- Select Reports from the section.
- Choose the Print Quality Report.
2. Check Ink Levels
Low ink levels and empty cartridges can also cause the HP pro printer to show printhead errors.
Most HP printers display ink and toner levels on the Control Panel. So, check the ink levels from the printer control panel by following the steps below:
- Look for an Ink drop icon, a Cartridge icon, an Ink Levels menu, or a Toner Level indicator.
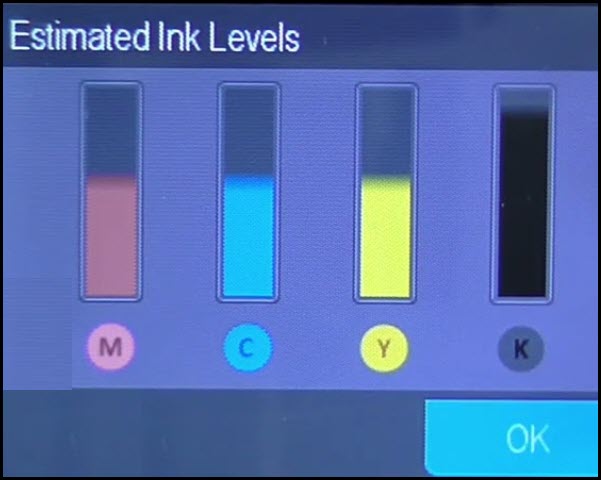
To check the ink levels from the Windows system, you can use HP smart. Here is how you can do it:
- Install HP Smart and set it up with your printer.

After the setup, the ink level is displayed on your home screen.
If you find the ink level is low, change the ink cartridges. To do that, follow the steps shown below:
- Open the printer lid.
- Remove the cartridges one by one gently.
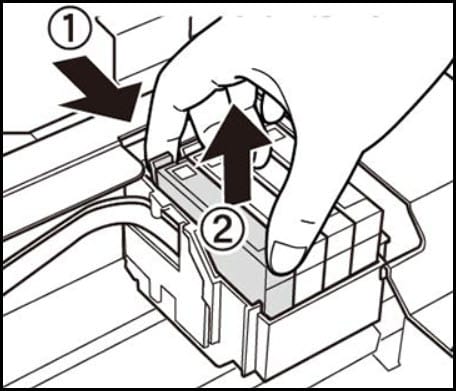
- Now, insert the authentic HP printer’s new cartridge.
- Switch on the printer.
After replacing the ink cartridges if you still get the same HP printer error, then go to the next solution.
3. Clean Printhead
If your HP printer printhead is dirty, then it can also cause an HP Officejet Pro printer error. So, clean the printhead following the steps given below:
Make sure that the device is turned off and the power cable is unplugged.
- Now, open the Printer lid and remove the ink cartridges.
- Place cartridges on a clean paper or tissue in an inverted position.
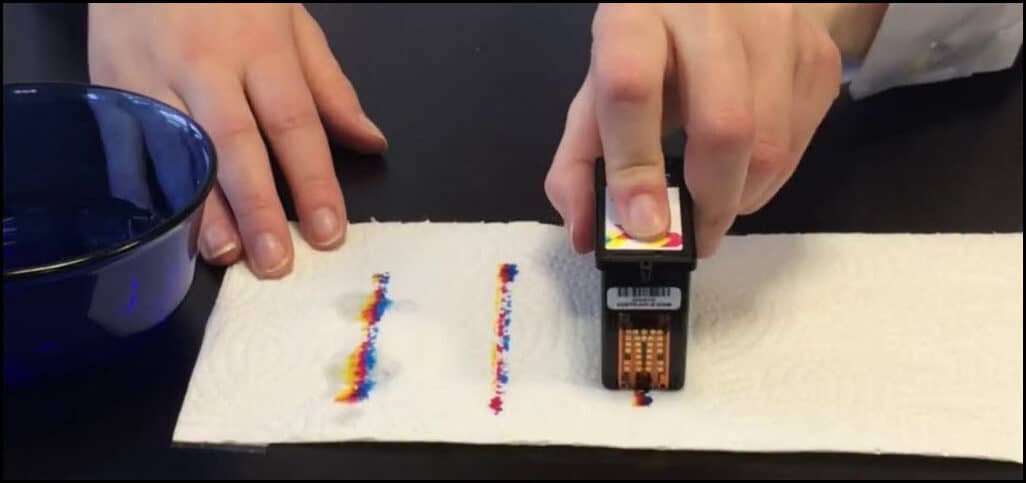
- Remove the print head very carefully from the printer.
- Clean the print head’s back position with a microfiber cloth by damping it in warm water.
- Clean the nozzle until no black ink is sticking to the fabric.
If your cartridges have ink in them but are clotted with old ink, then wash them by following the instructions given below:
- Soak the print head in lukewarm water or hold it under running tap water for 10-15 minutes.
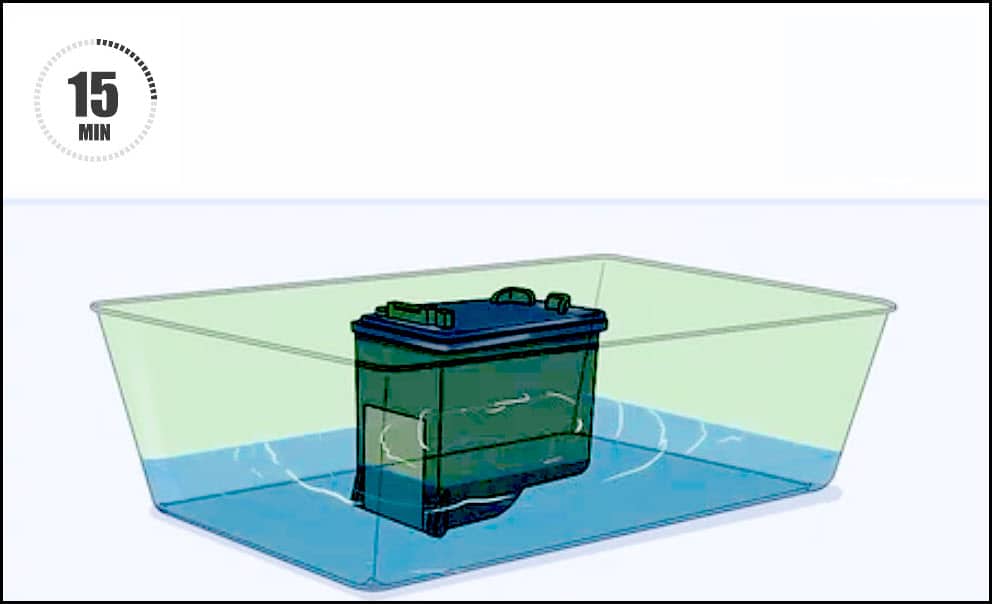
- Wash properly and then dry the print head by wrapping it with a dry towel or lint-free cloth sheet.
- Now, place it on tissue paper for a minimum of 15 minutes.
When dry, put the ink cartridges back into the printer and run a test print. If you again get the same error, check the printer alignment.
4. Align Printhead
If the printhead is not aligned correctly, the HP OfficeJet Pro printer can show a printhead error. So, align the printhead correctly following the instructions given below:
- Press Windows + R keys simultaneously to open Run.
- Type control and hit the Enter key to open Control Panel.

- Choose the Devices and Printers option.
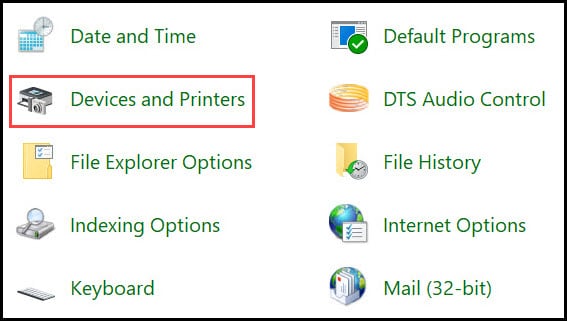
- Select your printer and right-click on it.
- Select the Printing preferences option.
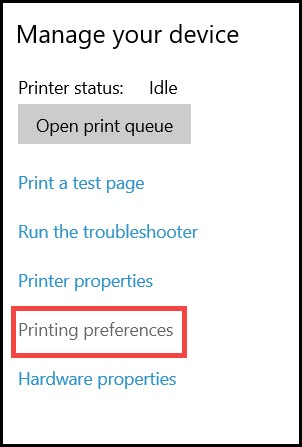
- Click on the Clean Printhead option, and finally, select Align Printhead.
Wait until the process gets finished. Try a test printing and if the above solution does not solve the problem, check the Smart clip.
5. Check The Smart Chip
If the smart chip is not in the right place then it may also trigger the HP OfficeJet printer printhead failure issue.
To fix the issue, make sure that the smart chip is aligned perfectly. To do that, follow these steps:
- Turn off the printer and eject the cartridges one by one.
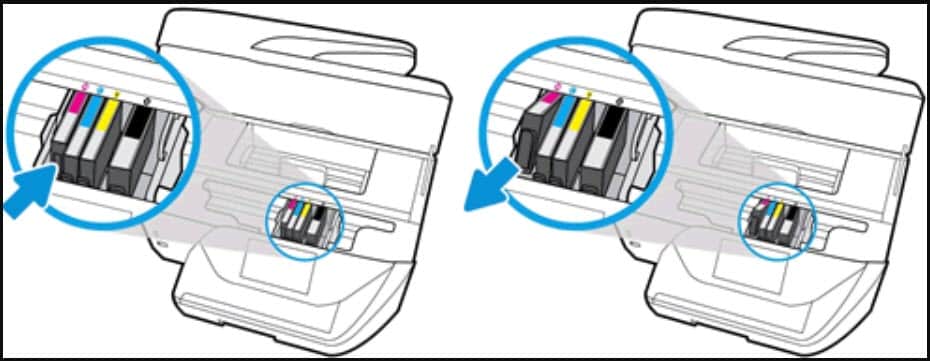
Check the cartridges and the smart chip. If the smart chip is dirty and scratched, then replace the cartridges with a new one.
- Now reseat the cartridges properly in the correct position.
6. Reset The HP Printer
If, after performing all the other steps, the HP printer is still showing a printhead error, then reset your printer.
Resetting the printer can rearrange all the settings and fix the issue.
To reset the printer, follow the steps below:
- Tap on the Main menu from the printer panel section.

- Select Back and Cancel and then again Back and Cancel.
- Find the Reset button under the Service menu.
- Select the Semi-full Reset option.
Follow the on-screen prompts to finish the process. Avoid any kind of interference, and don’t turn off the printer during the process.
After the process completes, run a test printing. If the issue persists, perform 41 test.
After the process completes, check the report. If it says Pen Status: Pen Ok then this indicates that the print head is steady.
Frequently Asked Questions [FAQs]
1. What Causes Printhead Error?
Printhead error is caused due to dry ink and the ink nozzle’s clogging. It triggers the physical damage of your printhead.
2. What Does It Mean When My HP Printer Says There Is A Problem With The Printhead?
If the printhead is clotted or dirty, then your HP printer can show up that there is a problem with the printhead error.
3. How Do I Clean The Printhead On My HP OfficeJet 6830?
From the printer’s control panel section, tap on the Setup icon, navigate to the Printer maintenance option, and select the clean printhead option.
Final Words
Let us know which of the above methods fixed the HP OfficeJet Pro printer’s printhead problem.
If you still have queries regarding the issue, ask us in the comments section below, and we shall revert soon with answers.
Leave a Reply