If you are a frequent organizer of Microsoft Teams Meetings, then you can easily avoid unnecessary noise and visual distractions in a meeting by disabling the attendee mics or cameras.
Go through the article in detail and perform the steps to manage the attendee audio-video permission in Microsoft Teams.
Here we go….
How To Prevent Mic And Camera Use Before The Meeting?
Contents
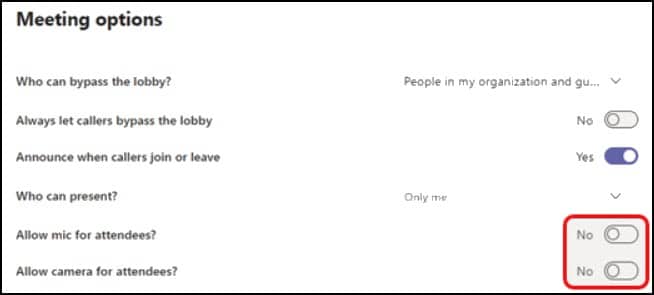
The meeting organizer can disable the mic and camera by scheduling the meeting and sending out the invite.
In this case, the attendees will not be able to use the mic or camera during the ongoing meeting.
In this case, all the attendees of the meeting will join the discussion with the camera and the microphone off.
Follow the steps below to prevent the microphone and camera use:
- First, go to the Calendar and double-click on the Meeting.
- Now, select the Meetings options at the top of the screen.

- Finally, turn off the “Allow mic for attendees” Or “Allow camera for attendees?”
- Click on the toggle and select the Save option.

How To Disable Mics And Cameras During The Meeting?
While the meeting is in progress, it can happen that the organizer of the meeting disables the mics and cameras of the attendees at any time during the meeting.
Currently, attendees who are joining the meeting using the phone number from the meeting details will not be prevented from turning on their mics and cameras.
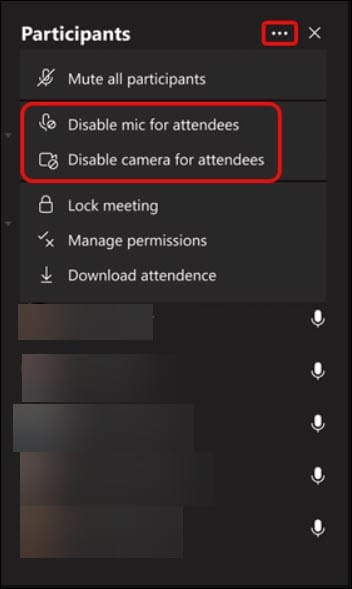
Here is how you can disable all attendees’ mics or cameras:
- Click on the three-dot option next to the Participants.
- Then, select Disable mics for attendees or disable the camera for attendees.

- After performing the above step, you will notice that all attendees’ mic or cameras will appear dimmed.

Note: If you want to enable everyone’s mic or camera, then click again on the three-dot icon, then “Allow mic for Attendees or “Allow camera for Attendees”.
How To Disable Individual Mics And Cameras?
You can also turn them on when you want to hear from someone or visualize something or you want someone to speak or be seen.
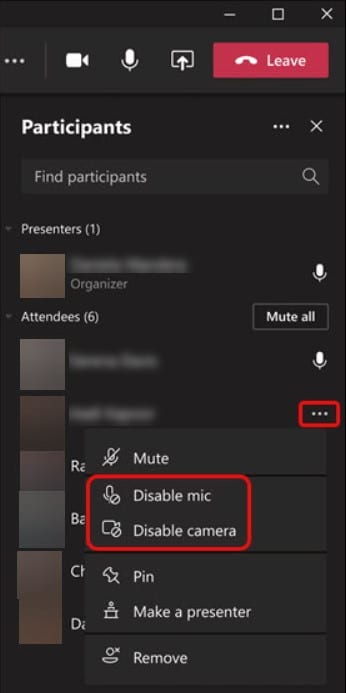
If you want to disable any particular attendee’s mic and camera, then follow the steps to do so:
- Firstly, you must click on the three-dot option next to the individual’s name.
- Then, select disable mic or disable the camera.

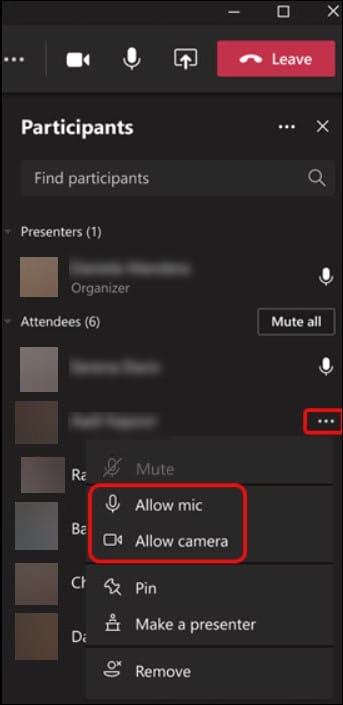
Note: if you want to allow any attendee to unmute or share their video, then select “Allow mic” or “Allow camera” next to the name of the person.
By doing this the person can unmute and share the video.

Final Words
Update us with your inputs or comment if any. Feel free to reach out to us in the comment section below.
Leave a Reply