Sharing documents is pretty easy during Teams video meets. If you have access to the file on your device, you can easily share it with others in Teams in a few clicks.
This includes files on your local device, OneDrive, or other cloud storage.
You can either share the file itself or share the link to the file. Now go through the methods to know how to attach the documents in Teams.
Also read: How To Enable Camera On Microsoft Teams
How To Attach Documents In Teams Video Conference?
Contents
To share files within a Team meeting, follow the steps given below:
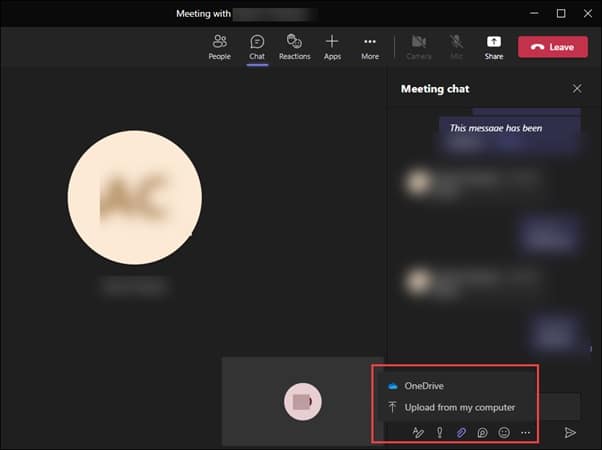
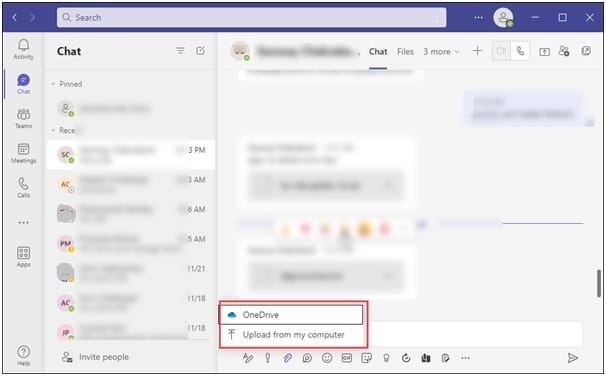
- Select the Chat option and click on the Paper clip icon, as shown in the picture below.
![]()
- Next, choose One Drive or Upload from my computer, depending on where you have stored the file you want to send.
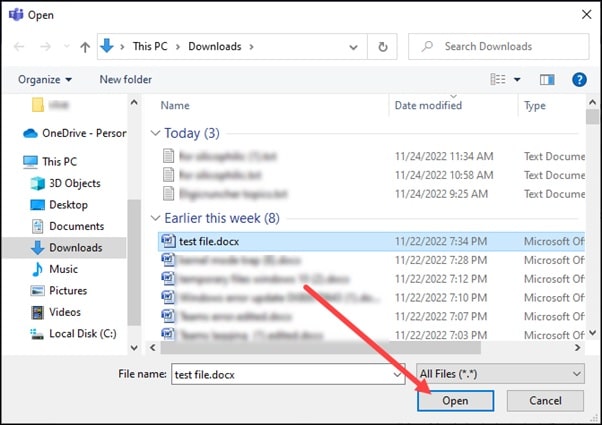
- Select the file and click Open.
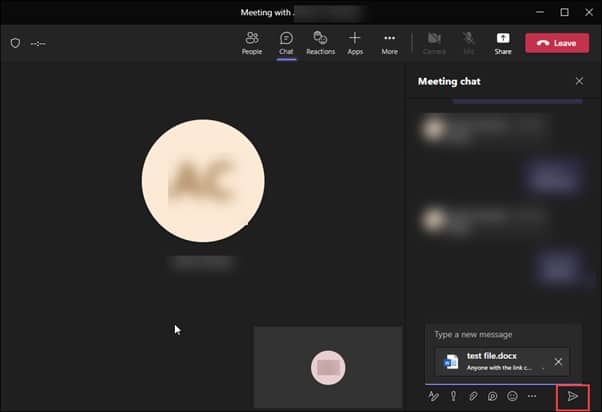
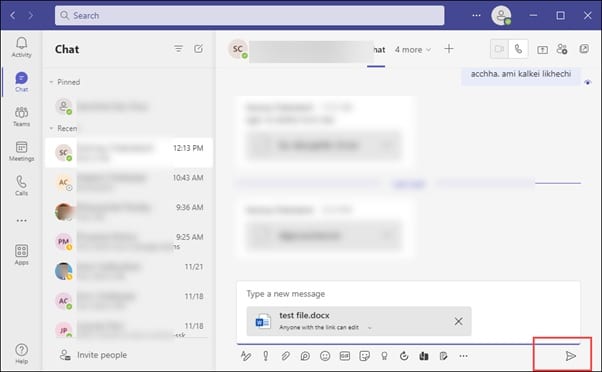
- The file will be uploaded to your Teams chat. After that, click on the Send button, as shown in the picture below.
- You can also attach documents from the Share option. Click on the Share button at the top of the Teams meeting UI.
- Then choose to Browse OneDrive or Browse my computer.
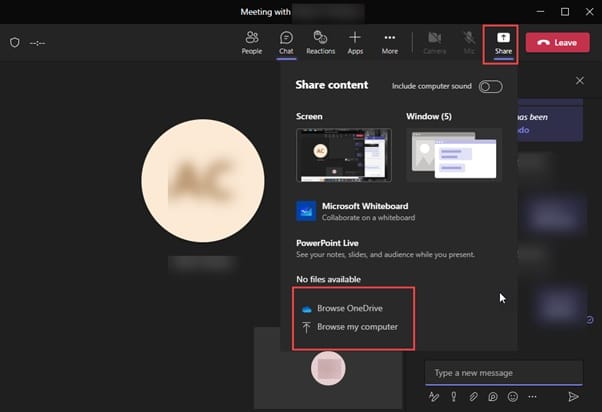
- Choose your file or document and upload it. Then click on the Send button to send the document.
How To Attach Documents In Teams Group Chat?
To share files with a Team or channel, follow the steps given below.”
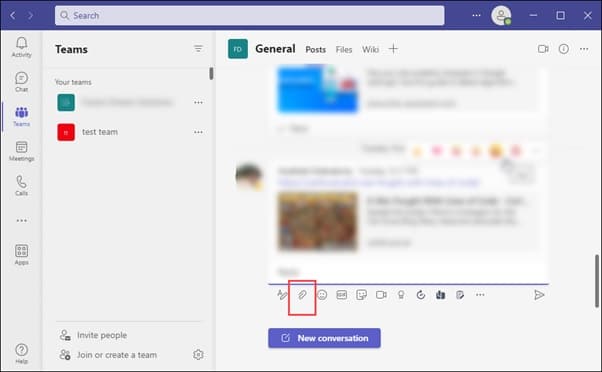
- Open the Team where you want to send the file as an attachment.
- Click on the Paper clip option.
- Choose One Drive or Upload from my Computer option.
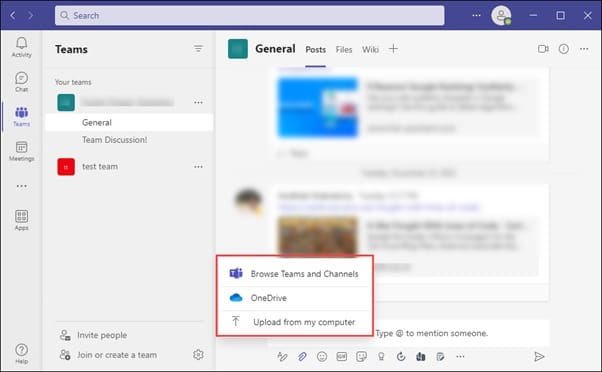
- Go to the file location. Select the file and click on the Open button to attach it.

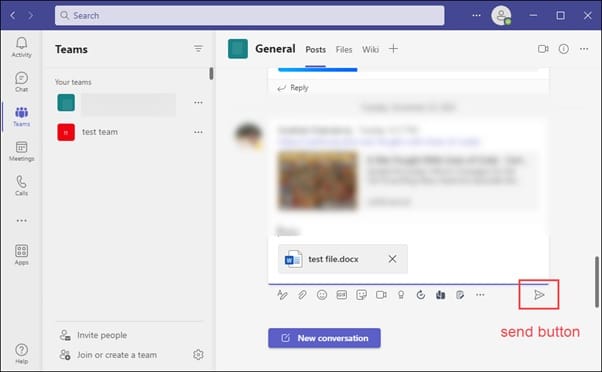
- Let the file upload in Teams. Then click on the Send button. You can also Choose Browse Teams and channels option.
- Select a file from the list. Either click on Upload a copy or share the link.
- Then click on the Send button.
- You can also drag the file to the message from your PC’s file directory and send it.
How To Attach Documents In Teams Individual Chat?
To share files in a one-to-one group chat, follow the given steps.
- Open the chat where you want to send the file.
- Click on the Paper clip option.
![]()
- Choose One Drive or Upload from my Computer.
- From the file location, choose the file and click on the Open button to attach it.

- Let the file upload in Teams. Click on the Send button.
- You can also Choose Browse Teams and channels option. Select a file from the list. Either click on Upload a copy or share the link.
- Then click on the Send button.
- You can also drag the file to the message from your PC’s file directory and send it.
How To View The Attached Files
When a document is shared in Teams, the team members can easily view it.
If a file link is shared, then click on the link to get the file access.
- If a file is sent, then click on the three dots menu beside the file and select open in Teams or Desktop app or browser.
- Or you can simply download the file and view it.
How Long Does Microsoft Teams Keep Files?
Teams stores files and images shared with other items for easy access across all your devices.
Here is how long each of this data stays in the Teams database for users to access:
| Items | Time Duration |
| Files or Documents | As decided by the user |
| Images | As decided by the user |
| Group Titles | As decided by the user |
| Messages | As decided by the user |
| Calendar Items | As decided by the user |
| User Location & Location Sharing | 90 Days |
| Call History | 30 Days |
| User Profile | As decided by the user |
| Contacts | As decided by the user |
| Tasks | As decided by the user |
| Diagnostic Data | As decided by the user |
| User Join Code | As decided by the user |
| Group Join Code | As decided by the user |
| Status Message | As decided by the user |
Related: Create A New Team In Microsoft Teams In Seconds!
Closing Up
So that’s all! If you have any further queries related to this topic or other issues, ask us in the comments section below.
Leave a Reply