“Audio render error. Please restart your computer” occurs when the computer fails to render the audio properly.
This results in choppy audio, distorted audio, or even no audio at all.
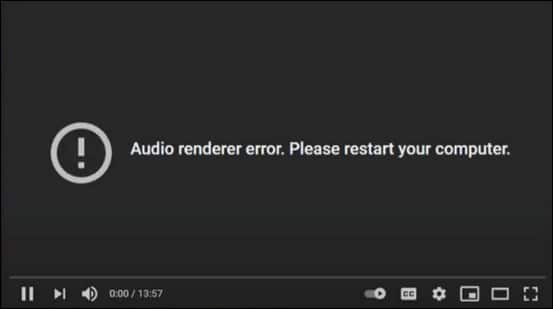
This problem is reportedly occurring in most web browsers on Windows.
Audio render errors are relatively easier to fix, but still, if the user fails to solve a YouTube audio render error, then perform the troubleshooting steps.
Here are the tips to prevent audio render error, but before that, look at the causes that trigger this error.
What Causes the YouTube Audio Render Error?
Contents
If you have encountered audio problems while using YouTube, then these factors are generally responsible for audio render errors:
- Incompatible audio settings
- Outdated or corrupt drivers
- Glitch in the plugged audio device
- Hardware problems
- Conflicting audio devices
- Improper audio device settings
- Software issues
- Browser issues
Also, read: How To Fix YouTube Error Code 3?
How Can I Fix The “Audio Render Error Please Restart The Computer.”?
In order to prevent audio render errors from taking place in the future, follow the steps mentioned below:
1) Restart The Computer
Restart the computer first and check the ways to fix the temporary glitch.
Since audio renderer error occurs due to system lag and other problems, the best possible way is to restart the system.
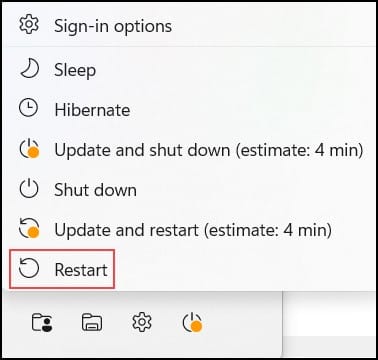
Restarting the device will help the files to come back into the memory and thereby help in fixing the error.
2) Restart The Audio Device
Restarting the audio device resets the audio settings to their default values which are known to fix problems related to incorrect settings.
Since the temporary glitches or errors mostly affect the audio driver, reloading is also another way by which you can fix the problem.
Perform these steps to disable the audio driver:
- Right-click on the Start button, open the “Device Manager,” and then click on “Audio inputs and outputs.”
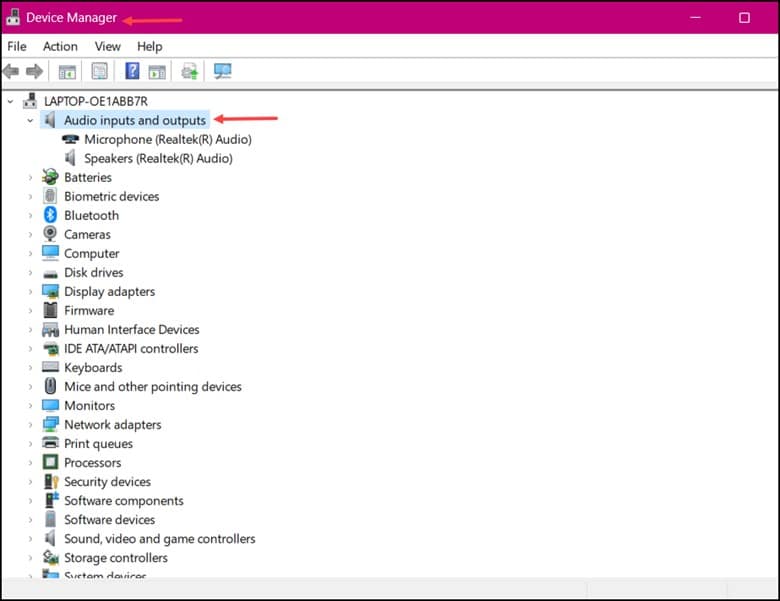
- Right-click on the connected audio device and then select “Disable device.”
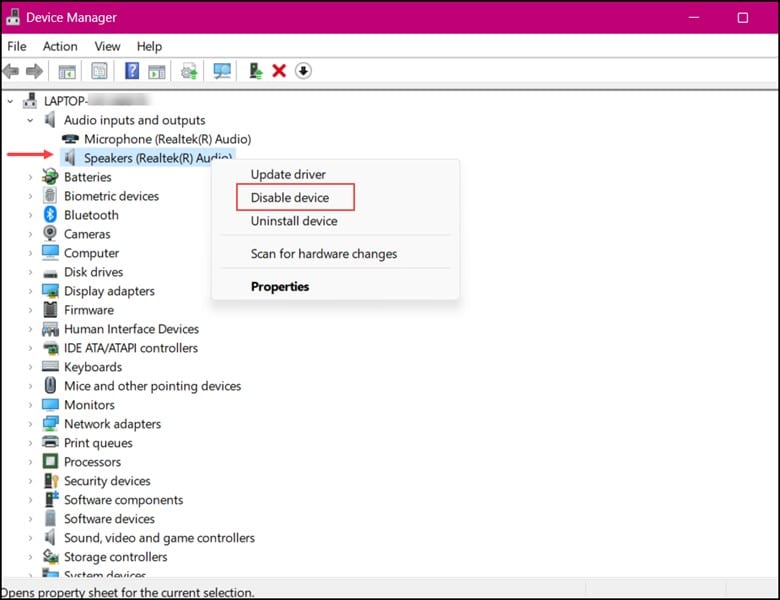
- Wait for a few seconds and, right-click on the device and choose the “Enable device” option.
3) Run Audio Troubleshooter
Audio troubleshooter is generally a tool known to detect and fix audio-related problems within the audio driver and settings.
So, run the audio troubleshooter to see if this fixes the problem.
Here is how to run the audio troubleshooter:
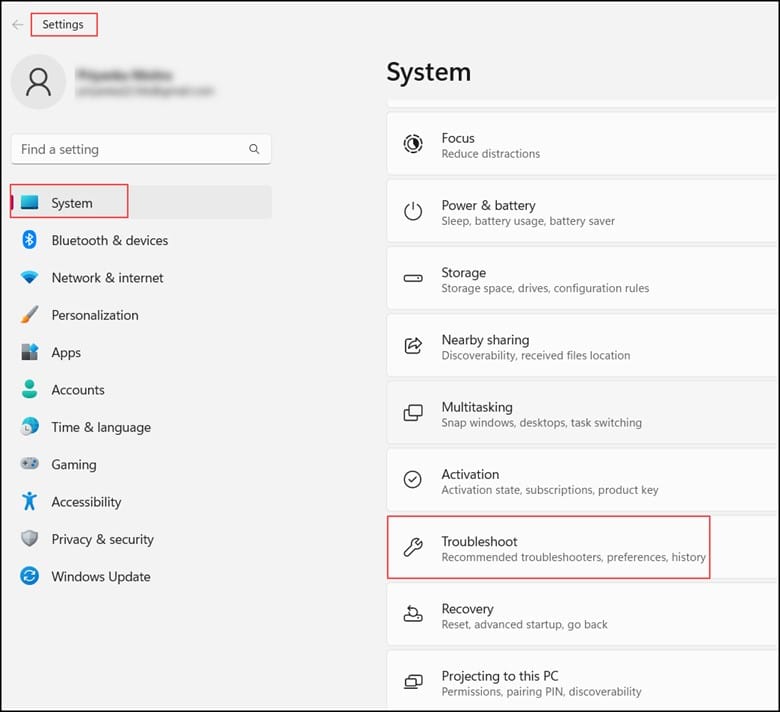
- Type “Settings” on the Windows Search bar and select the top result.

- From the “System” tab, choose the “Troubleshoot” option.
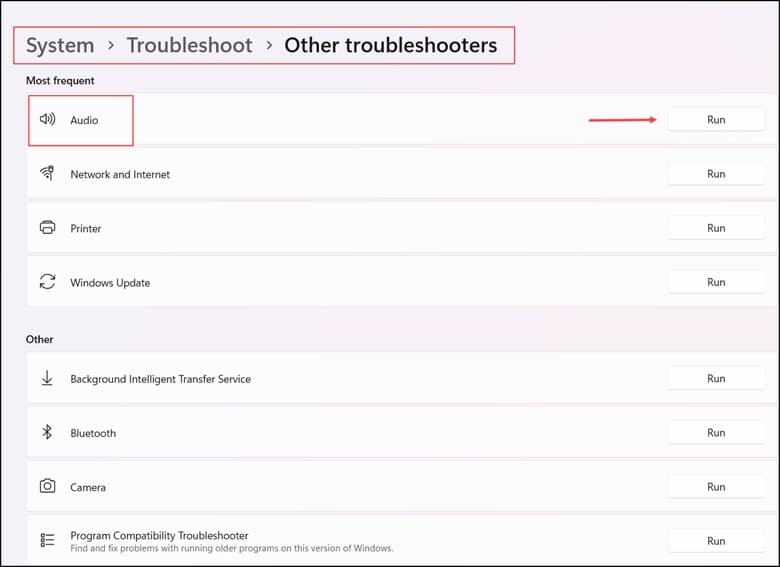
- Click on the “Other Troubleshooters” option and then click on “Run” next to “Audio”.
4) Close Unnecessary Apps
Closing unnecessary apps will free up the system resources that help the computer focus on rendering audio. Besides, it also prevents conflicts between apps that are sometimes known to trigger various audio problems. Certain apps run in the background and cause audio problems.
This is the way by which you can close the unnecessary apps:
- Right-click on the Windows Start menu and open the “Task Manager.”

- Now open the “Process” tab and search for the apps that you are not using currently.
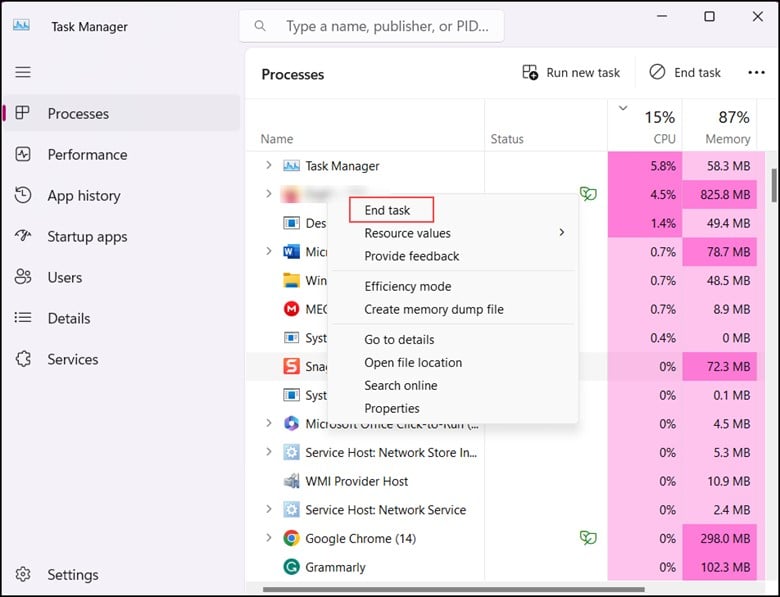
- Finally, right-click on the app and then select “End Task”.
5) Update Drivers
Updating the audio drivers will help update the software known to control the audio device.
This will resolve the compatibility issues and include the fixes for those bugs causing the audio render error.
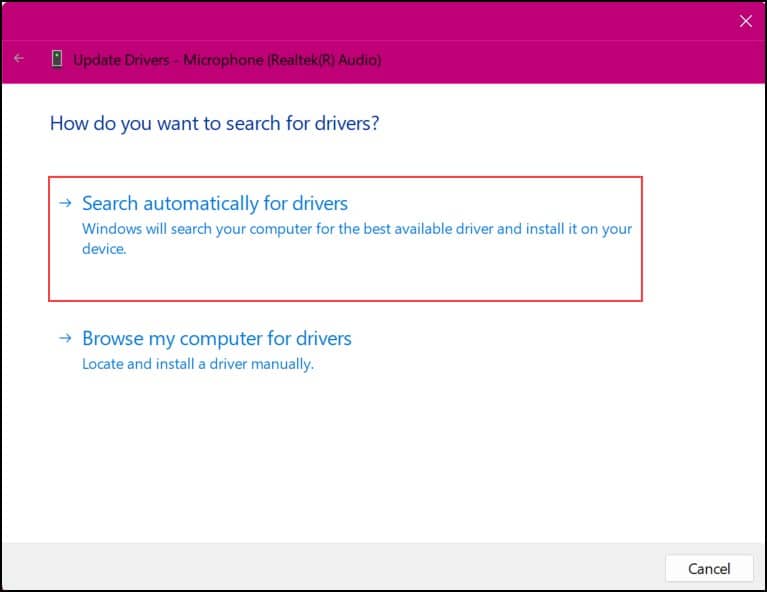
This is how you can update the audio driver:
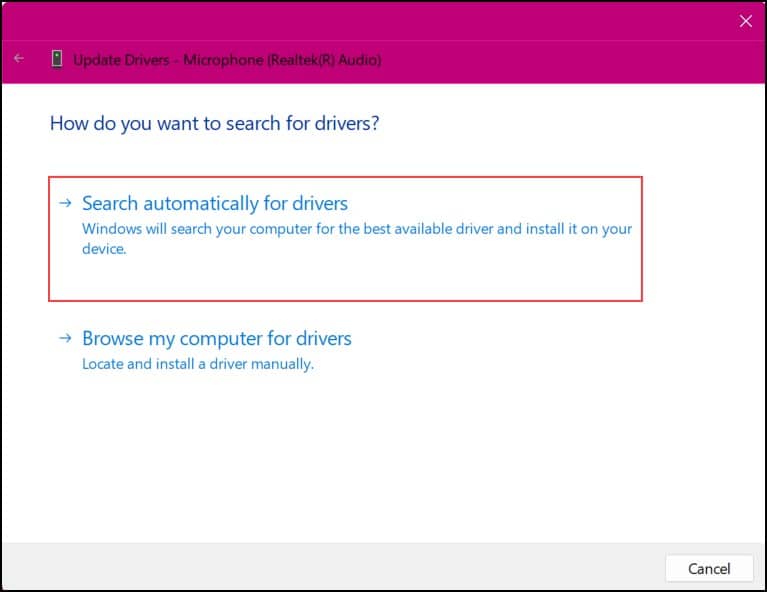
- Open Device Manager and click on the “Audio inputs and outputs” button.

- Next, right-click on the connected audio device and select “Update driver.”

- Click on Search automatically for drivers.
6) Reconnect The Default Audio Device
Unplugging and replugging the audio device will help to reset the connection between the computer and the audio device.
It will also re-detect the audio device and will be helpful in case of a temporary bug within the audio device.
For instance, people using headphones can unplug, replug them, and finally look for the issue.
Ensure there isn’t any weak connection of the device within the system. You can do the same thing with other devices too.
7) Update The Browser
If you are using an outdated browser, then it is highly likely that the particular issue is caused due to the outdated browser.
Therefore, download the latest browser update to fix this issue.
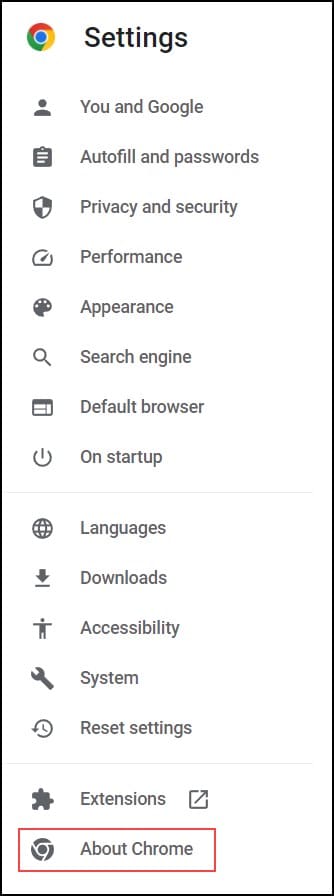
Here is how to update Google Chrome:
- Open Chrome and click on the three-dot menu.
- Choose the “Settings” option and then click on the “About Chrome” option from the left pane.
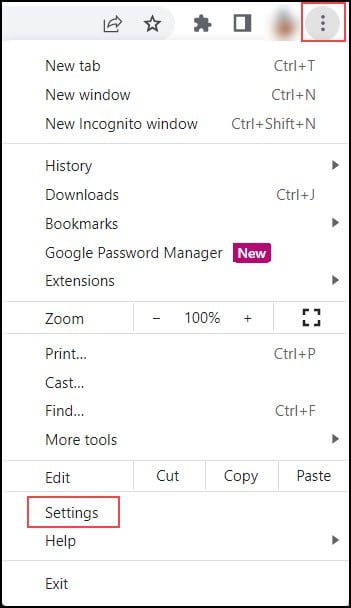
- Finally, Google Chrome will search for new updates and download the available updates.
Frequently Asked Questions (FAQs)
- Why Is The Audio Render Error Specific To YouTube?
Audio render errors can happen on any website, but it’s more common on YouTube due to the huge number of videos and also due to the complexity of the website. So, the large number of videos on YouTube face these technical glitches, which lead to audio rendering issues.
- Is An Audio Render Error On YouTube Always Fixable?
Mostly the audio render errors on YouTube are temporary and can be quickly resolved through troubleshooting. But if you can’t, then you need assistance from YouTube support.
- Can Ad-Blockers Or Third-Party Software Cause Audio Render Errors On YouTube?
Yes, ad-blockers or any other third-party software sometimes interfere with YouTube’s audio rendering, resulting in errors.
Wrap Up
Overcoming the audio render error on YouTube is nothing but the restoration of sound. So, after you return to your usual self again, savor the triumph and get going.
Leave a Reply