Calibrating your laptop screens or monitors is very important if you want to witness the full potential of your display. Many times, we have users asking, why even after having high-end display does their screen look so dull?
Well, it looks dull because your Windows is running the default color combination, and that’s why it is very important to calibrate your screens. In this article, we will discuss how you can calibrate laptop screen on Windows 10.
Calibrate Laptop Screen On Windows 10
Contents
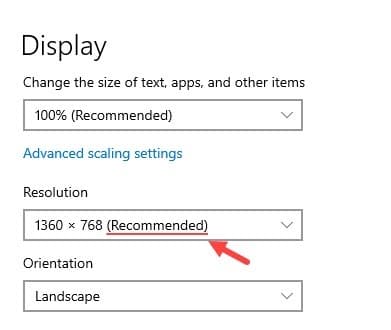
Before you calibrate your laptop screen, you need to check if the desktop resolution is set to the recommended resolution of your monitor or not.
Check If The Desktop Screen Is In Recommended Resolution
To check if the active desktop resolution is set to recommended resolution, follow the steps given below:
- Right-click on your desktop and click on the Display settings option from the pop-up menu.
- Scroll down to the Scale and Layout section and check if the Resolution is set to the recommended value. If not, then click on it and select the recommended value.
Steps To Calibrate Laptop Screen On Windows 10
Now that you have set your laptop screen to the recommended resolution, it’s time for starting the Windows 10 color calibration utility. Color calibration in Windows 10 can easily be done using the following steps:
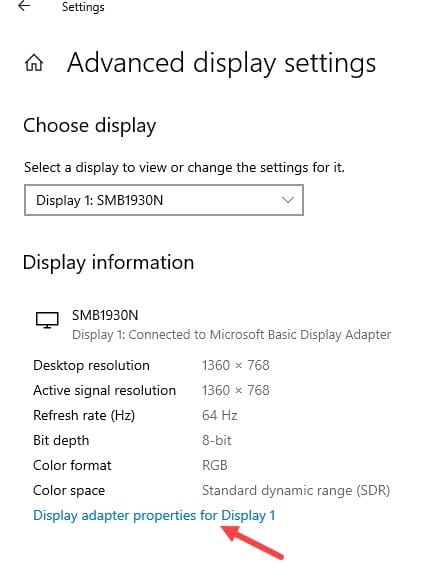
- Right-click on your desktop screen and open the Display settings like before.
- Scroll down and locate the Advanced display settings in the Multiple displays section.
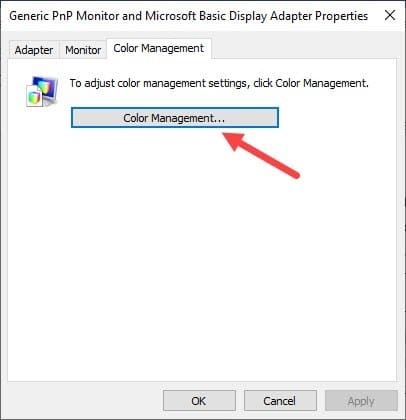
- Click on the Display adaptor properties for Display 1 option. This will open the Generic PnP Monitor and Microsoft Basic Display Adaptor Properties.
- Select the Color Management tab and then click on the Color Management option.
- Now, select the Advanced tab and click on the Calibrate display option.
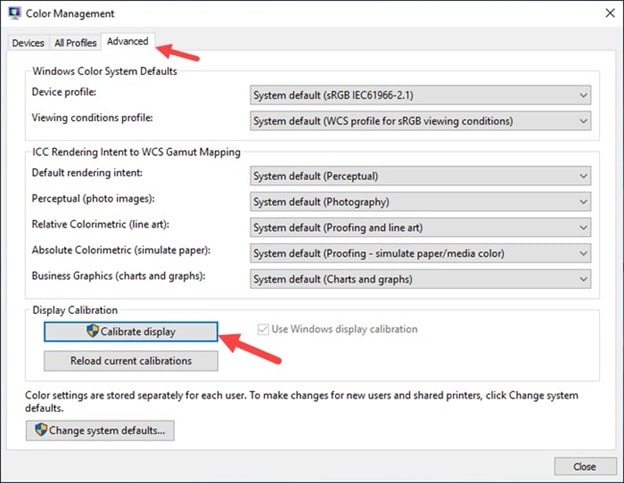
The Display Color Calibration wizard will now open on your screen. Click Next to start the process.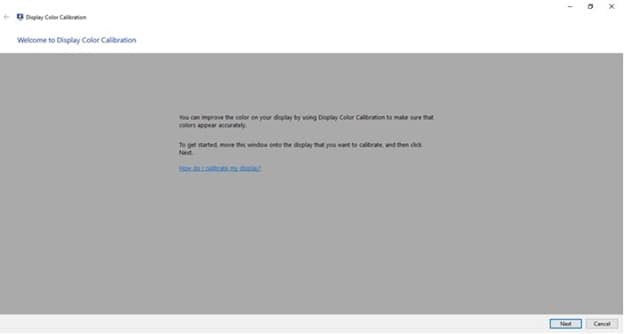
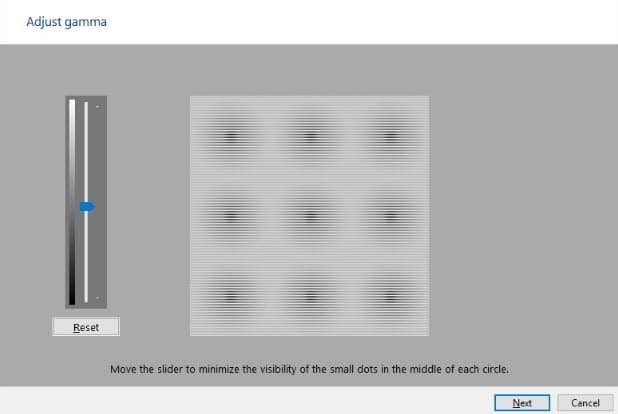
Now, you will be asked to adjust the gamma settings of your screen. There will be small black dots on the screen and a slider at the side. Move the slider up and down to adjust the gamma settings, keep changing until the black dots are barely visible.
Proper gamma settings will lead to more depth and realism, so adjust it carefully. Click Next after you have adjusted the gamma settings.
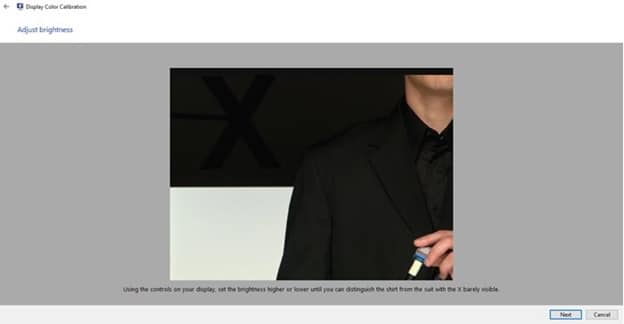
The wizard will now ask you to adjust the brightness and show you three photos. Click on Next.
Open the Brightness controls of your laptop and adjust the brightness until you can distinguish the shirt from the suit with the X barely visible in the photo. Click Next again when then you adjusted the brightness of your laptop.
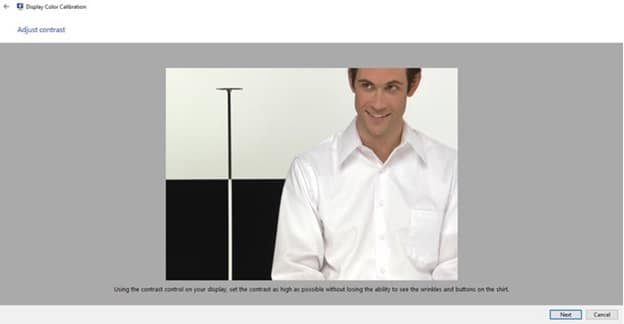
Now, you will be asked to adjust the contrast of your screen and as before, a picture will appear on the screen. Click on the Next option again.
Locate the contrast settings in your laptop and open it, increase the contrast until you lose the ability to see the wrinkles and buttons on the white shirt in the picture. Click on Next after you have adjusted contrast.
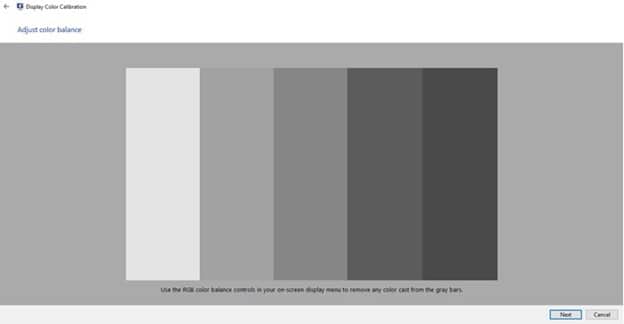
Click on Next again, to adjust the color balance of your laptop. Adjust the red, green and blue sliders until all the color cast is removed from the gray bars using the RGB color balance controls on your laptop. Once done, click on Next.
The calibration of your laptop screen is finished, now you can compare the previous calibration with this one. After you are satisfied with the new calibration, click on the Finish option to finish the color calibration in Windows 10.
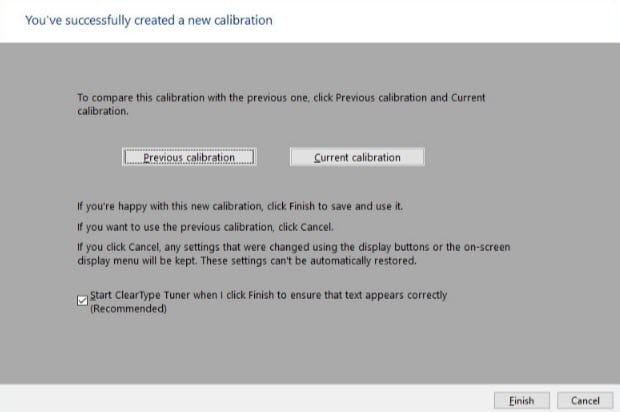
Finally, the ClearType Tuner will be up on the screen. You can start it to have your texts displayed correctly.
There are many 3rd party applications out there like Calibrize or QuickGamma, which you can use to calibrate your laptop screen. But we would recommend using the inbuilt Windows 10 color calibration application as it is more than adequate enough to do so.
Wrapping Up
So, now you know how to calibrate laptop screen on Windows 10. Using the inbuilt color calibration utility the way it has been said above in the article will easily calibrate your laptop screen. Feel free to leave your thoughts on the article in the comment section.
Thank you so much. This was very thorough!