When you delete any file on your PC, the deleted file is moved to the Recycle Bin and not deleted from the memory (unless the file is large). The deleted files in Recycle Bin continue to take space in your memory, slowly filling it up. You can delete the files from your Recycle Bin, but let’s be honest, we often forget to clean the Recycle Bin.
That’s why I have written this article discussing how to empty Recycle Bin automatically. To do this we will use the Storage Sense or use the Task Scheduler to create a task that automatically deletes the Recycle Bin after a period.
How To Empty Recycle Bin Manually?
Contents
Before we discuss how you can clear Recycle Bin automatically, let’s first see how to do it manually. In Windows, empty Recycle Bin manually by using the following steps:
- Right-click on the Recycle Bin. It will open a menu.
- Select the Empty Recycle Bin option from the pop-up menu.
- A prompt will appear asking for confirmation. Select Yes.
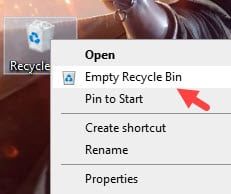
Now, all the files present in Recycle Bin will get deleted.
How To Empty Recycle Bin Automatically?
It is important to periodically clear the Recycle Bin, otherwise, you will soon be running out of space. You clear Recycle Bin automatically using two ways. The easy one is using the Storage Sense, and the other roundabout one is by using the Task Scheduler. Below we have shown both methods.
Clean Recycle Bin Using Storage Sense
The Storage Sense utility in Windows 10 has the feature to clean Recycle Bin periodically. To set it for cleaning Recycle bin periodically, follow the steps given below:
- Press the Windows key and type Turn on Storage sense in the search bar.
- Select the top option to open the Storage settings.
- Turn on the Storage Sense toggle and select the Configure Storage sense or run it now option.
- In the Temporary files section, select the drop-down menu below the Delete files in my recycle bin if they have been there for text.
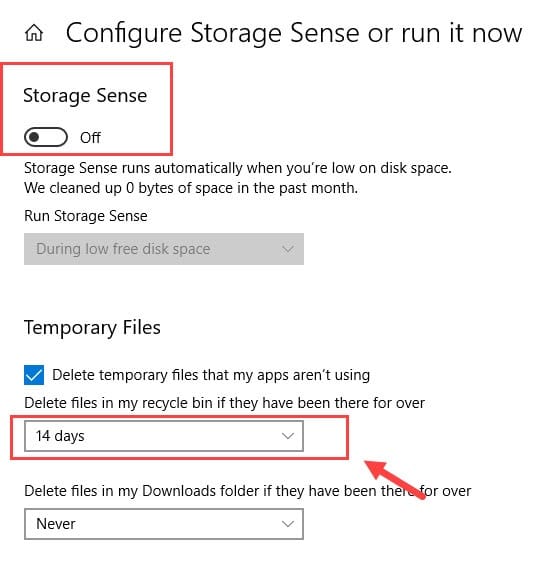
- Select the period for cleaning the Recycle Bin.
That’s it. Now, Storage Sense will automatically clean Recycle Bin periodically as set.
Bonus: Storage Sense can also be configured to delete the downloads folder periodically.
Clean Recycle Bin Automatically Using Task Scheduler
You can also use Task Scheduler to create a task specifically for clearing the Recycle Bin. To do it, follow the steps given below:
- Press the Windows key and type Task Scheduler in the search bar. Select the top option from the search result.
- After the Task Scheduler opens on your screen, right-click on the Task Scheduler Library and select the New Folder option.
- Give a name to the folder like Important tasks or my tasks. This will keep your tasks organized.
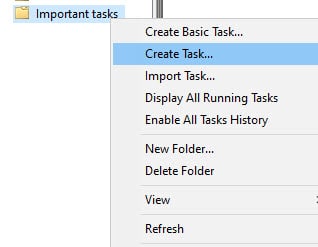
- Now, right-click on the folder you just created and select the Create Task option.
- Select the General tab and enter a name like clear Recycle Bin periodically.
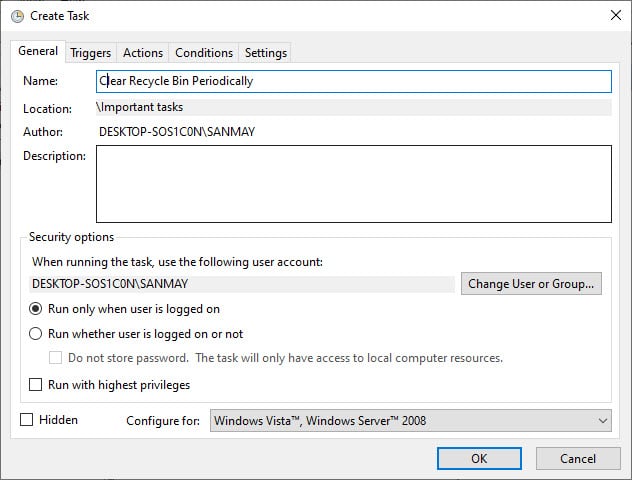
- Next, click on the Triggers tab and select the New option.
- Select the trigger action of the task by clicking on the Begin the task menu. You can select On a schedule, At log on, On an event, At startup and various other trigger options. The trigger action you select will decide when the task will begin.
- Also, enter the start date and time and when it will work, like Daily, Weekly, or Monthly.
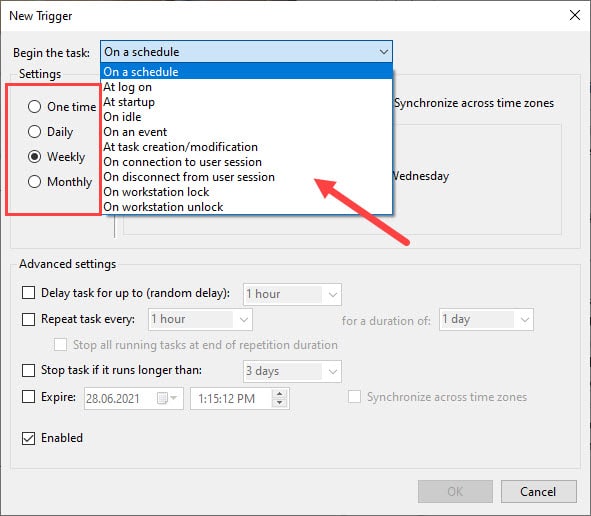
- Click on OK to save the changes.
- Next, select the Actions tab and select the New option.
- In the Settings section, on the Program/script box, enter cmd.exe.
- On the Add arguments (optional) box, enter the following argument:
/c “echo Y|PowerShell.exe -NoProfile -Command Clear-RecycleBin”
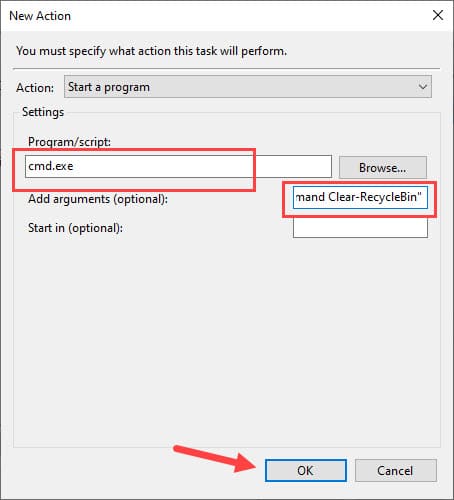
- Finally, click on OK to save the changes.
After you have finished all the above steps, the task will run automatically in Windows to empty Recycle Bin according to the trigger action you have set.
Wrapping Up
So, there you have it. Now you know how to empty Recycle Bin automatically. Take some time when you decide the trigger action as it will set when the task begins working. If you have any questions related to this topic, then ask below in the comment section.
Leave a Reply