Google Chrome is used worldwide, and almost every working PC has either had it installed or installed it at some point.
Being this massively popular browser, it can be annoying when it also has its fair share of bugs.
One of the popular bugs of Google Chrome is it automatically closes or crashes on the desktop screen.
After researching the problem and going through the responses of people who faced or are facing this issue, I have come up with a list of the following solutions.
Perform them, and you can solve this issue on your PC.
What To Do When Google Chrome Keeps Closing?
Contents
Many different things can make Google Chrome close automatically or crash. Here are the troubleshooting methods you need to perform to fix it.
Solution 1: Disable Browser Extensions
Corrupted or unsupported browser extensions are known causes of this bug. If you have installed an extension from an unknown source, or if the extension installed has turned corrupted, it can cause bugs and issues with Chrome, like forcing it to close automatically.
To fix this issue, you can disable the extensions and remove the problematic ones. Here is how you can do it:
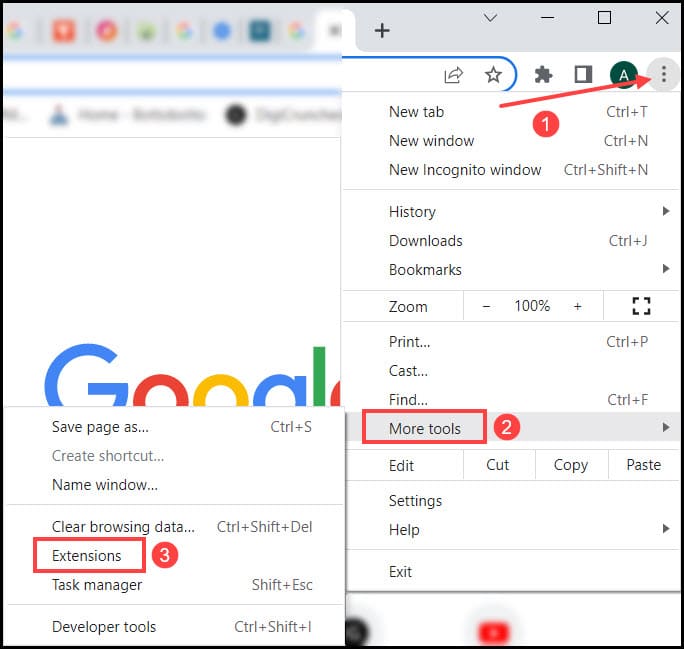
- Open Chrome and click on the three dots icon on the top right.
- Click on the More Tools option and select Extensions.
- Turn off the toggles beside all the extensions to disable them.
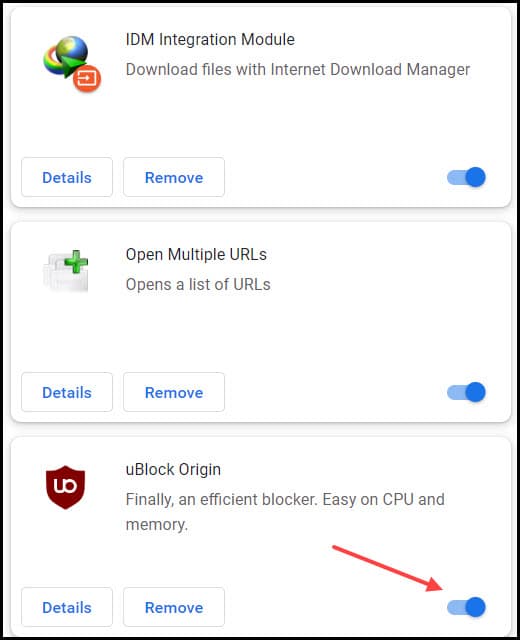
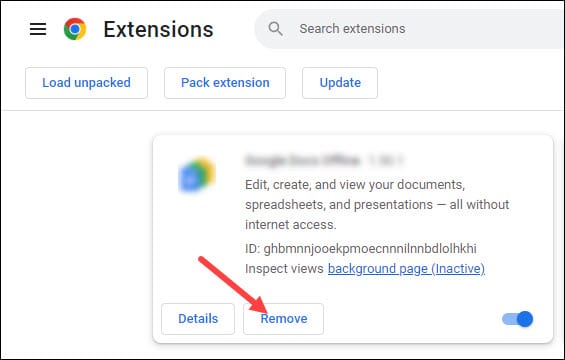
See if the issue gets fixed. If yes, enable the extensions one by one and see which causes Chrome to close. Once you have pinpointed the problematic extension or extensions, click on the Remove option adjacent to it to uninstall it from Chrome.
Solution 2: Clear Cache
Cache files are temporary files of Chrome used to quickly load websites or other Chrome processes.
These cache files can get corrupted and cause bugs for Chrome if not cleared periodically.
If extensions are not responsible for the issue, then the cache might be.
Here is how you can clear it:
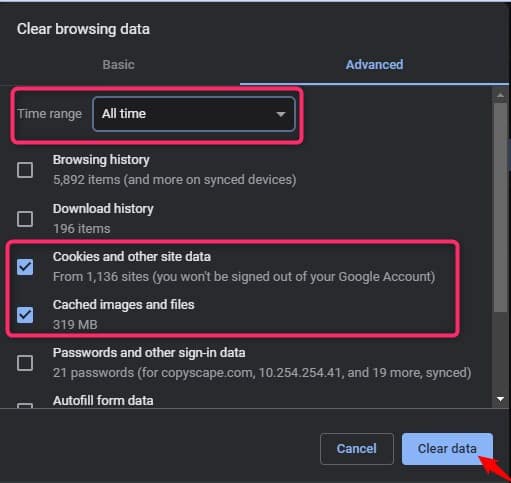
- Open Chrome and press the Ctrl + Shift + Delete keys.
- Click on Advanced and set the Time range to All time.
- Select Cached images and files, Cookies and other side data options and click on Clear data.
- Wait for it to finish and restart Chrome.
Solution 3: End High Memory Consuming Processes
Like Windows, Google Chrome also has its Task Manager, used to check the processes of Chrome running in the background.
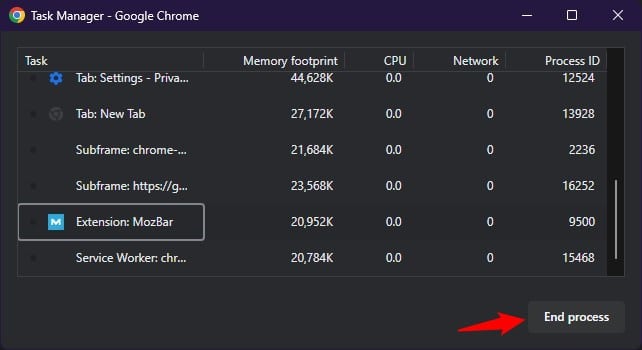
If any process is consuming a large number of resources, then it might also be responsible for closing Chrome. You can end it from the Task Manager and see if that fixes the issue.
Here is how you can do it:
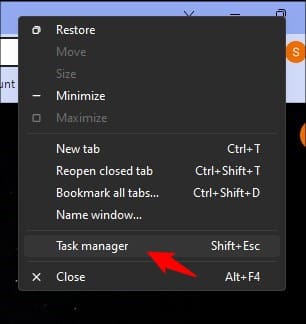
- Open Chrome and right-click on the header bar.
- Select the Task Manager option.
- Look for the process that’s consuming the most memory and select it. Click on End process to end it.
Solution 4: Reset Chrome
Resetting is another way you can solve this bug. Many users have solved the Chrome closing automatically issue by resetting it.
Here is how you can do it:
- Open Chrome and click on the three dots.
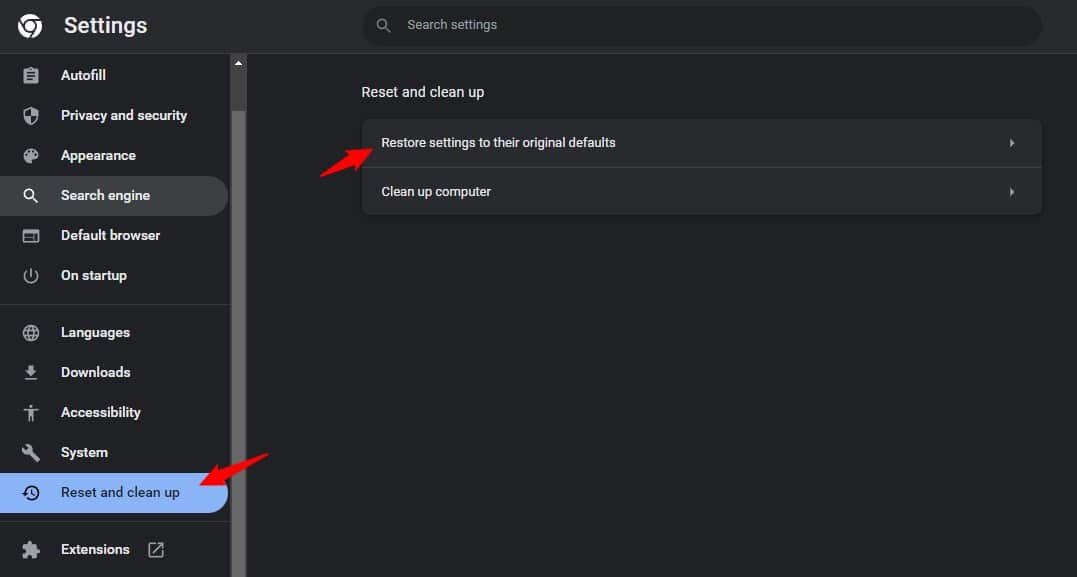
- Select Settings and click on Reset and clean up from the left.
- Click on Restore settings to their original defaults from the right.
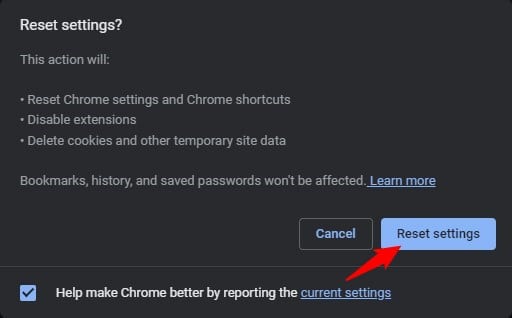
- Select Reset Settings to complete the process.
Wrapping Up
So, there you have it. Now you know how to easily solve the Chrome keeps crashing issue. If you have any questions about this topic, ask us in the comment section below.
Leave a Reply