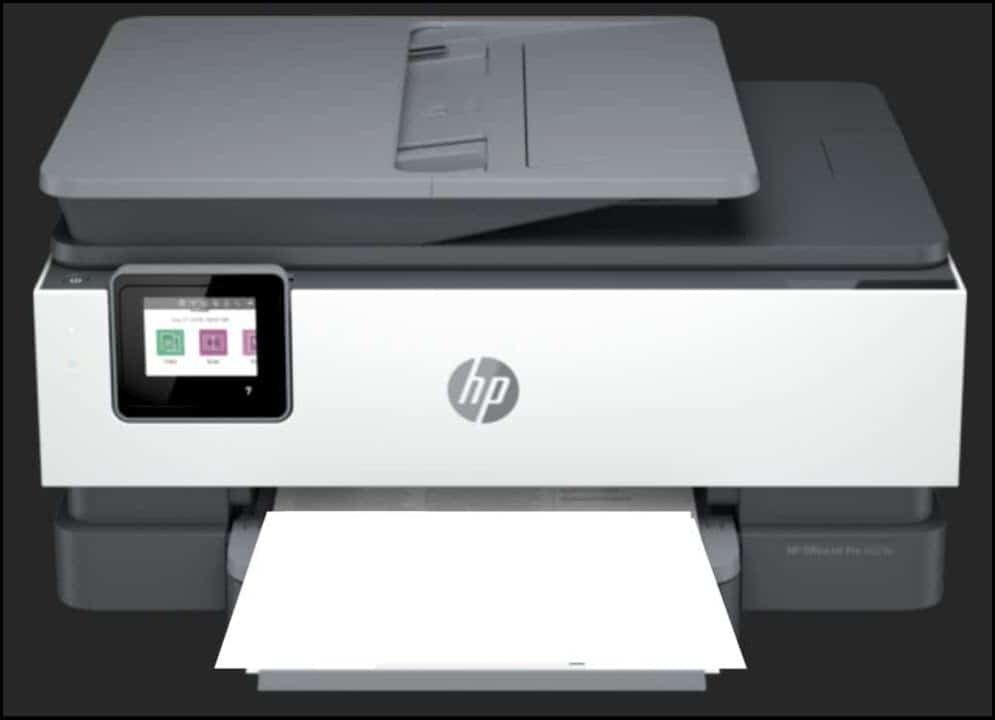
If your HP Printer is printing blank pages then it can be due to low ink or empty ink cartridges. Follow this article to know how to fix the problem easily.
How To Fix The Printer Printing Blank Pages On HP Printer?
Contents
Follow the instructions below when your HP printer is printing blank pages issue.
1. Restart The Printer
Restart your Printer when it is printing blank pages. Sometimes a fresh restart can fix minor bugs and errors that can be responsible for the issue.
- So, turn off your Printer, and unplug all the cables and peripherals attached to the device.
- Wait for several minutes, connect all the cables, and turn it on.
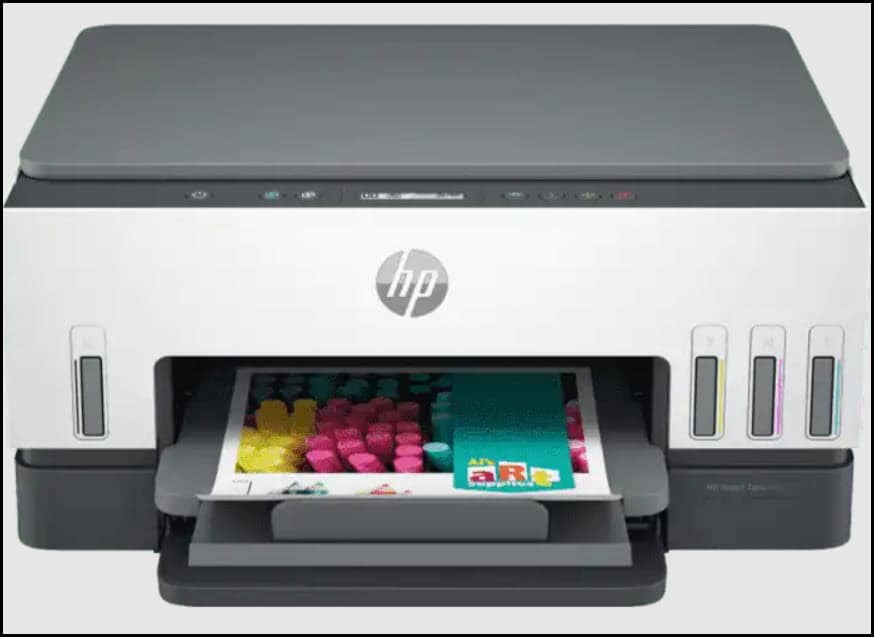
Switch on your device and check that the issue is resolved; otherwise, go to the next solution.
2. Skip Blank Pages
If the document you want to print has blank pages, then you may find some blank pages while printing.
If the printing document is small, go to print preview options and omit all the blank pages.
But if you have large documents to print, then follow the steps below to do so:
Steps for Windows
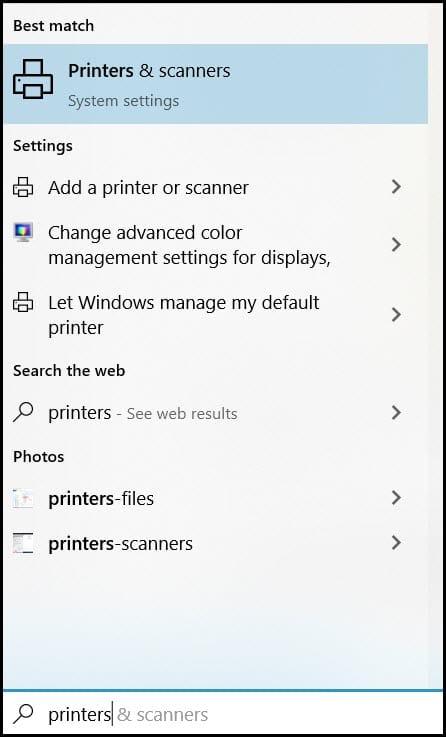
- Search Printers & scanners using the Windows search bar and select the top option.
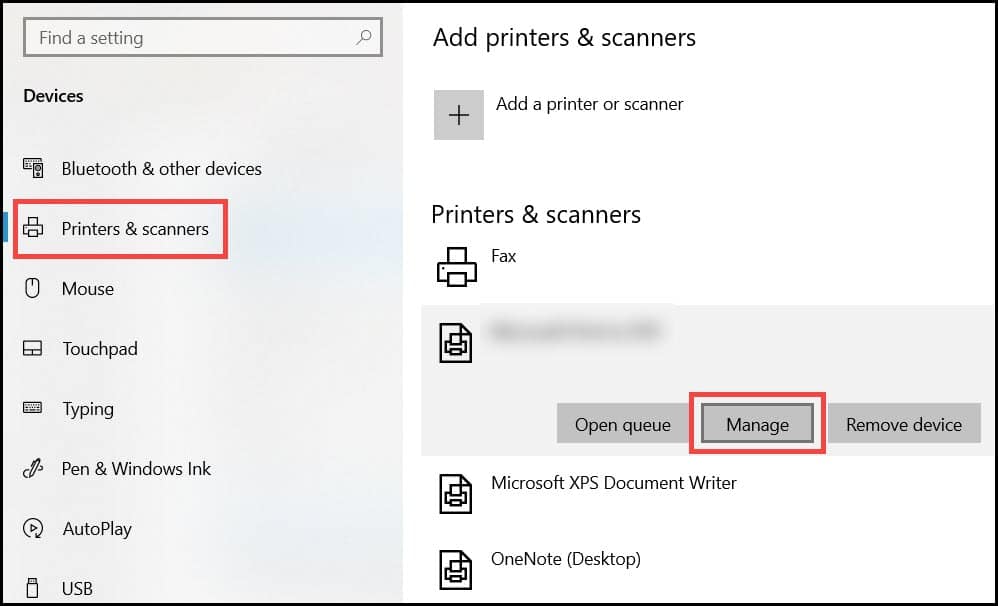
- After the Printers & Scanners menu opens, select the Manage button under your device.
- Click on the Printing preferences option from the next window.
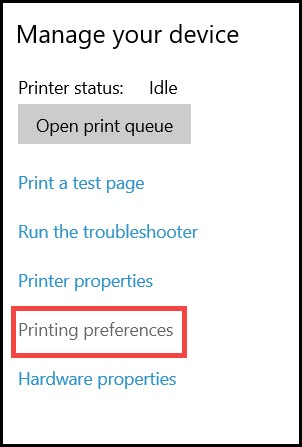
- Choose the Skip Blank Page option and select Ok to save the changes.
Steps for Mac
- From the Apple menu, choose System Preferences.
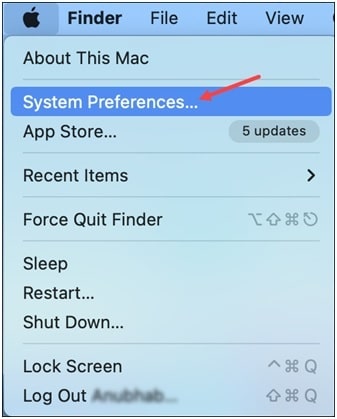
- Click on the Print & Scan / Print & Fax / Printers & Scanners option and choose your device.
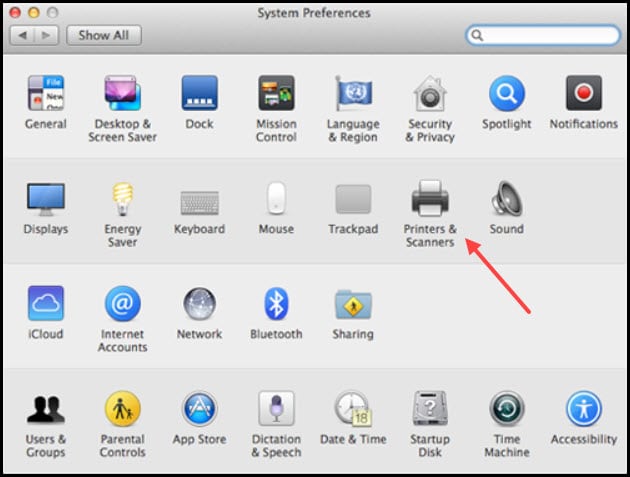
- Click on the Options & Supplies option.
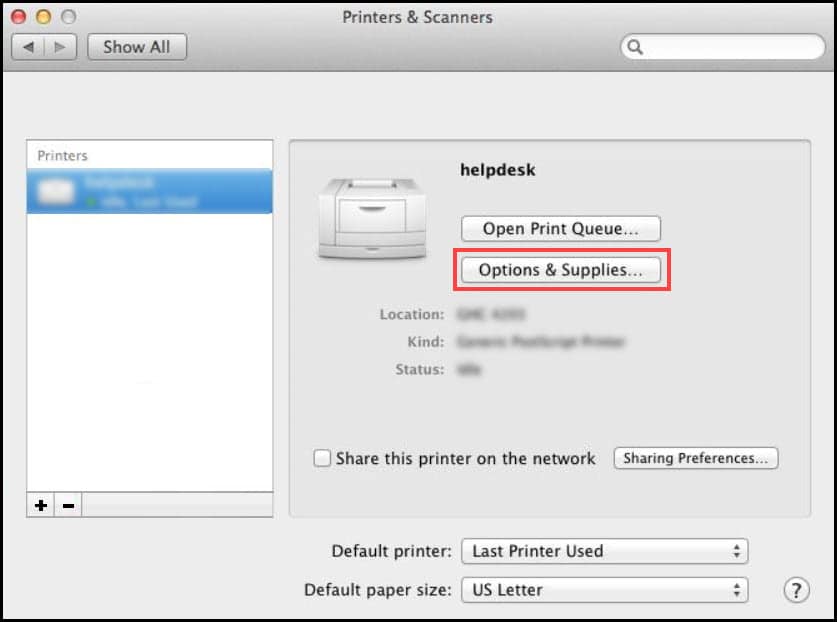
- Select Driver or Options.
- Turn on Skip Blank Pages option.
- Finally, click on Ok.
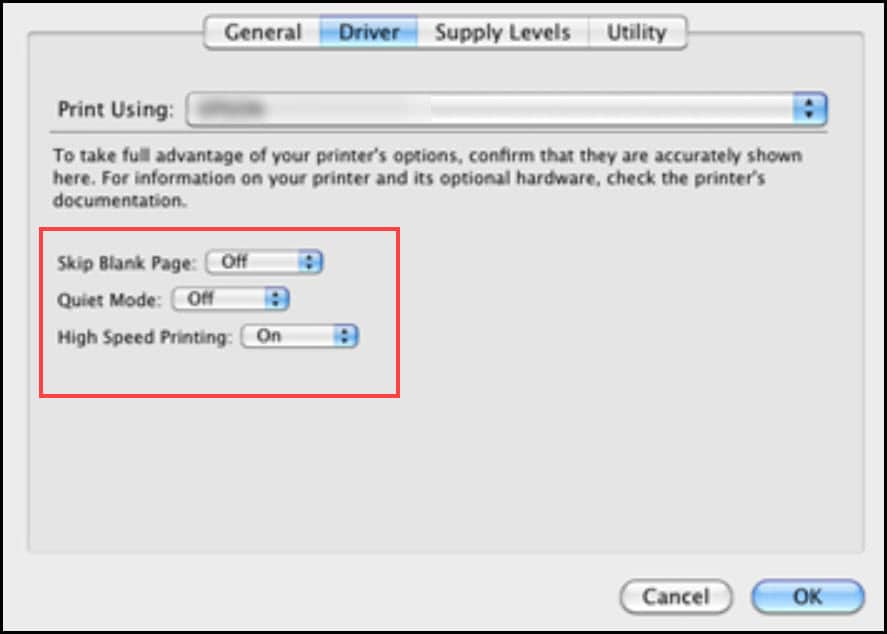
Now, restart the printing process and check if the issue is resolved. Otherwise, check the cartridges.
3. Check Cartridges
Check the ink cartridges for low or empty ink levels. This can be the vital reason why your Printer is printing blank pages.
Follow the instructions below to check that:
- Search for Control Panel in the Windows search bar and select the first displayed option.
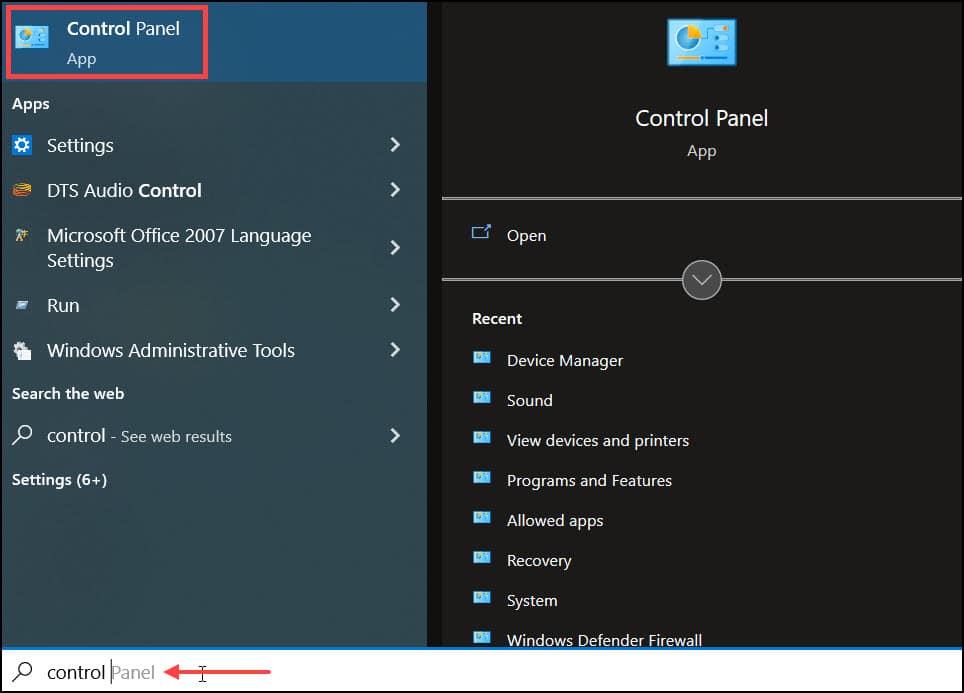
- Select Devices and Printers from the list of option.
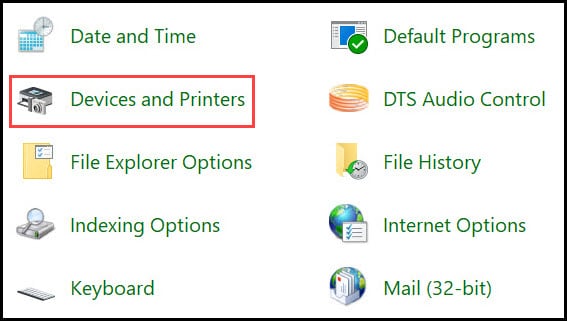
- In the next window, you’ll see all the printers connected to your system.
- Select the Printer you want to check in the devices and printers section.
- From the next section, you’ll see the ink levels at the bottom.
If you see that the ink is low or empty, then replace the ink- cartridge with a new one.
Make sure to buy the original HP cartridges and they must be re-connected properly.
To connect the cartridges to your device, follow the instructions given below:
- Switch On your Printer.
- Open the ink door and remove the ink cartridges while the device is turned On.
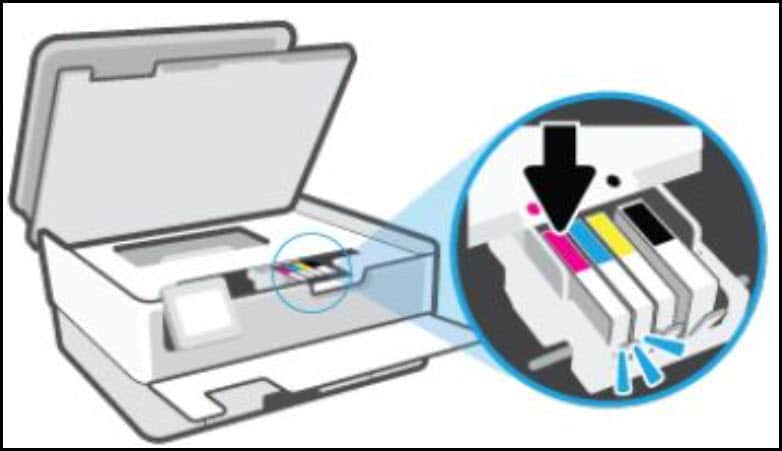
- Now, unplug all the power cables and wait for at least 1 minute.
- Insert the ink cartridges very gently and firmly.
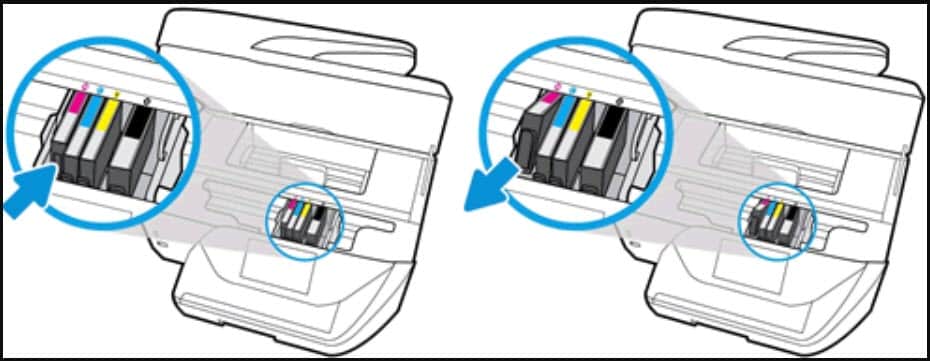
- Reconnect the power cable back and turn on the Printer.
After restarting the Printer, it will perform a warm-up cycle and fix all the temporary issues.
After the process completes, insert the ink cartridges and start to print. If the problem is still not fixed, clear the printer head.
4. Clean Print Head
A dirty and clotted print head can be why the Printer is printing blank pages.
To clean the print head, follow the steps below:
Clean Printhead Manually
- Turn off your Printer.
- Take out all ink tanks or cartridges one by one from your Printer.
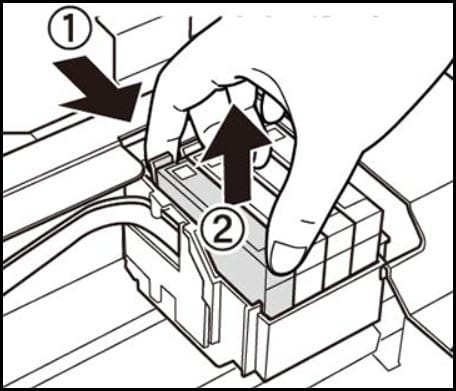
- Place the cartridges on a clean paper or tissue in an inverted position.
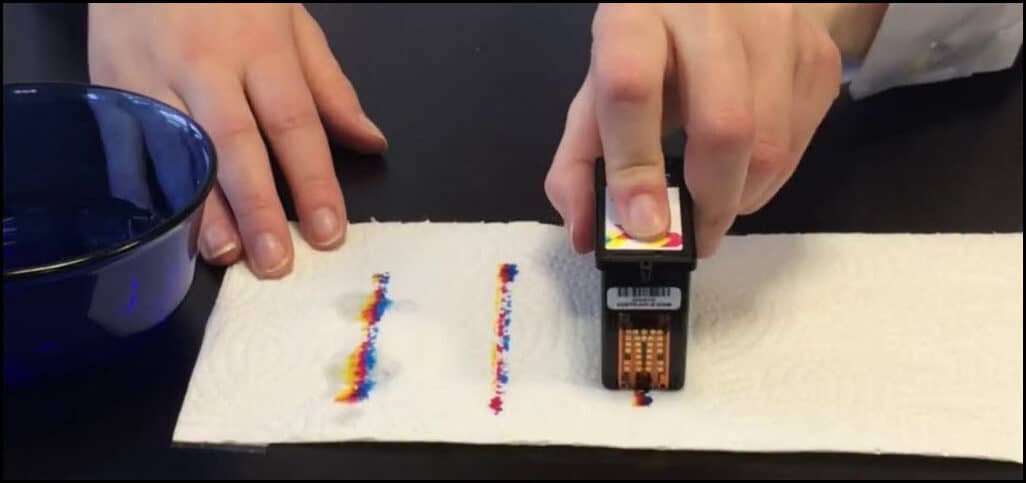
- Now, remove the print head very carefully from the Printer.
- Clean the print head’s back position with a microfiber cloth by damping it in warm water.
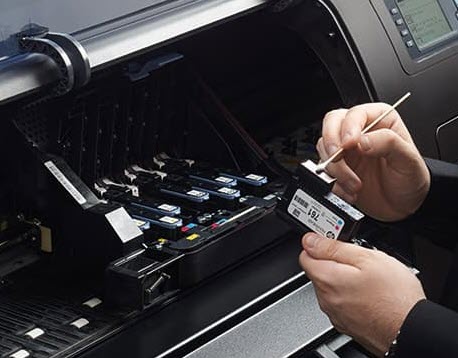
- Clean the nozzle position until no black ink is sticking to the fabric.
- Soak it in lukewarm water or hold it under running tap water for 10-15 minutes.
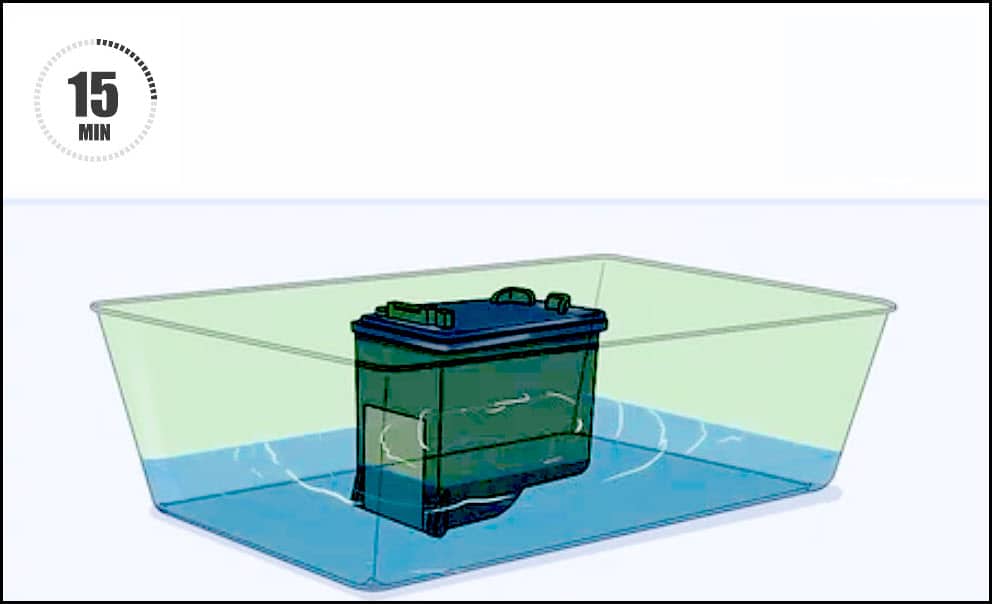
- Wash properly and then dry the print head by covering it with a dry towel or lint-free cloth sheet.
- Now, then place it on tissue paper for a minimum of 15 minutes to air-dry.
- Place the print head on the cartridge and insert it into the respective slots.
Clean Printhead Automatically
Steps for Windows
- Press Windows + R to open the Run Utility.
- On the dialog box type control and hit the Enter key to open the Control panel.

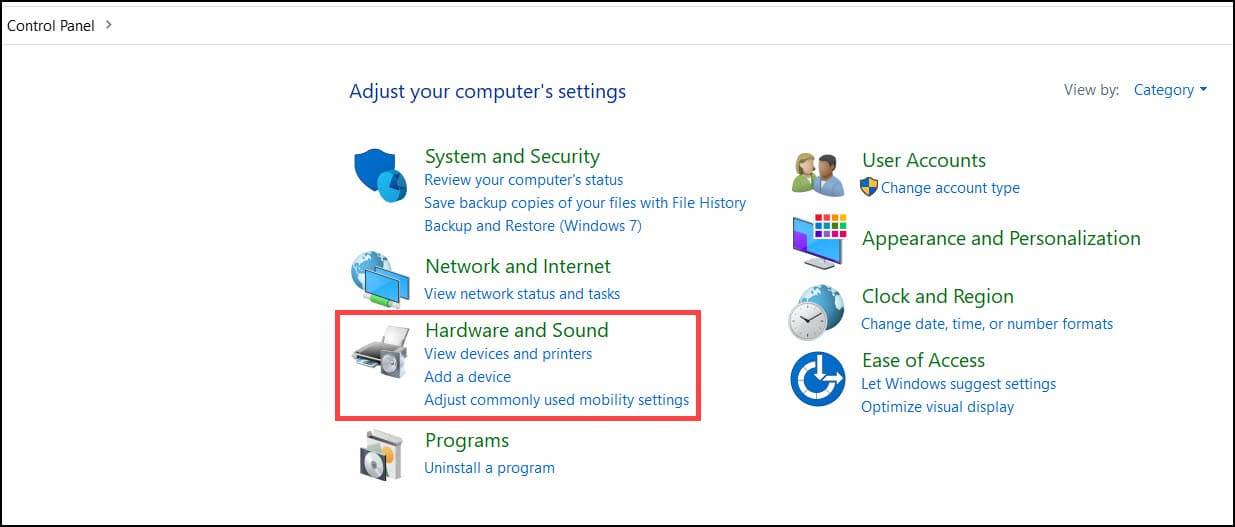
- Select the Hardware and Sound option from the list.
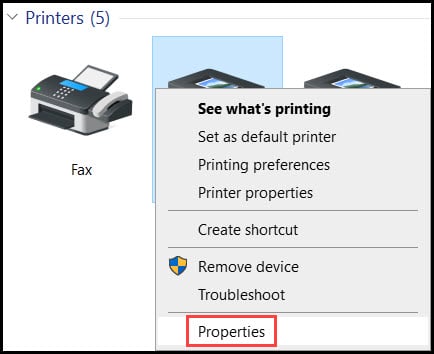
- Choose the Devices and Printers and right-click on your product and click on Printer Properties.
- Click on Maintenance and choose the Clean Heads option and select Ok.
Follow on-screen instructions to complete the process.
Steps for Mac
- Select System Preferences from the Apple menu.

- Choose the Printers and Scanners option and click on the Machine option.

- Select the Options & Supplies option.

- Click on the Utility button, and select Open Printer Utility.
- From the Status monitor screen, select the Control menu > Maintenance >Print Head Cleaning.
Follow the on-screen instructions to complete the process. Then turn on the Printer and check if the issue is resolved.
5. Align The Printer Head
If the cartridge is not properly aligned, then also the Printer won’t function properly.
So, check the printhead alignment following the instructions given below:
- Turn on your Printer and load paper in the tray.
- From the printer control panel, touch the dash icon beside the Setup icon.
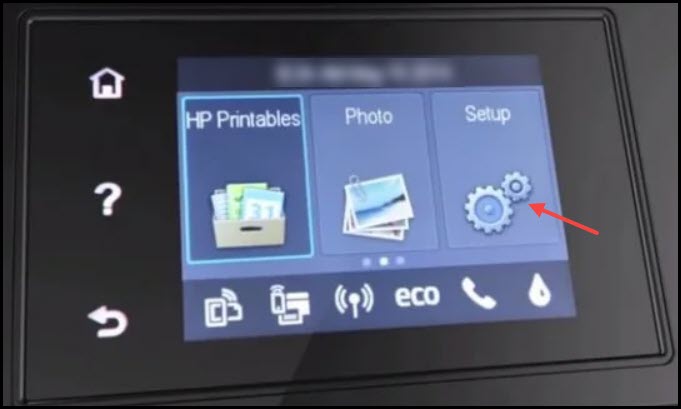
- Using the arrow keys navigate to Tools > Ok option.
- Again locate the Align Printer option using the arrow keys and confirm by tapping on Ok.
- Open the lid of the Printer. The alignment page is placed on the scanner glass facing the printed side.
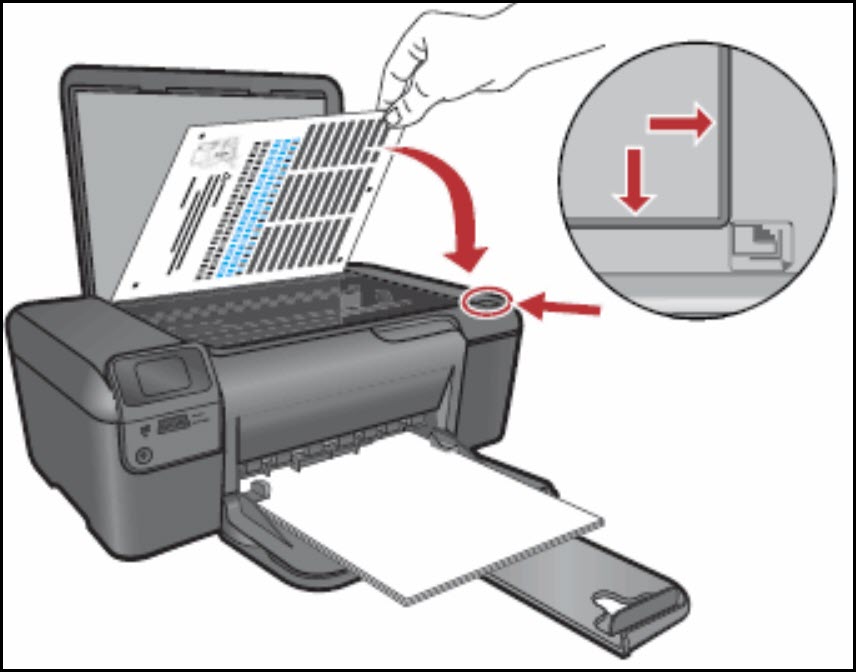
- Close the lid and tap on Ok to complete the process.
Wait until the process is completed. Check if the problem is solved otherwise, run the printer troubleshooter.
6. Troubleshoot Printer (Windows)
Windows have an in-built printer troubleshooter to fix Printer related issues.
To do so, follow the steps below:
- Press Windows + I to open the Settings option.
- Click on the Update & Security option from the list.

- From the left panel, select Troubleshoot.
- Select Additional troubleshooters from the right panel.

- Choose the Printer from the list and click on Run the Troubleshoot option.
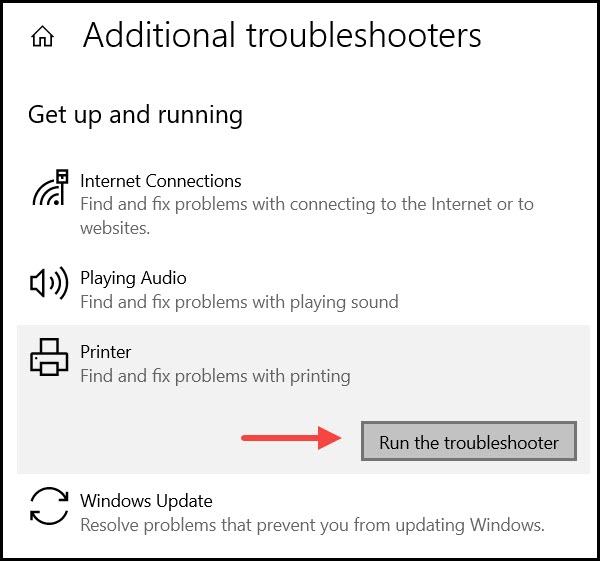
After the process completes, if your Printer is still printing blank pages, update the printer driver.
7. Update The Printer Driver
An outdated printer driver can be the reason why the Printer prints nothing.
So, update the printer driver, follow the steps below:
- Open the Run utility.
- Type devmgmt.msc on the dialog box and press the Enter key to open the Device Manager.
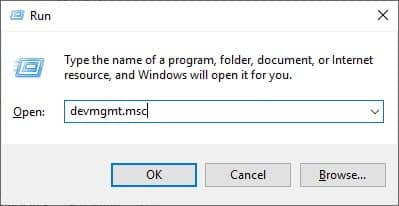
- Expand the Print queues section and right-click on the model number. Select Update driver option.

- From the next window, click on Search automatically for drivers option.
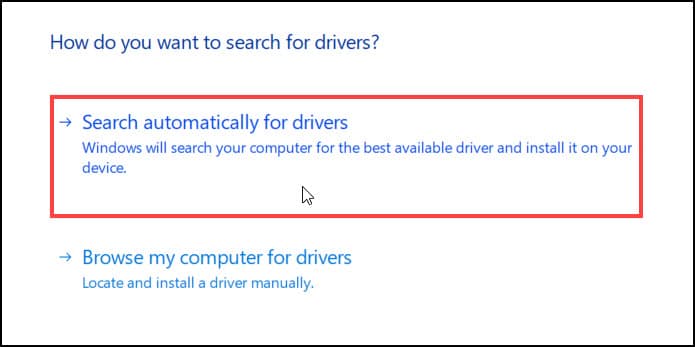
Follow the on-screen instructions to complete the process. After the process completes, restart the PC and check if the issue is resolved.
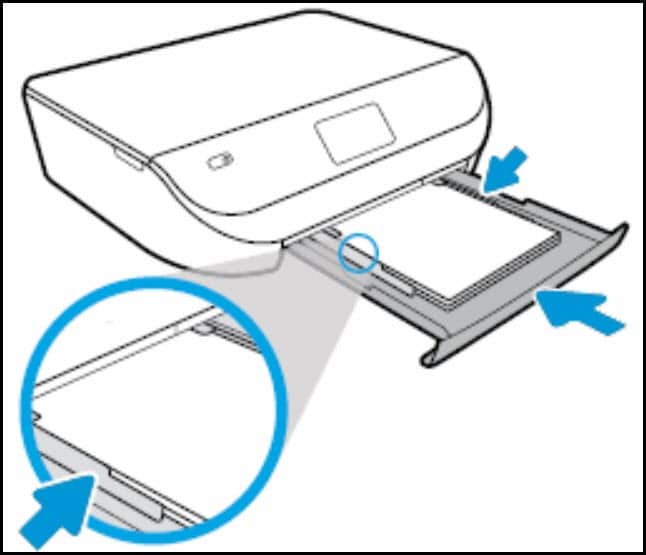
8. Check Paper Tray
If the issue persists, then it can be due to wrong paper use or an empty paper tray and or it is not properly connected to the Printer.
Check that the paper size is correct and the quality is perfectly matched with the type you want.
Also read: Why Canon Printer Prints Blank Pages
Final Words
Let us know which of the above solutions helped when the HP printer is printing blank pages.
If you still have queries, ask us in the comments section below.
Leave a Reply