Desktop skins or wallpapers reflect your preferences and personality.
Rainmeter allows you to create and display customizable desktop applets or widgets called skins.
So, if you wanted to customize your desktop with a suitable Rainmeter skin, then you are in the right place.
Today I am going to show you how to install Rainmeter for your PC and change the entire look of your desktop.
How To Install Rainmeter?
Contents
Here I will show you two methods to install Rainmeter. Follow the installation methods described below and get a Rainmeter skin for your desktop PC. Also, if you want to create your own Rainmeter skin, then jump to this guide.
Standard Installation
Follow the steps mentioned below to install the Rainmeter skin on your PC:
- Visit the official website and download the Rainmeter from there.
- Double-click on the downloaded file and begin the installation process.
- Select the language and click on the OK button.

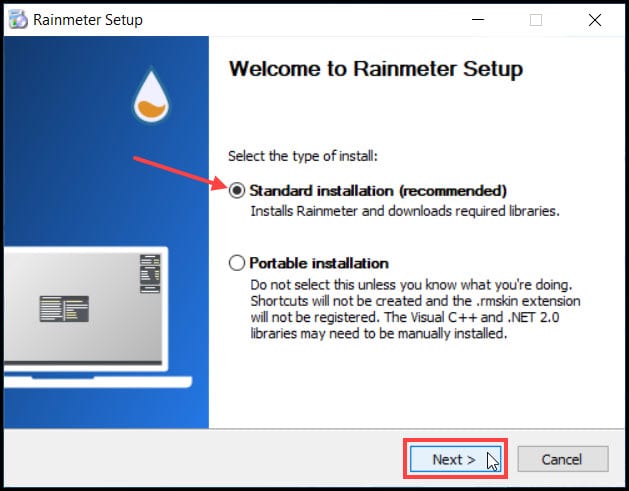
- Select the Standard installation option and click on Next.
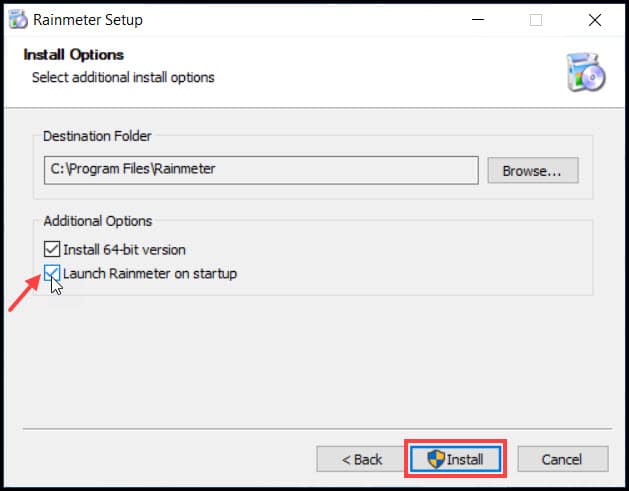
- Check Launch Rainmeter on Startup box, else you will have to start it manually every time your PC restarts.
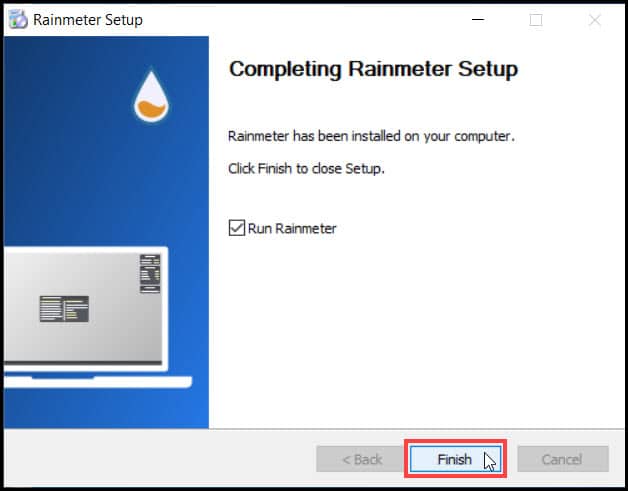
- Wait till the installation process gets completed and finally click on the Finish button to complete the process.
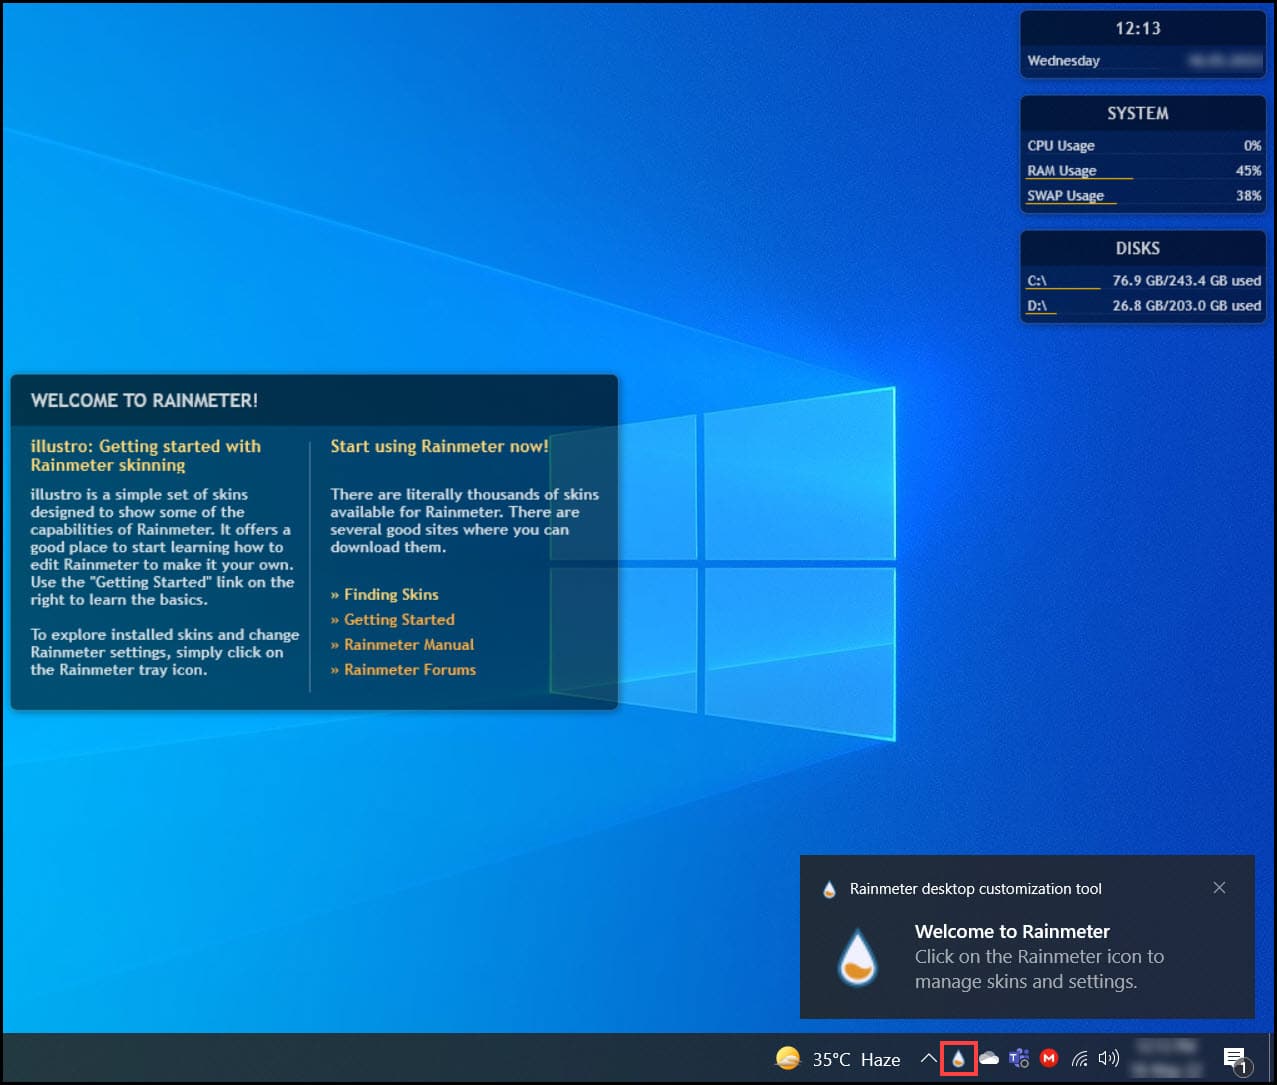
Launch the Rainmeter program after the installation. Now the default Rainmeter skin will be appear on your desktop.
After the installation of the Rainmeter skin, now it’s time to set it up.
Follow the steps below to do it:
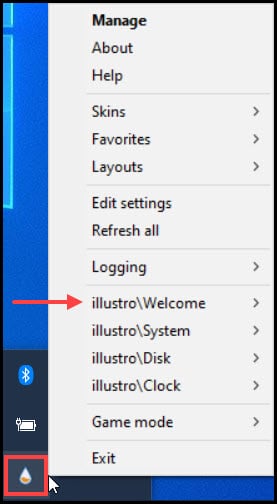
- From the notification tray, right-click on the Rainmeter icon. Select the illusrto\Welcome option.
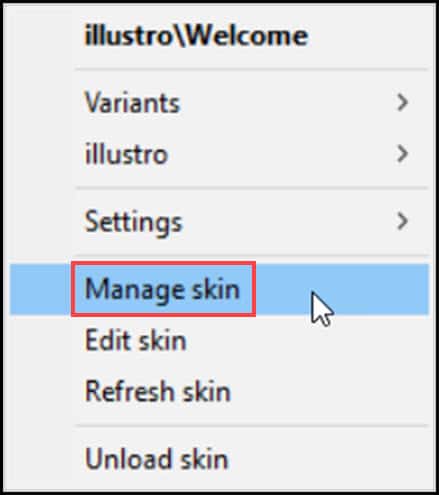
- Click on the Manage Skin option as shown below.
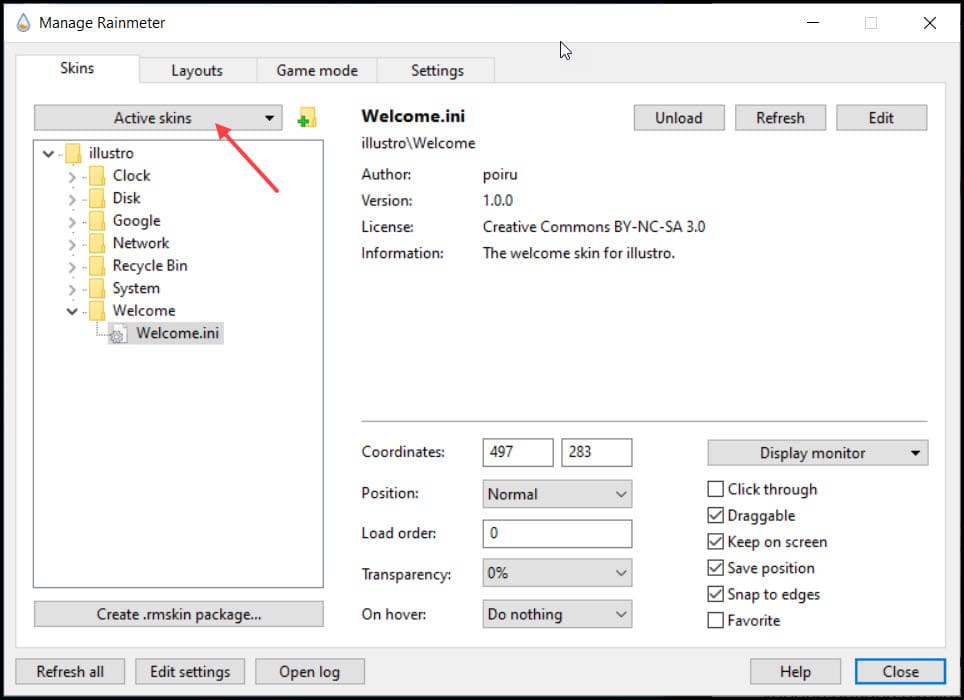
- From the Next Window, you’ll get the list of Installed Rainmeter skins under Active skins.
- Just click on it, and get access to manage the Rainmeter skins individually.
By changing the variables of the skins, you can easily edit each one of them.
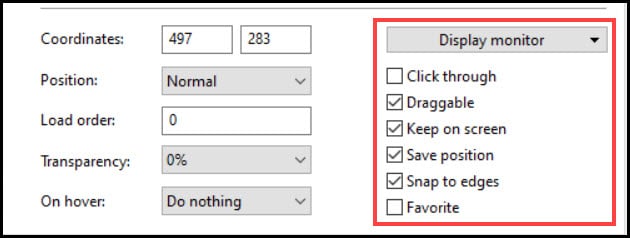
- Under the Display Monitor option, check the Draggable, Click-through, Keep on-screen boxes to make the changes.
Now, follow the steps below and change the Rainmeter skin:
- Download your preferable Rainmeter skin from the list given in the article.
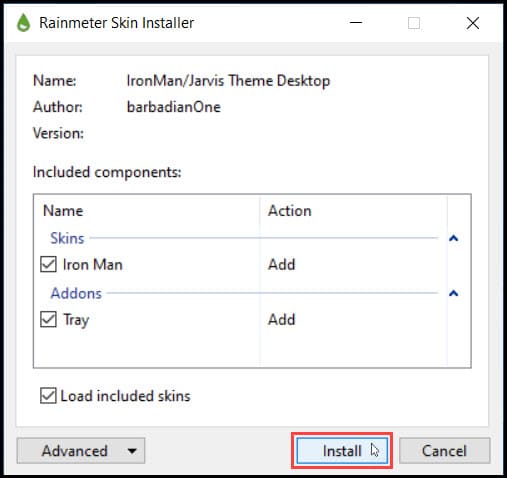
- Double–click on the downloaded file to initiate the installation.
- You can change your taskbar color and background color for a better display.
- Also, auto-hide the taskbar and hide all the desktop icons.
- Finally, rearrange the skin as per your preference.
Conclusion
So that’s it. Now you know how to install and change Rainmeter skin on your PC.
If you still have queries, ask us in the comments section provided below.
Leave a Reply