BSOD errors are the most troublesome and fear-inducing errors. Users tend to have nervous breakdowns when they face BSOD errors, and they are correct to be afraid as BSOD errors occur when the system fails.
KMODE Exception Not Handled error is a BSOD error that we are going to discuss in this article. In Windows 10, KMODE Exception Not Handled error generally arises due to corrupted software or faulty drivers that lead to a complete system failure.
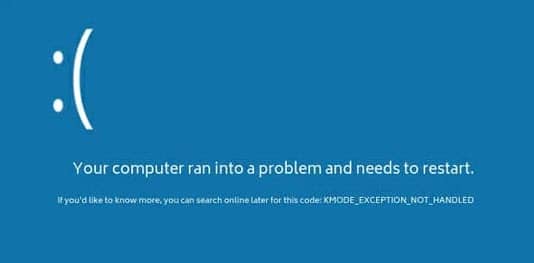
In this article, we will discuss the various ways you can troubleshoot this error so that when you face this problem, you can skip having an episode of a nervous breakdown and just focus on the error.
Also, you may want to check out this article on Windows update getting stuck.
Solving The KMODE Exception Not Handled Error
Contents
Below we have discussed some troubleshooting methods, which should fix this error. Read and execute them carefully and hopefully, you will be free of this error by the end of this article.
Solution 1: Disable Fast Startup
Disabling the Fast startup feature is the most reported fix for this error. Fast startup is a feature that allows faster recovery from shutdown and hibernation, which reduces the boot time. This is a very useful feature, but it can also load the driver problems already present on the computer.
To disable the Fast startup feature, follow the steps given below:
- Type Power and Sleep settings in the Windows search bar and open the top option.
- Select the Additional power settings option in the Related settings section.
- Next, click on the Choose what the power buttons do option.
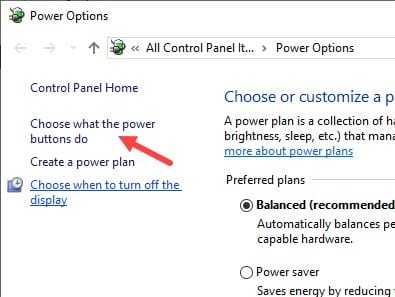
- Select the Change settings that are currently unavailable option and uncheck the Turn on fast startup (recommended) option.
- Finally, click on the Save changes option.
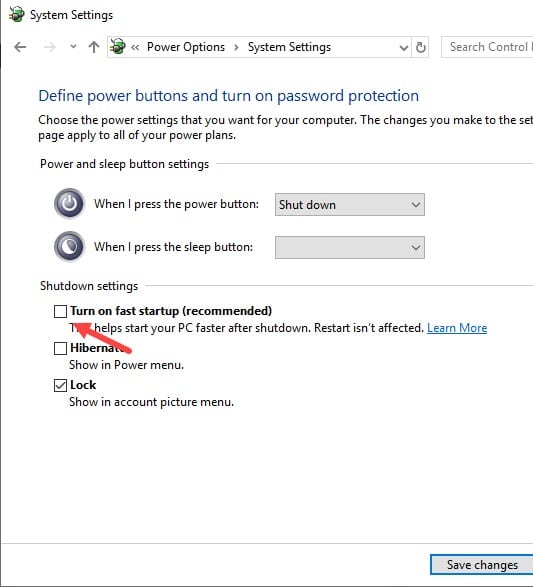
After disabling the Fast startup feature, the stop code KMODE Exception Not Handled should not arise again. However, if the error persists, then try the next solution.
Solution 2: Troubleshoot Drivers
Faulty drivers are another known cause of this error. Generally, if the error is caused by faulty drivers, then the name of the faulty driver should be mentioned in the error. Updating that driver should fix this error.
To update drivers, follow the steps given below:
- Open the Run utility by pressing the Windows + R keys.
- Type devmgmt.msc and click on OK to open the Device Manager.
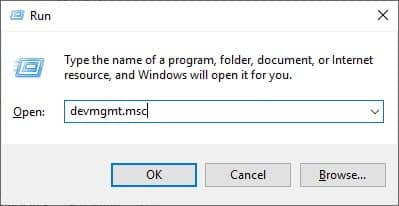
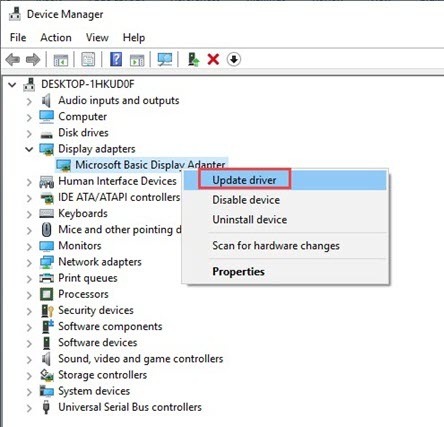
- Locate the driver in the Device Manager and right-click on it.
- Click on the Update driver option.
- Select the Search automatically for updated driver software option.
Follow the instructions on your screen to complete the update. - Restart the computer after the update finishes.
If updating the driver doesn’t work, then try reinstalling the driver. First, uninstall the driver by right-clicking on the driver and selecting the Uninstall device option. Then, visit the manufacturer’s website and download the latest driver. Finally, install it and check if the error has resolved.
Solution 3: Uninstall The Corrupted Software
If the error is caused by a corrupted software rather than the drivers, then uninstalling the software should resolve this error. To uninstall the corrupted software, follow the steps given below:
- Open the Run utility again.
- Type appwiz.cpl and press Enter to open the Programs and features console.
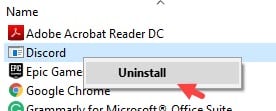
- Locate the corrupted software and right-click on it.
- Select the Uninstall option.
Follow the instructions on your screen to complete the uninstallation process.
- Finally, restart the computer after the software gets uninstalled.
Solution 4: Run SFC Scan
SFC scan or System File Checker scan is an in-built Windows utility. This utility searches for corrupted systems files and repairs them. Complete system failure can occur due to corrupt system files, which leads to BSOD errors. If the above solutions didn’t work, then most likely the error is caused by corrupted system files.
To run the SFC scan, follow the steps given below:
- Type cmd in the Run utility and press the Ctrl + Shift +Enter keys.
An elevated Command Prompt will open on your screen.
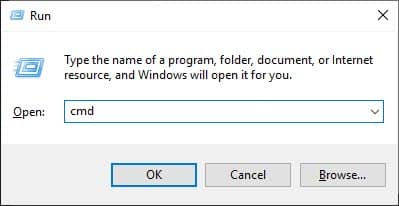
- Type sfc /scannow and press Enter to start the SFC scan.
It will take some time so make sure you do it when you have sufficient time in your hand.
- After the scan finishes, restart your computer.
Solution 5: Run The Windows Memory Diagnostic Tool
If none of the above solutions worked, then your RAM seems to be the main culprit. Issues with the RAM can trigger the KMODE Exception error. In this scenario, try running the Windows Memory Diagnostic Tool, which will check your RAM for errors.
To run the Windows Memory Diagnostic tool, follow the steps given below:
- Type Windows Memory Diagnostic in the Windows search bar and click on the appropriate option.
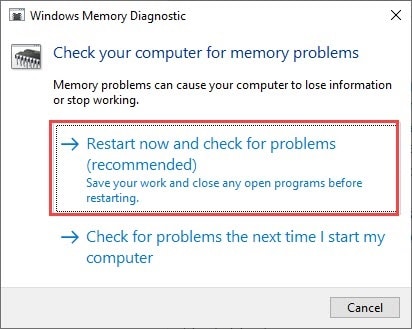
- Select the Restart now and check for problems (recommended) option.
- Wait for the scan to finish.
If any errors are found during the scan, then the RAM is the main culprit. Try removing and resetting the RAM to eliminate any possibility of loose connection and it also resets the RAM. However, if the error still occurs after resetting the RAM, then you will probably have to buy a new one to fix this error.
Wrapping Up
So, there you have it. Now you know what to do if you face the KMODE Exception Not Handled BSOD error. Read and execute the above solutions carefully and this error should get fixed for you. Leave your comments down below sharing your views on this article.

Leave a Reply