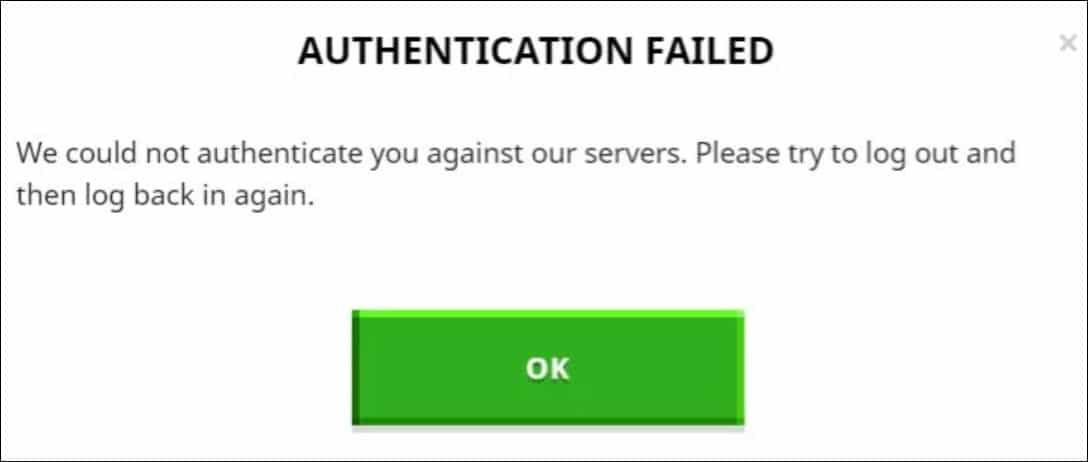
While trying to establish a connection with Minecraft server you may sometimes encounter the “Failed to Authenticate your Connection” error.
Usually, the error occurs due to a bug or unstable Minecraft server status, but there can be other causes for it.
Here I have discussed how to easily fix Minecraft failed authentication error, so read till the end and perform as shown.
Also read: FIX: A JNI Error Has Occurred In Minecraft Server
How To Fix Minecraft Failed Authentication Error?
Contents
If you get the authentic error while connecting to Minecraft server then follow these instructions and fix the problem.
1. Restart Minecraft
When you get Minecraft authentication error, first restart Minecraft. A fresh restart can often fix issues like this.
To restart the game, follow the steps below to do so:
- When the launcher is on, press the Alt + F4 keys to forcefully exit the game.
- After the game is closed, open the Minecraft launcher again by double clicking the desktop icon or from the Start menu.
- If the error message pops-up again, click on the Close button to exit the game.
Now re-launch the game and see if the issue persists, else go to the next solution.
2. Power Cycle Router And Modem
Sometimes due to connectivity issues, you can get an authentication server error in Minecraft.
To fix that, power cycle your router or modem, and see if that works.
Follow the steps to do so:
- Turn off the modem and router and disconnect all the power connections.
- After the modem is powered off, press and hold the Power button for 15-20 seconds. Wait for a few minutes.
- After that connect everything back and turn the Router or Modem On.

After the internet connection is restored, check if the issue is resolved or else move on to the next solution.
3. Sign Out And Re-Sign In To Minecraft
Signing out of Minecraft and re-signing can also fix the Minecraft authentication error.
- Open Minecraft. Select the Username option and click on Log-out.
- After logging out from the existing account, log in to the same account with the same credentials.
After the log-in, try to connect to the server and see if the problem is fixed, otherwise go to the next solution.
4. Using Direct Connect Option
Minecraft provides you the option to connect to the server directly. This means the user will not have to save the URL of the server and log in to the system.
So, connect the server with the Direct connect option when you are having issues connecting to the Minecraft server directly. Follow the steps below to do so:
- Go to the server list screen from the Minecraft launcher.
- Select the Direct Connect option as shown below.
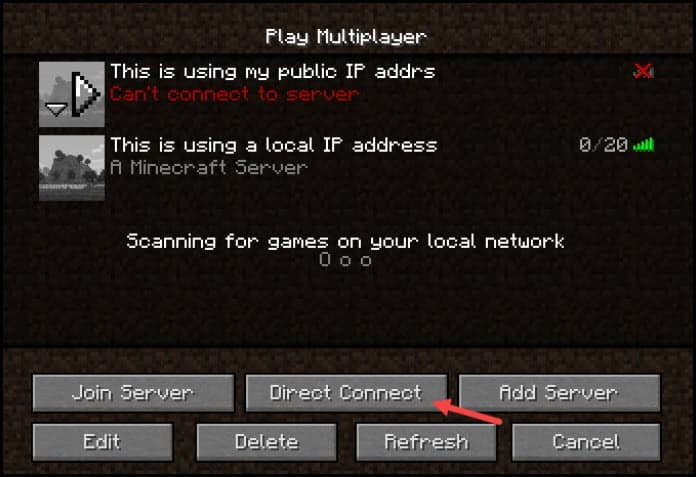
- On the server address box type “stuck.hypixel.net” and select the Connect button.
- Wait until the connection is established and connect to the game.
5. Flush DNS
If still Minecraft can’t connect to the server, try flushing the DNS.
There are chances that the cache got corrupted and this is preventing Minecraft from connecting to the servers.
By flushing the DNS, you can clear the previous DNS records from the cache and solve the problem.
Here is how you can do it:
- Enter CMD in Windows Search Menu and right-click on Command Prompt. Choose Run as administrator.
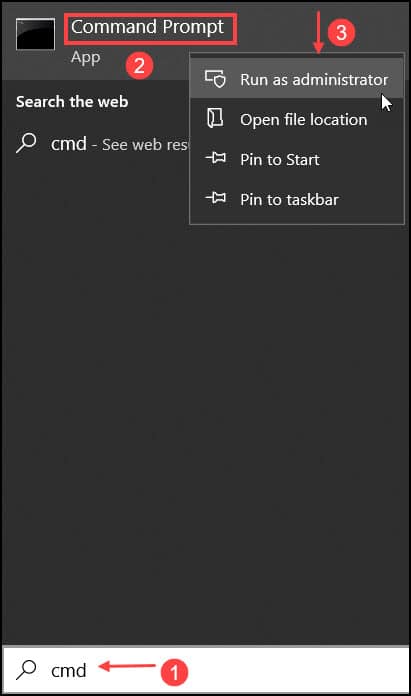
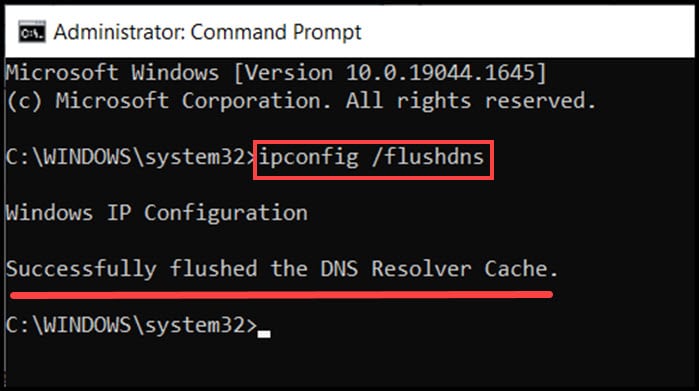
- Enter the given commands in the elevated Command Prompt window one by one. Press the Enter button on your keyboard after entering each command.
ipconfig /flushdns
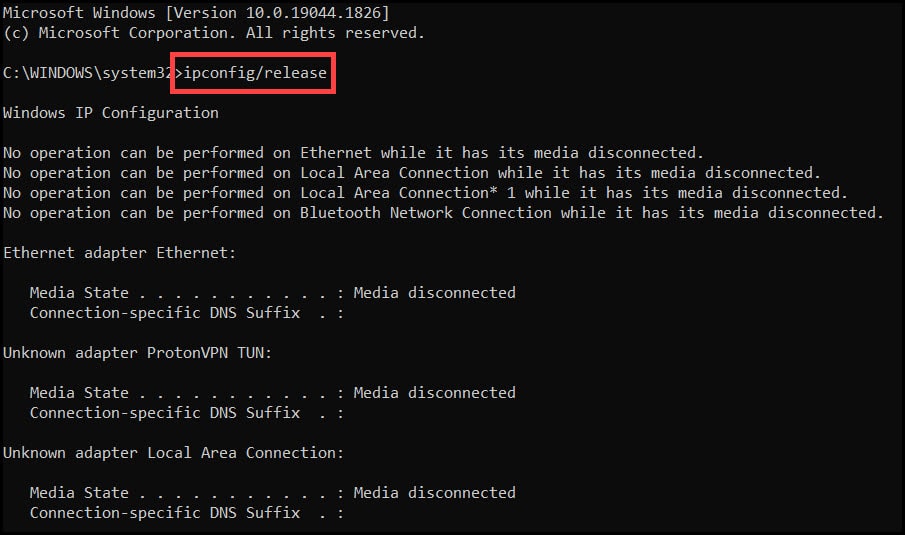
ipconfig /release
ipconfig /renew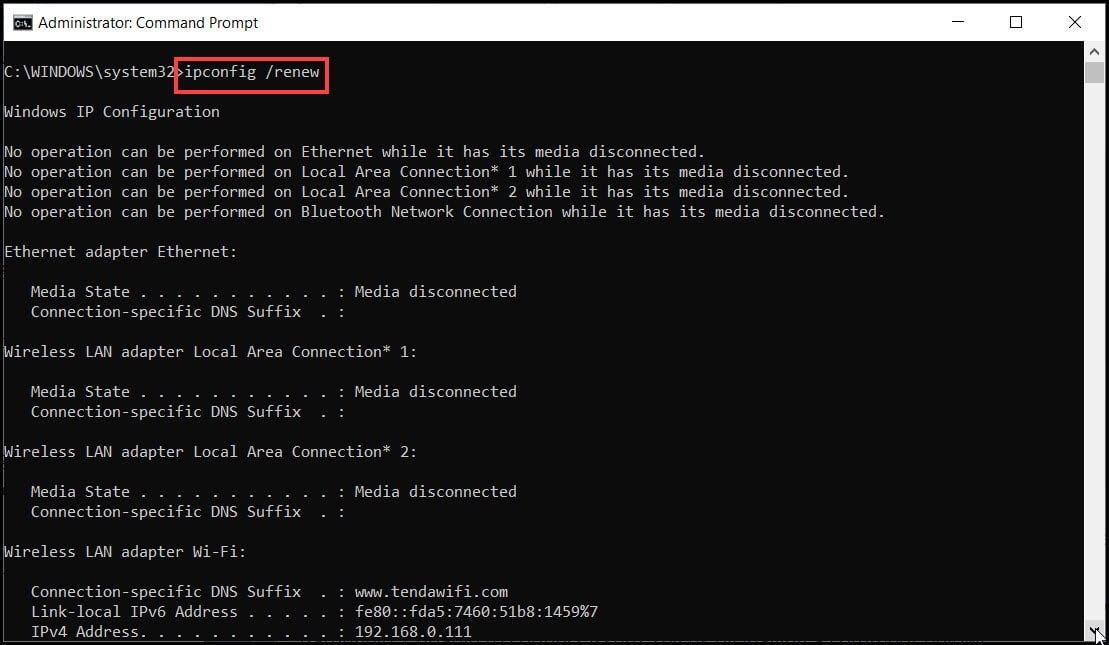
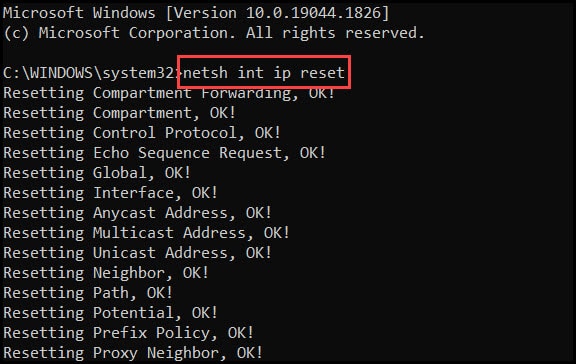
netsh int ip reset
netsh winsock reset
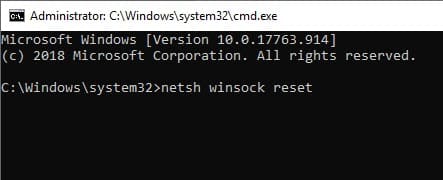
After successfully running these commands, check if the problem is solved.
6. Update Minecraft
An outdated game version can also trigger the Minecraft server issue. So, update the game to the latest version.
To update the game version to the latest version you can follow the given steps:
- You can update the game when Minecraft releases the update for your time zone.
- If you are notified of the update notifications, download and reinstall the updates.
Wait until the process is completed and then try to reconnect to the server.
7. Edit Host Files
If you still get the authentication error on Minecraft while connecting to the server, then check if the Minecraft serve is blocked from the host file.
Follow the steps below to do so:
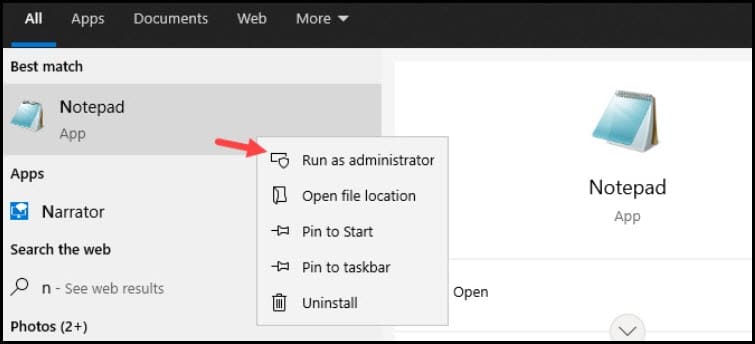
- Type the Notepad on the Windows search bar option and right-click on the top option.
- Select the Run as administrator option to run Notepad with administrative permissions.
- After the elevated Notepad opens, select the File option and chooses Open from the list.
- Now copy-paste the following path in the Name section and click on Open.
c:\Windows\System32\Drivers\etc\hosts
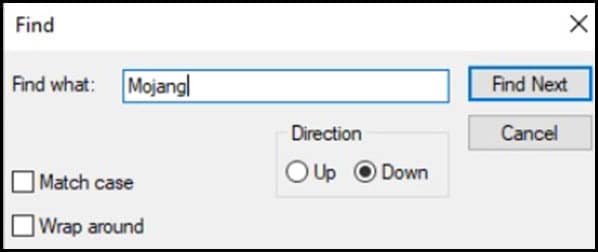
- Now, choose the Edit menu and select the Find option.
- Enter Mojang and find all the matches. If you find any matches on the file, delete them. Also search Minecraft next and delete anything that comes up.
- Save the changes.
Now check if the problem is fixed, otherwise go to the next solution.
8. Allow Minecraft Through Firewall
Sometimes Firewall may block Minecraft from connecting to the servers. Try allowing Minecraft on your Firewall and see if that fixes the issue.
First make sure to close the game or any of its running processes from the Task Manager.
To do so, follow the instructions below:
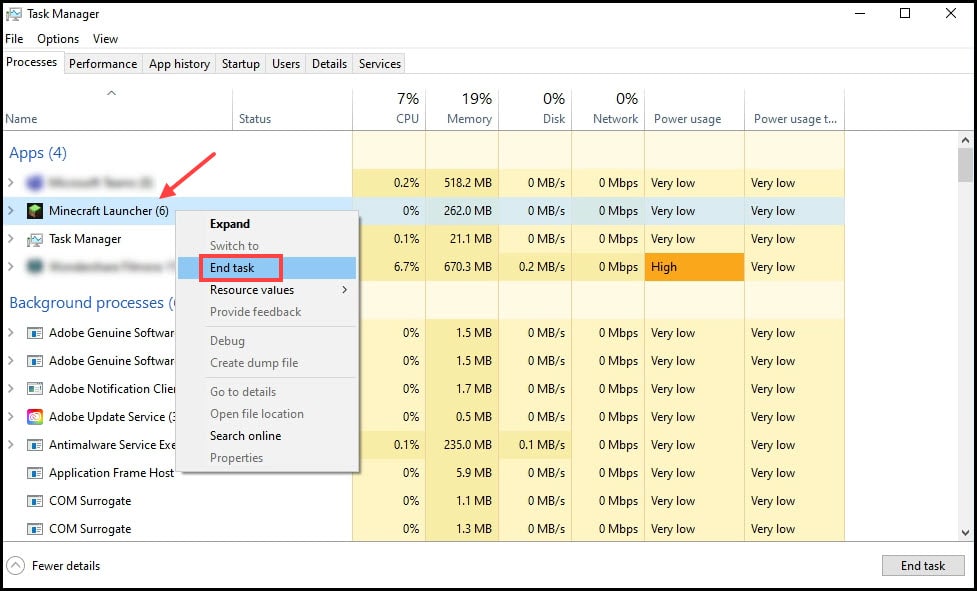
- Press Ctrl + Shift + Esc simultaneously to open the Task Manager.
- From the Process tab find the find anything related to Minecraft.
- Right-click on it and select the End Task option from the list.
So, now to allow Minecraft through firewall settings, follow the steps below:
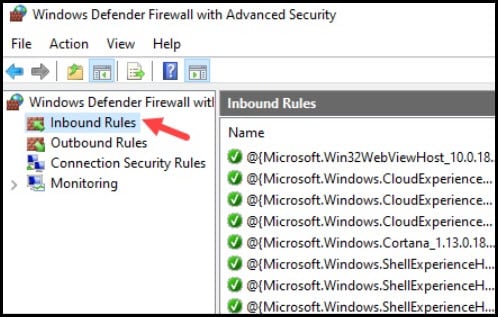
- Type Windows Defender Firewall with Advanced Security on the Windows search bar and select the first display option.
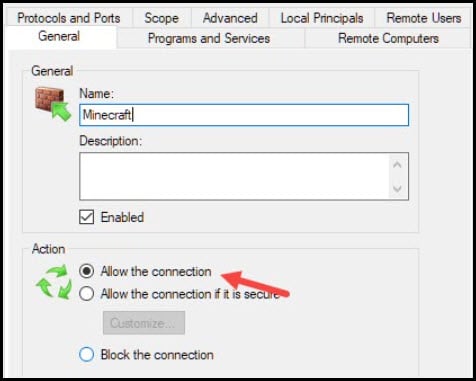
- Click on Inbound Rules and from the list double-click on Minecraft/Java.
- Set the Action section to Allow the Connection from the Properties window.
- Select the New Rule from the right panel and click on the Program radio button.
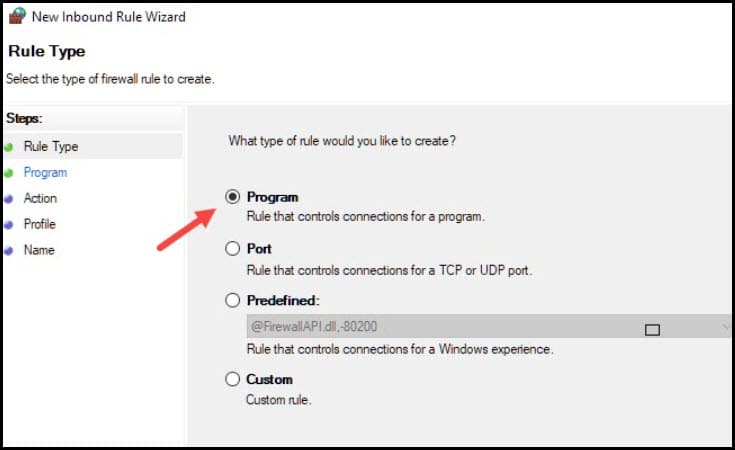
- Select the Next button and click on the Browse button.
- Navigate to the Minecraft installation directory.
C:\Program Files (x86)\Minecraft\runtime\jre-x64\
- Next click on the folder with the Java version number and find the Bin folder. Double click on it.
- Here you will find javaw.exe. Double click on it and select the Next button.
- Choose the radio button of Allow the Connection and check all the three profile boxes.
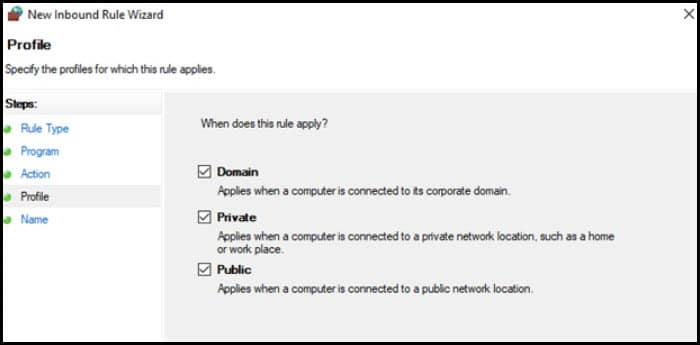
- Select the name of the rule and repeat the method for Java.exe in the Bin folder.
Follow the same procedure on the Outbound Rules and check whether the issue is fixed.
Frequently Asked Questions [FAQs]
1. How Do You Authenticate A Minecraft Server?
Try signing out and resigning in, make sure your time settings are properly set, reload the game and try the other solutions shown here to fix this error.
2. How To Fix Minecraft Failed To Authenticate Your Connection Error?
To fix the Minecraft failed to authenticate connection error, restart the Minecraft server, flush DNS, power cycle your modem or router, update the game, allow the game in the firewall, and also change the host files.
3. What Does Failed To Authenticate Your Connection Mean?
Failed to authenticate connection error in Minecraft means that you cannot join a Minecraft server.
Final Words
So, here there you have it. Hopefully the above solutions helped you fix the Minecraft authentication error.
If you still have queries regarding the error, ask us in the comments section below.
Leave a Reply