PowerShell is a Windows in-built .Net Framework application that helps users to perform various administrative tasks.
Deleting a folder is a simple task, but when you try to delete a large folder using Windows File Explorer, it takes a lot of time.
You can save your time by deleting the folder using Command lines in PowerShell.
Read this article and know how to delete folders, files, and contents using PowerShell.
Also read: How To Delete The Removable Storage Devices Folder On Desktop?
How To Delete Folders Using PowerShell
Contents
There are various methods you can use to permanently delete the folder using PowerShell.
Here, I have described how to do it, so simply follow the methods as mentioned.
1. Delete Specific Folder Using ‘Remove- Item’ Commands
If you want to delete specific folders or files using PowerShell, then try this method:
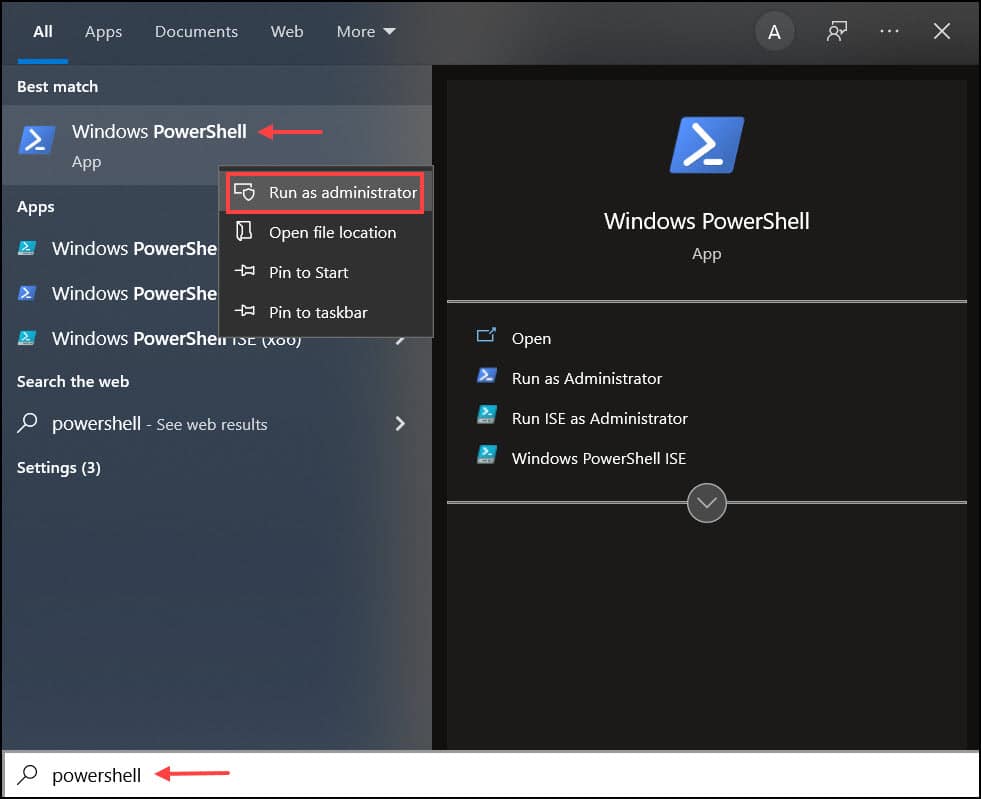
- Type PowerShell in the Windows search bar, right-click on it and select Run as an administrator.
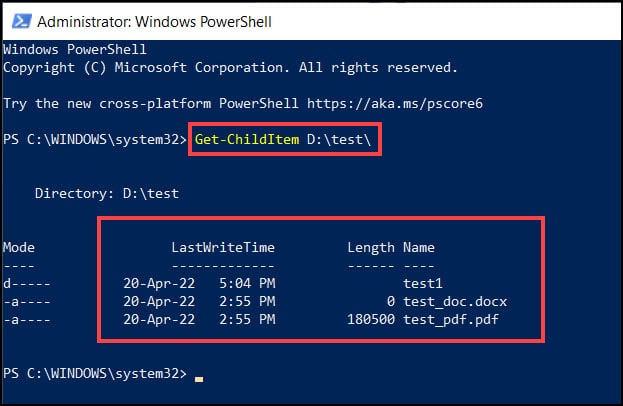
- Type the following line of commands in PowerShell, to check the contents of the specified folder (e.g. test):
Get-ChildItem D:\test\
- Check all the files and the folders inside the folder.
- Now, to remove the specific file or folder, type the following line of commands: [Here we are deleting the test2 folder and all the files inside it]
Remove-Item D:\test\test1\test2\ -Verbose
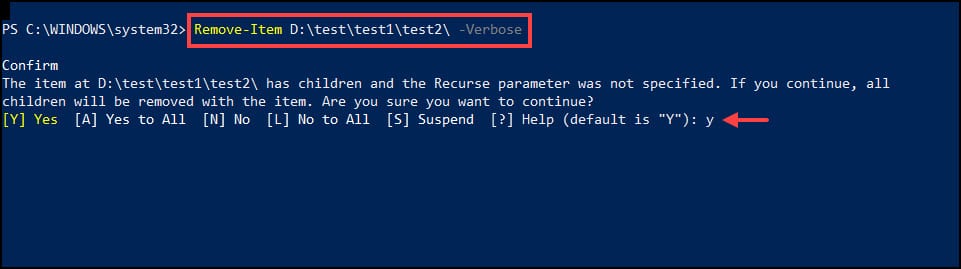
- Enter Y from the keyboard to confirm the action.

2. Delete All The Contents Using ‘del’ Command
By using the del command in PowerShell, you can delete all files in the folder. Here is how you can use it:
- Type PowerShell in the Windows search bar, right-click on it and select Run as an administrator.
- In the PowerShell window, type the following line of commands and hit Enter: [Change the folder and drive names accordingly]
del D:\test\
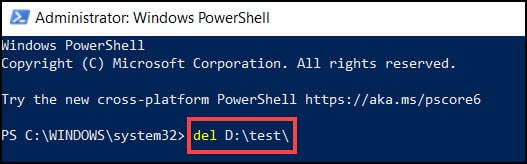
- Now enter Y from the keyboard to delete the entire directory.

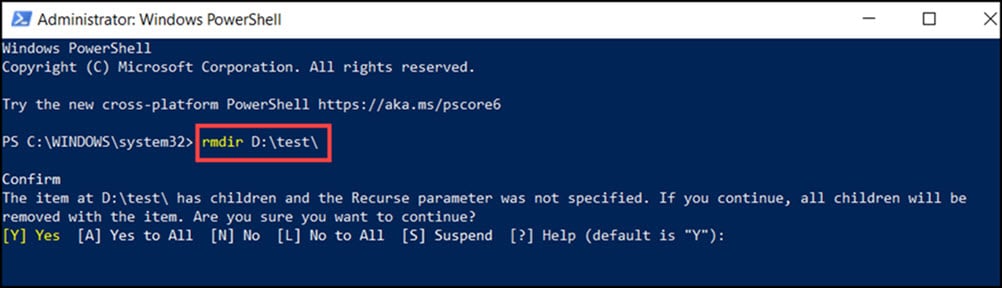
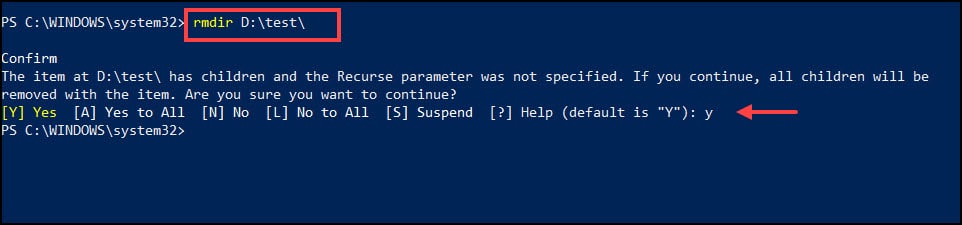
3. Delete Folder Using The ‘rmdir’ Command
By using the rmdir command in PowerShell, you can delete or remove specific directories.
Here is how you can use it:
To run the following commands, follow the below steps:
- Run the Powershell as an administrator.
Type the following line of cmdlets and hit the enter button to execute the commands. [Change folder and drive name according to yours]
rmdir D:\test\
- Now enter Y from the keyboard to delete the entire directory.
| del | remove-Item | rmdir |
| Delete all the files in a folder and makes the folder empty | Delete any files with any kind of extensions. |
Delete or remove a specific directory. |
Wrapping Up
Hopefully, after reading the above article, you now know how to use PowerShell to delete folders and files.
If you still have any question regarding this issue, ask us in the comments section given below. Stay connected and feel free to share.
Leave a Reply