The automatic startup repair tool is extremely useful in fixing Windows startup related issues.
However, many users have reported that they are facing the “startup repair couldn’t repair your PC” error after running the automatic startup repair tool and then the repair tool will go on a loop.
This is a concerning error as the automatic startup repair tool is an integral part of Windows.
If you are also facing this issue, then don’t worry as in this article I have discussed the troubleshooting procedure you need to go through when Windows 10 startup repair is not working.
Also read: Fix: Windows 10 Won’t Boot After Bios Update [Solved]
How To Open The Command Prompt When Windows Doesn’t Startup Properly?
Contents
If you are using the Windows 10 startup repair tool, then I would guess that your computer isn’t starting up properly. To fix this error, it is important to access the Command Prompt. Here are the steps you need to follow to open the Command Prompt from the repair options:
- First, insert your Windows 10 installation disk or recovery drive while starting your computer.
- Select your language and other preferences as given on-screen. Once done, click on Next.
- Now, click on the Repair your computer option located on the bottom left side of your screen. This will open the Repair options.
- Click on the Troubleshoot option and then select the Advanced options.
- Here you will find the Command Prompt option. Click on it to open the Command Prompt.
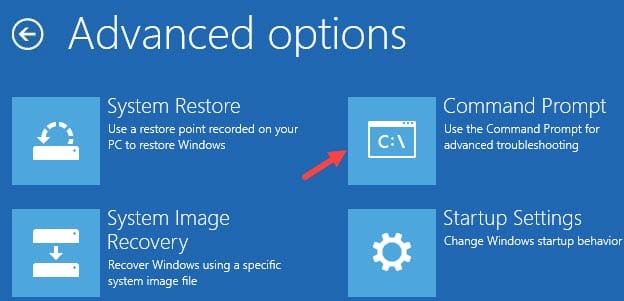
Once you know how to open the command prompt, follow the troubleshooting procedures given below to fix this error.
How To Fix Startup Repair Couldn’t Repair Your PC Error?
Here I have mentioned the troubleshooting procedures you need to follow in order to fix this Windows 10 automatic repair loop issue. Read the instructions carefully before executing them to avoid making any mistakes.
Solution 1: Rebuild Boot Configuration Data And Repair Master Boot Record File
One effective solution to this error is to rebuild the BCD and repair the MBR file using command lines. BCD or Boot Configuration Data contains the boot configuration parameters for starting Windows. If it gets corrupted, then Windows can face unbootable situations.
The MBR is a special type of boot sector that holds the executable code to function as a loader for the installed operating system. When MBR gets corrupted, Windows boot related issues can occur.
To rebuild BCD and repair the MBR file, follow the steps given below:
- Open the Command Prompt as mentioned above.
- Type the following commands and press Enter after finishing each one:
a) bootrec.exe /rebuildbcd
b) bootrec.exe /fixmbr
c) bootrec.exe /fixboot - Wait for the commands to finish running.
After the above commands finish running, the boot sector problem should be fixed. If this error was caused due to corruption in the boot sector, then this solution should fix it. Check if the error still persists when you are using the Windows 10 startup repair tool. If yes, then try the next solution.
Solution 2: Run Chkdsk Scan
Memory corruption is another reason why this error may occur. If there are corrupted sectors in the memory, then it can lead to such errors. To check and fix corrupted sectors in memory, you can use the Chkdsk tool. To run the Chkdsk tool, follow the steps given below:
- Open the Command Prompt again.
- Type the following command and press Enter after finishing it:
chkdsk c: /f /r /x
Here C: is the letter of the system drive. If your system drive has another letter, then use that in place of C. - Wait for the scan to finish as it will take some time. Do not close the Command Prompt prematurely.
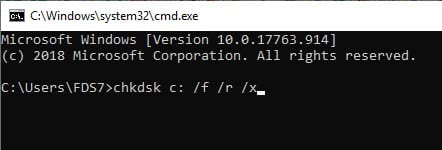
After running the Chkdsk scan, you should at least know whether there are bad sectors in your hard drive. But the tool should be able to fix any minor corruption in the sector. Check if the startup repair couldn’t repair your PC error is fixed and Windows 10 automatic repair loop starts again.
Solution 3: Run The SFC And DISM Scan
Corrupted system files and registry entries can also lead to such an error. To fix corrupted system files and registry entries, you can run the System File Checker scan and the DISM scan. To run the SFC scan and DISM scan, follow the steps given below:
- Open the Command Prompt again.
- Type the following command and press Enter after finishing it:
sfc /scannow
- Wait for the scan to finish. It will take some time so do not close it prematurely.
- After the scan finishes, restart the computer.
- Now, open the Command Prompt again.
- Type the following command and press Enter after finishing it:
DISM /Online /Cleanup-Image /RestoreHealth
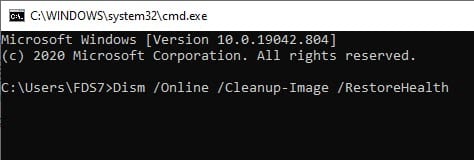
- Wait for the scan to finish and then restart.
After running the SFC scan and DISM scan, the Windows 10 automatic repair loop issue should get fixed.
Solution 4: Recover Windows Registry
A corrupted registry can also cause this type of error. Windows Registry is the home of all the settings of Windows. Any corruption in any of the keys can cause the system to crash and no boot in. It can also lead to Windows 10 startup repair not working. To recover Windows Registry, follow the steps given below:
- Open the Command Prompt again.
- Type the following command and press Enter after finishing it:
cd C:\windows\system32\logfiles\srt\
Here C is the letter of the system drive. If your system drive letter is different then use that in place of C. - Now, type the following command and press Enter:
SrtTrail.txt - Press the Ctrl+ O keys and select All Files from the File Type.
- Navigate to the following location:
C:\windows\system32 - Right-click on CMD and select the Run as administrator option. This will open an elevated Command Prompt.
- Type the following command line and press Enter:
cd C:\windows\system32\config - Now, type the following commands to rename Default, Software, SAM, System, and Security files to .bak and back up these files:
a) rename DEFAULT DEFAULT.bak
b) rename SAM SAM.bak
c) rename SECURITY SECURITY.bak
d) rename SOFTWARE SOFTWARE.bak
e) rename SYSTEM SYSTEM.bak - Type the following commands and press Enter:
copy c:\windows\system32\config\RegBack c:\windows\system32\config
Here again, c is the system drive letter. Change it to the system drive letter your PC have. - Finally, restart the computer.
Now, check if the startup repair couldn’t repair your PC error still persists when you run the Startup repair.
Solution 5: Disable Early Launch Anti-Malware Protection
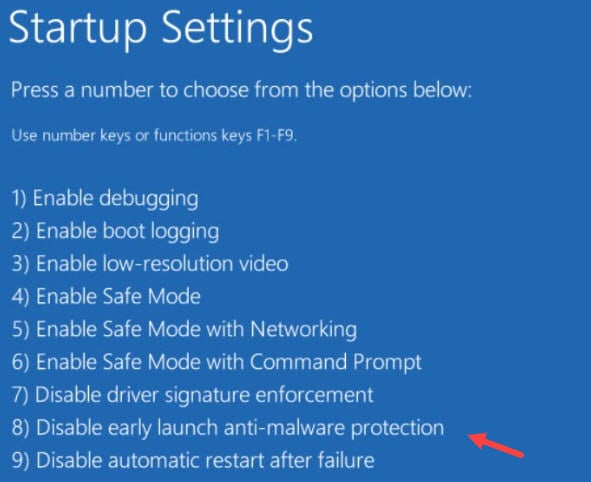
Are you facing this situation after installing any anti-malware programs? Then you can follow these steps to disable early launch anti-malware protection, which should allow you to boot in desktop without any issue. To do that, follow the steps given below:
- Open the Repair Options as mentioned above.
- Click on the Troubleshoot option.
- Next, select Advanced options.
- Select the Startup Settings option. The Startup options will appear on your screen.
- Click on the Restart option.
- Now press F8 on your keyboard to select the Disable early launch anti-malware protection and boot in desktop.
Solution 6: Disable Automatic Startup Repair
If none of the above solutions work, and you are still entering the Startup repair loop, or if the startup repair window is automatically appearing on your screen without your desire, then you can disable the Automatic Startup repair tool.
To disable the automatic startup repair tool, follow the steps given below:
- Open the Command Prompt again.
- Type the following command and press Enter after finishing it:
bcdedit /set recoveryenabled NO - Restart the computer.
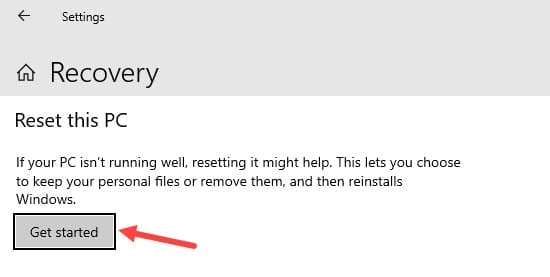
Solution 7: Reset The PC
If disabling the Startup repair also doesn’t work, then you can try resetting the PC. To reset the PC, follow the steps given below:
- Open the Repair options again.
- Click on the Troubleshoot option.
- Click on the Reset this PC option.
- Follow the on-screen instructions to complete the process.
Wrapping Up
So, there you have it. Now you know how to fix the startup repair couldn’t repair your PC error. One or a combination of a few of the above solutions should help you fix this error. If you have any further questions regarding this article, ask them in the comment section below.

Leave a Reply