Recently many users have encountered the error message ‘Steam needs to be online to update please confirm your connection and try again’ on Steam.
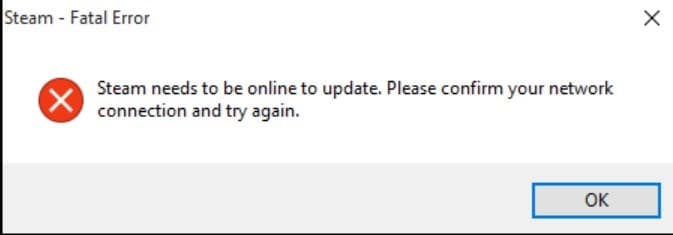
These types of connection errors or Steam mostly happen when the gamers launch the Steam app and it starts to update itself.
This can happen due to proxy settings, Firewall, DNS configuration, or if Steam lacks administrative privileges.
What To Do When Steam Says “Steam Needs To Be Online To Update”?
Contents
Here are the working solutions to fix the problem when you see the message “Steam needs to be online to update” but you are online.
Follow these methods and perform the steps to fix the problem.
1) Check Your Internet Connection
Check your internet connection when you get the ‘Steam needs to be online to update’ prompt.
Steam needs a stable internet connection to update. So, make sure you have that. If the ethernet is connected, but there is no internet connection, fix it first.
You can check the internet speed from here. If there is no problem with your internet connection, flush the DNS.
2) Flush DNS & Reset Winsock
Sometimes the DNS cache can become corrupted and show these error messages on Steam.
Flushing the DNS should clear all the DNS records &IP addresses from the cache.
So, clear the DNS &then reset Winsock to fix the problem.
Follow these steps for clearing the DNS cache:
- Type Command or CMD in the Windows Start Menu and select Run as administrator option for the Command Prompt option.
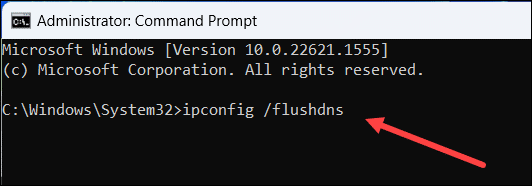
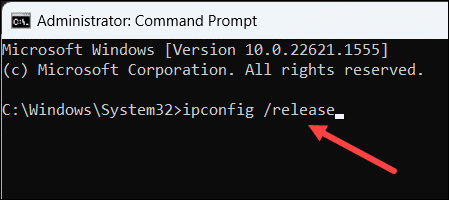
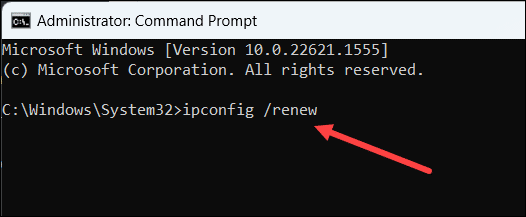
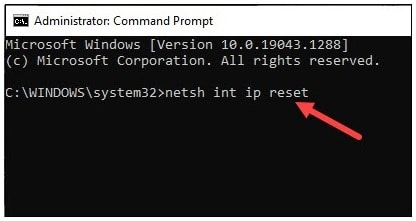
- When the elevated CMD window opens, copy & paste the following line of commands one by one and hit Enter:
ipconfig /flushdns
ipconfig /release
ipconfig /renew
netsh int ip reset
netsh winsock reset
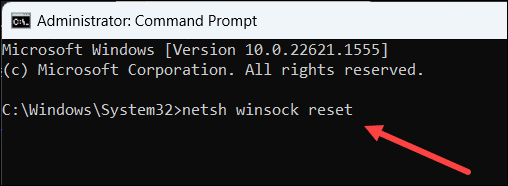
Once you finish running all the above commands, exit the CMD window.
Now relaunch Steam and check if this could fix the issue. If not, change the DNS settings.
3) Change DNS
If Steam still asks you to confirm your network connection, change the DNS server. This can fix connectivity issues.
Follow these steps to change DNS:
- Launch the Run utility by pressing Windows + R key.
- Copy & paste the following command in the Run command box and hit Enter.
ncpa.cpl
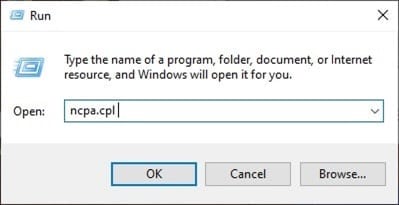
- Right-click on your network service and expand its properties.
- Now find and click on Internet Protocol Version 4 [TCP/IPv4]. Expand its Properties.
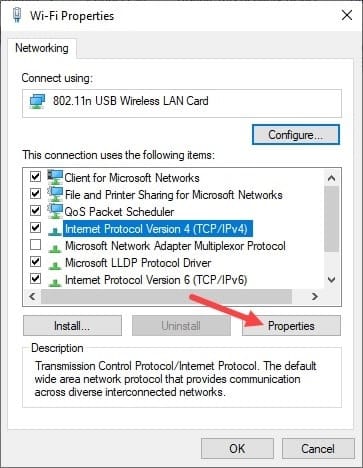
- Next, choose to Use the following DNS server addresses option.
- Set the Preferred DNS Server address to 8.8.8.8. Then change the Alternate DNS Server address to 8.8.4.4.

- Click on OK to save the changes. Now openSteam, and if the issue persists, run Steam in Compatibility Mode.
4) Run Steam In Compatibility Mode
Running Steam in compatibility mode can fix the connectivity issue.
So, try these steps and see if this can fix the problem:
- Right-click on the Steam shortcut on your Desktop and select Show more options > Properties.
- Go to the Compatibility tab. Next, check the box next to Run this program in Compatibility Mode for the option.
- Choose a Windows version from the drop-down box.
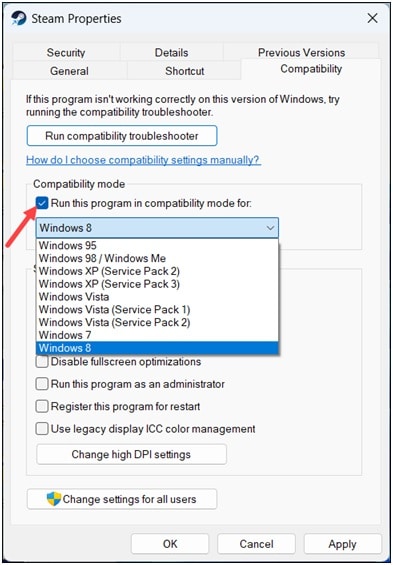
- Also, check the checkbox for Run this program as an administrator.
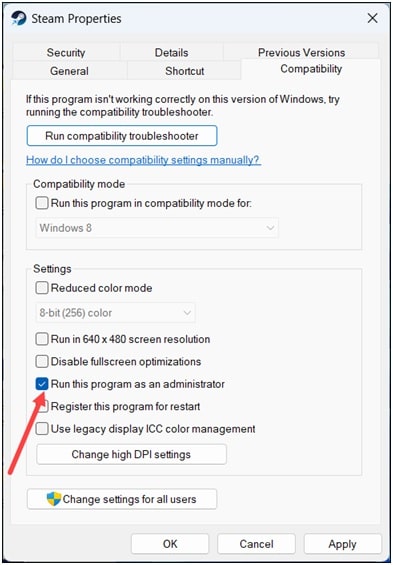
- Click on Apply > OK. Open Steam and see if this could fix the error. If not, turn off the proxy.
5) Disable Proxy Settings
You can encounter connectivity issues on Steam if you are using a proxy.
So, turn off the proxy settings to see if this solves the problem. To do that, follow these steps:
- Go to the Windows search menu and type Internet Options.
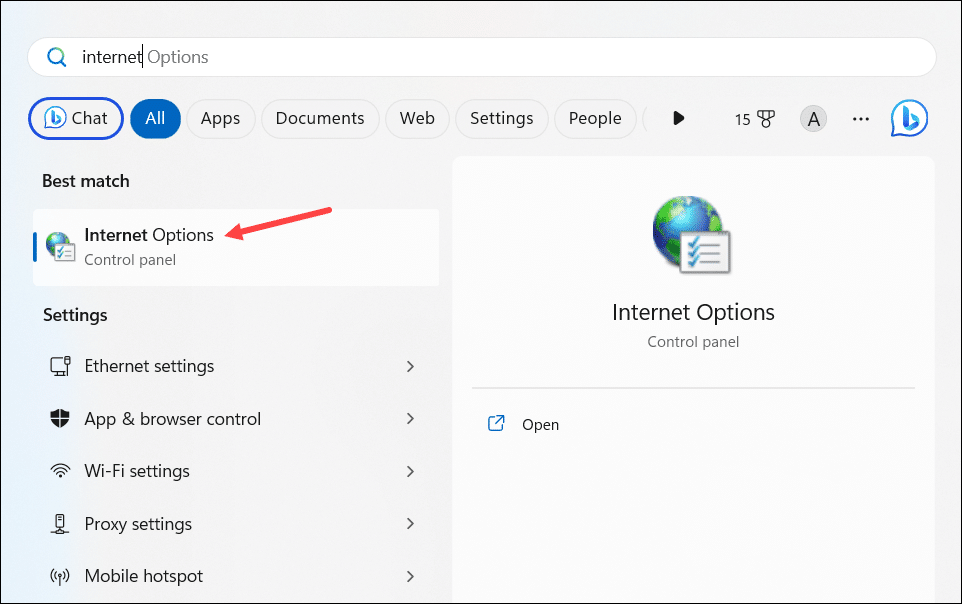
- Select the top option.
- Go to the Connections tab & select LAN Settings.
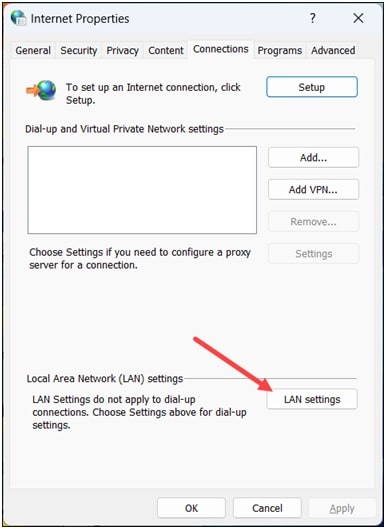
- Go to the Proxy Server section and uncheck – Use a proxy server for your LAN.
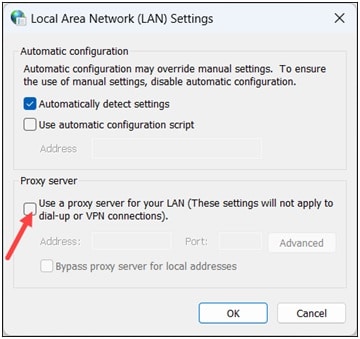
- Click on OK to apply the changes.
Windows will now automatically detect the network’s proxy settings after this. Open Steam, and if the issue persists, disable Firewall.
6) Disable Firewall
Firewall can sometimes be overprotective and interfere with Steam.
This can be the reason why Steam says you need to be online to update.
Disabling the Firewall temporarily can fix the issue.
Here is how to disable the Firewall:
- Type Windows Firewall in the Windows Search Menu and select Windows Defender Firewall.
- Select Turn Windows Defender Firewall on or off from the left side pane.
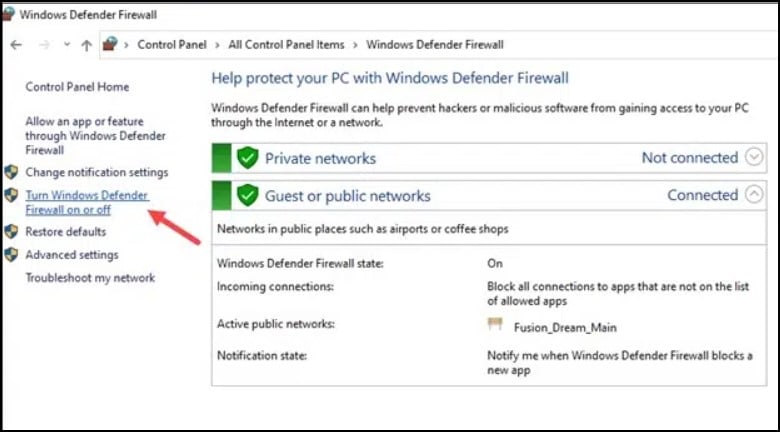
- Then click on the Private & Public settings to Turn off the Windows Defender Firewall (not recommended) option.
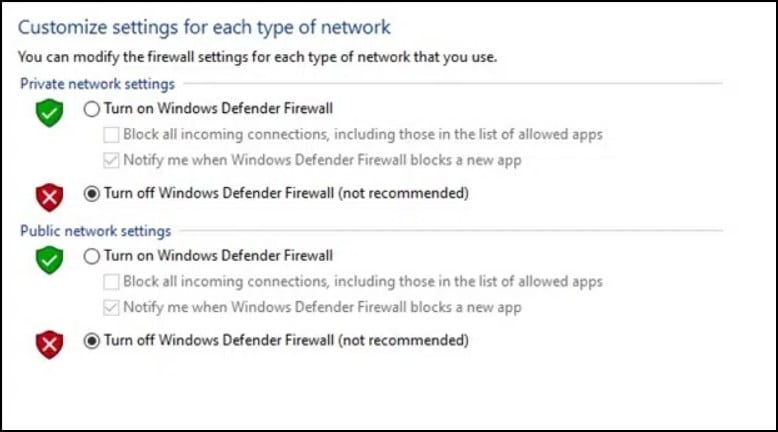
If you have any other antivirus program installed, disable that too.
- But you should enable your antivirus or Firewall soon after, as your machine is vulnerable to viruses or malicious threats without them.
7) Modify Registry
If disabling the antivirus and firewall could not fix the Steam connectivity issue, tweak the registry.
But be cautious, as making changes in the registry can be risky. So, follow the steps exactly as given below:
- Open the Run utility and type regedit in the Run command box. Hit Enter.

- Click on Yes on the UAC prompt window.
- Now navigate to the following location:
HKEY_CURRENT_USER\SOFTWARE\Valve\Steam
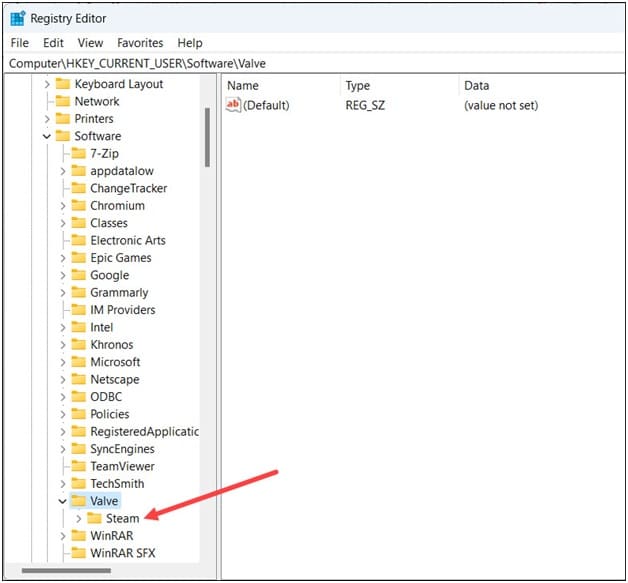
- Double-click on the Offline from the right-side pane.
- If you cannot find the key, right-click on a space on the right pane. Select New >DWORD (32-bit value) & name it Offline. Then double-click on it.
- Set its value data to 0 & click on OK. Exit the registry and restart your PC.
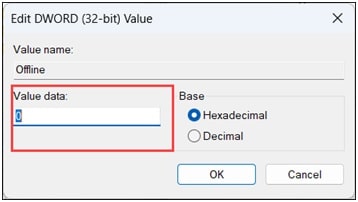
Now relaunch Steam and see if this could fix the issue.
8) Add -tcp Parameter
Steam generally uses User Datagram Protocol or UDP to transmit data.
Transmission Control Protocol or TCP is regarded as faster than UDP.
You can change the protocol to TCP if you have encountered an error on Steam.
To do that, follow these steps as given:
- Right-click on the Steam shortcut and open its properties.
- Go to the Target dialogue box and add a space then ‘-tcp’ at the end, like the picture shown here.
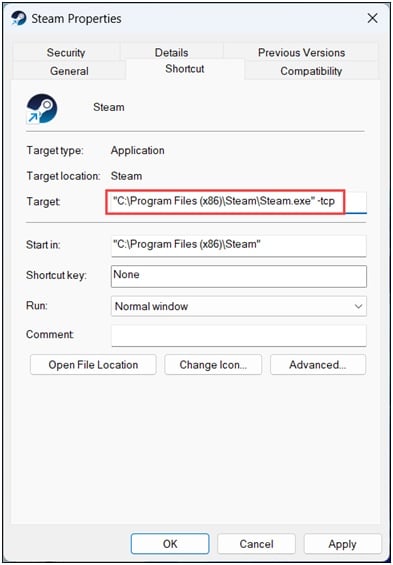
- Apply the changes made and exit the window. Use the desktop shortcut to launch Steam and check if it runs as expected.
9) Reinstall Steam
If none of the above methods can resolve the connection error in Steam, reinstall Steam.
Due to a bad installation, this can happen, So, a fresh installation can fix the issue.
Follow this process to reinstall Steam:
- Open Run utility. Type or copy & paste the following command in the Run command box and hit Enter:
appwiz.cpl
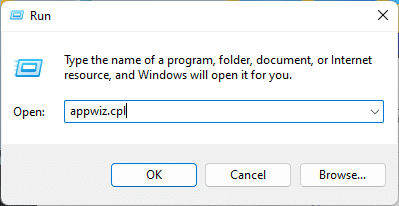
- Click on Uninstall or change a program option. Then find Steam and right-click on the app.
- Click on the Uninstall option. Follow the on-screen instructions provided next to finish the uninstallation process.
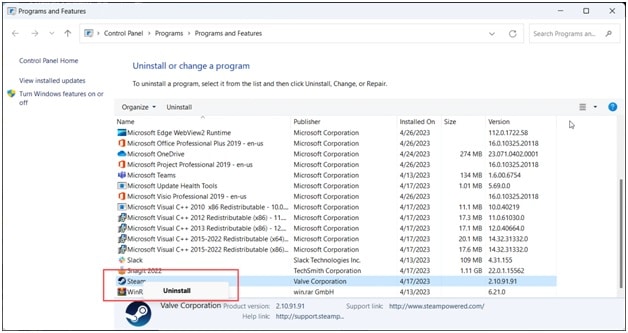
Now, download Steam from its official website; you should not have a problem this time.
Frequently Asked Questions [FAQs]
- Why can’t I update Steam?
Steam can take time to download if the app server is slow or the internet connection is unstable.
You can switch to a different download region or change DNS server and see if this can fix the problem.
- How can I force an update on Steam?
To force updates on Steam, go to Steam Library.
Right-click on the specific game and open its properties. Then check the box for the ‘Always keep this game up to date’ option.
- How many KB is good for download?
A high-speed internet connection or broadband is defined by at least 768 kbps download speed and at least 200 kbps upload speed.
Wrap Up
So, there you have it! The above methods should fix the ‘Steam needs to be online to update’ error.
Tell us which method worked for you. We are eager to hear from you.
Leave a Reply