Windows is the most used desktop OS of the current time. This has been possible because of its features and tools specifically made to cater to the users’ need. One of the tools of Windows is Task Scheduler. Not many users tend to know about this amazing tool. In this article, I have given a complete guide on how to use Task scheduler in Windows 10.
After reading this guide, you should have an understanding of what Task Scheduler is and how to create a basic and an advance task.
What Is Task Scheduler?
Contents
Task Scheduler is a Windows tool that can be used to set up automated tasks when certain conditions are met. Each task you create will have a trigger, and a predefined action that occurs after the trigger is set.
Using the Task Scheduler, you can basically create any task that you need to do on a regular basis, like automatically clearing the Recycle bin.
How To Open Task Scheduler In Windows 10?
One of the easiest ways to open Task Scheduler in Windows 10 is using Start menu.
- Type Task Scheduler in the Start menu search box.
- Select the top result to open the Task scheduler.
Another easy and fast way to open Task Scheduler is by using the Run utility. Here is how to do it:
- Press the Windows + R keys to open the Run utility.
- Type taskschd.msc in the search box and press Enter. Task Scheduler will open on your screen.
How To Create A Basic Task In Windows 10 Scheduler?
After you have opened Task Scheduler in Windows 10, you would want to schedule tasks in Windows 10. To Schedule a basic task in Windows 10, follow the steps given below:
- Open Task Scheduler.
- On the left panel, right-click on the Task Scheduler Library expansion branch and select the Create New Folder option from the right-click context menu.
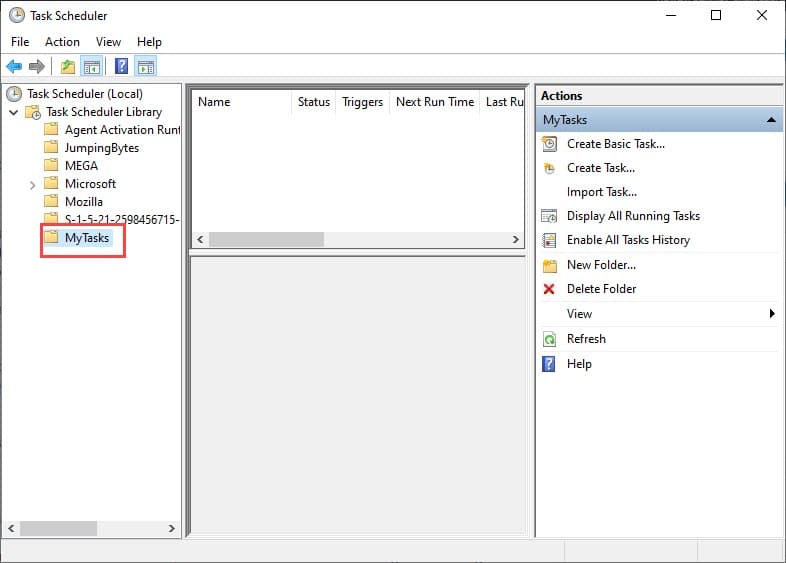
- Name the task folder to something that distinguishes it from the system tasks. Example: MyTasks. Click on the OK option to finalize the name of the folder.
- Expand the Task Scheduler Library option and select the folder you just created.
- On the Actions panel, located on the right-side, click on the Create basic task option.
- Name the task as something that describe its job. Like if you are creating a task for emptying the recycle bin, name it EmptyRecycleBin.
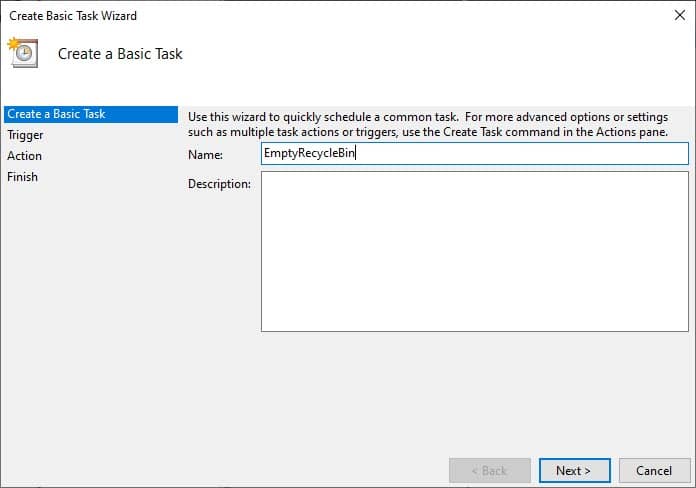
- You can also write a description of the task in the description box or choose to avoid it.
- Click on the Next option.
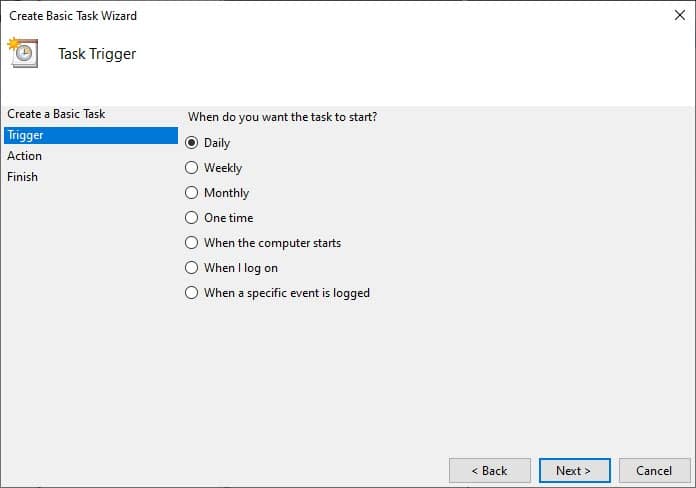
- Now, you will have to choose the first trigger for the task. Choose when you want that task to start. For convenience, let’s choose Monthly. Task Scheduler will provide you many such triggers that you need to customize to get the exact timing of the task down.
- Click on the Next option.
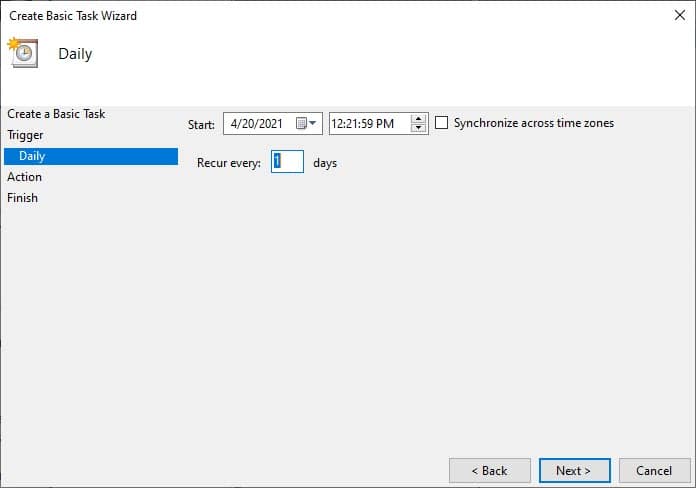
- In the Start section, enter the date and the time you want the task to start running.
- In the Months drop-down menu, check the month that you want this task to run and uncheck those that you don’t want this running.
- You can also specify the days the task will run and the days it won’t run, using the Days and On drop-down menus.
The On drop-down menu allows you to pick the specific days of the week.
- Click on the Next option.
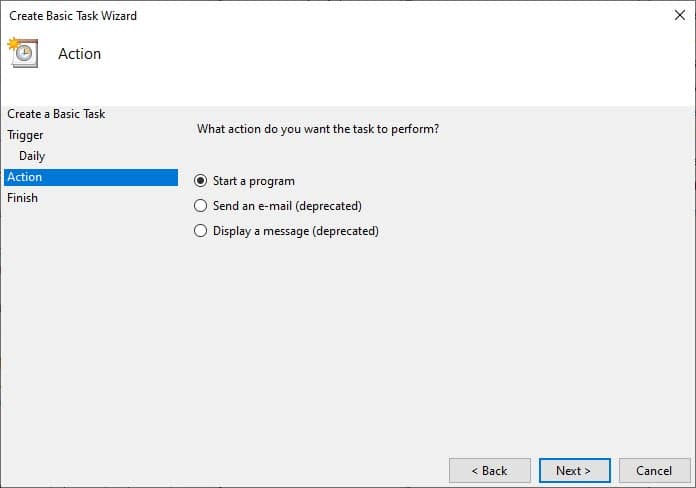
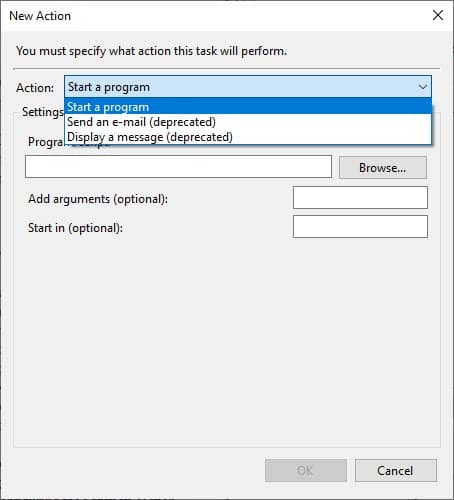
- Now, you have to pick the action for the task. Whether you want to start a program, send an e-mail, or display a message. For convenience, I assume that we will pick the Start a program action.
Also, Send an e-mail and Display a message are deprecated features of Task Scheduler, which means that Microsoft is no longer maintaining them. This means that it may or may not work.
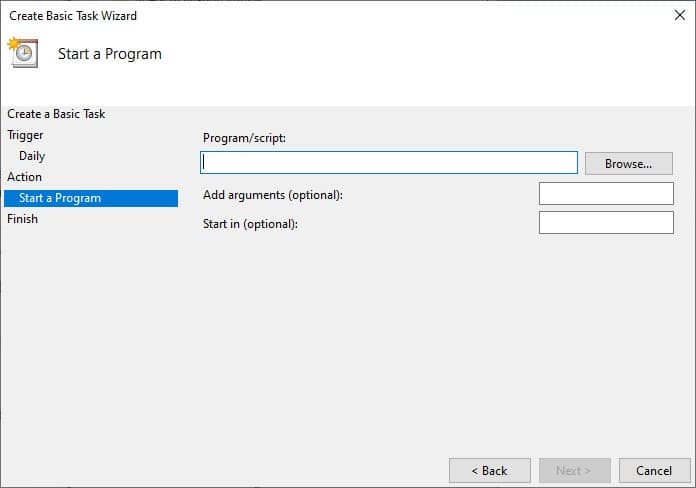
- Now, in the Program/script section, enter the path of the executable that you want to run. If you don’t know the path, then use the Browse option to navigate to it.
- Enter specific instructions for the task in the Arguments section, or leave it blank.
- You can also specify the folder in which the app will start from the Start in section. Leave it blank if you don’t want the app to open from any specific folder.
- Finally, click on the Finish option.
After you have completed all the above steps, the task will be saved and run as its trigger has been set. This is how you create a basic task on Task Scheduler in Windows 10.
How To Create An Advanced Task Using Windows 10 Scheduler?
After you have created a basic task, now you can learn how to create an advanced task. Advanced tasks are needed for tasks that are more complicated, like having multiple triggers. It also offers more customizability in terms of triggers and actions. To create an advanced task, follow the steps given below:
- Open Task Scheduler.
- Create a new folder in the Task Schedule library as mentioned in step 2-3 above.
- Now, expand the Task Schedule library option and select the folder you just created.
- On the Actions menu in the rightmost panel, click on the Create Task option.
- Now, name the task. We are going to make it run as a PowerShell script so you can name it First Powershell Script or something similar.
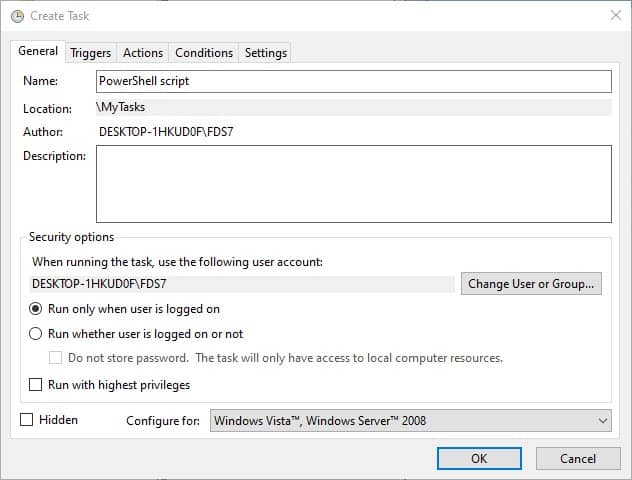
- You can also write a description of the task in the Description section or you can simply leave it empty.
- Now, in the General tab, you have the Security options section. Here you can configure the administrator account that will run the task. If your user account has administrative privileges, then you can select that. Also, you can configure whether the task runs when you are logged in or not and whether to run it with the highest privileges. Running the task with the highest privileges will be required if the task requires elevated privileges to run.
- Click on the Triggers tab and select the New option. Now you will have to select the triggers for the scheduled task.
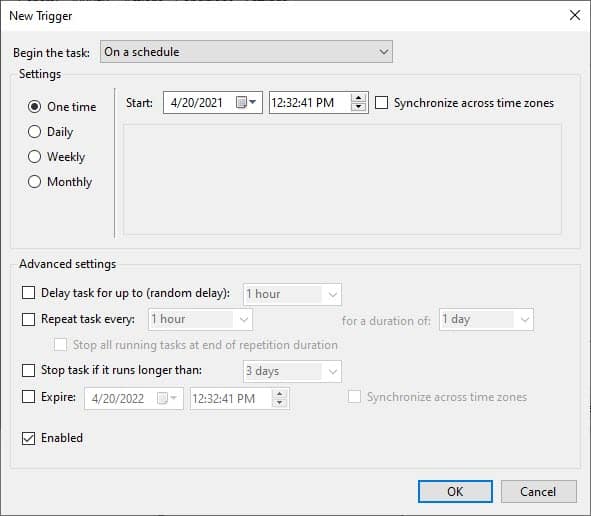
- In the Begin the task drop-down menu, select whether you want the task to start on startup, on a schedule, or the other options given there. For convenience, select On a schedule option.
- Now, in the Start section, set the date and time when the task will start. In the Months section, you can check the months that the task is supposed to run and uncheck the others.
- You can also configure the Days and On section to select either the days or a day of the week on which the task will run.
- In the Advanced Settings section, you can configure extra trigger details like whether to delay it, stop it, repeat it, and expire it.
- Click on the Ok option and then select the Action tab. Here you will have to configure what the task is going to perform.
- In the Action drop-down menu, select whether you want to start a program, send an e-mail, or display a message. For convenience, I assume that we will pick the Start a program action.
- In the Program/script section under the Settings, specify the path to the applications you want to run. Here we want to run a PowerShell script so, enter powershell.exe. You can always Browse to the path of the application if you don’t know the path. Also, for known applications like PowerShell or command prompt, all you need to do is mention their names as we did above.
- You can also specify arguments in the Add arguments section. For example:
-NoExit -ExecutionPolicy Bypass C:\PATH\TO\SCRIPT\first_script.ps1.
Here using the PowerShell.exe command the task will run the ps1. The part -ExecutionPolicy Bypass will make sure that the script runs successfully. The -NoExit argument prevents the PowerShell window from closing after the script finishes running. - Also, you can specify in which folder the application will run by configuring the Start in section.
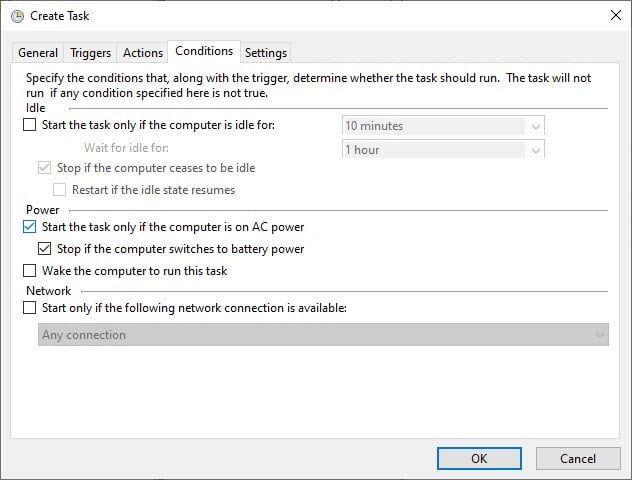
- Click on the Ok option and select the Conditions In the Conditions section, you can set conditions that will work with the triggers to decide when the task should run.
- Here you can configure the Power, idle, and Network conditions. For a simple task, you don’t really need to change any of these settings.
- Click on OK and select the Settings tab.
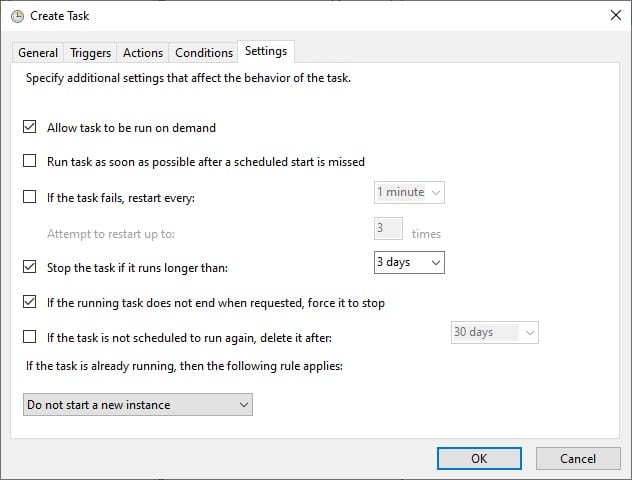
- In the Settings tab, you can configure some additional options, in turn, will directly affect the behavior of the task. You can configure options like running the task as soon as possible after a scheduled start is missed, whether to restart the task if it fails, and many more. These are all optional features that you may or may not want to configure.
- Finally, click on the OK option.
After all the above steps are complete, your task will be saved and ready to start as per schedule.
How To Edit A Task Created In Task Scheduler In Windows 10?
After creating a task, you also have the ability to edit it using the Windows 10 scheduler. Not just edit, you can also delete and run it manually. To edit a created task on Task Scheduler in Windows 10, follow the steps given below:
- Open Task Scheduler and expand the Task Scheduler Library option.
- Select the folder that you created to save the tasks.
- All the tasks you have created will be on your screen. Right-click on the task you want to edit.
- Select the Properties option to edit the task.
Also, to run the task click on the Run option, and to delete it click on the Delete option. - In the Properties section, you will find all the information on the task, like the triggers and actions. Here you can change them as you desire.
Wrapping Up
So, there you have it. Now you know what is Task Scheduler in Windows 10 and how to create a basic and advanced task using Windows 10 scheduler. If you have any further questions regarding this topic, ask them in the comment section below.
Hey,
I am looking to set up a task whereby my camera takes a photo and emails it to me upon login.
is this something that Task Scheduler can achieve or am I better looking at another form or program?
Thanks,
I think you should try using a 3rd party application as the Camera app on Windows doesn’t have an .exe file as it is a UWP app. So, you may not be able to call it using Task Scheduler. If you can find a command line for calling UWP apps, then it may be possible. Hopefully this helps.