When an executable is started, the OS creates a process for it. The process created is unique for each executable and has a special number, called Process Identifier (PID), which gets assigned to each of these processes. The process of an executable contains its program code and current activity.
As the processes created are unique, users can kill them using various methods. There can be various reasons for killing a process. Unresponsive programs, programs that are consuming high memory, and plenty more. In this article, I have discussed how to kill process in Windows 10 by using various methods.
How To Kill Process In Windows 10?
Contents
Windows 10 provide plenty of different options for killing a process. In Windows kill process can be done with Task Manager, Command Prompt, and PowerShell. Other than that, 3rd party software can also be used to do it.
How To Kill Process In Windows 10 Using Task Manager?
Task Manager is mostly used for killing processes on Windows 10. Windows Task Manager provides users important system information, like running processes or the memory a program is using, etc.
It can also be used for killing processes and is the mainstream method used by most Windows users (for unresponsive processes to be exact). Follow these steps and learn how to kill process in Windows 10 using Task Manager:
- Open the Task Manager by pressing the Ctrl + Shift + Esc keys on your keyboard.
- In the Processes tab, right-click on the name of the process and select the End Task option. This will close all the executable processes of that app.
- You can also kill the process from the Details tab. In the Details tab, right-click on the executable process that you want to kill and select the End Task option.
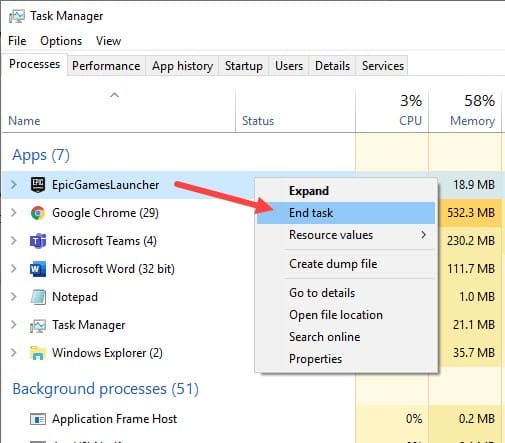
From Task Manager, you can kill the process by name, which is extremely convenient. However, sometimes Windows Task Manager will be unable to kill a process.
At that time, learning the other methods mentioned below will provide you extra options for killing that process.
How To Kill Process In Windows Using Command Line TaskKill?
TaskKill is a command-line of Command Prompt that can be used to kill process by name, kill process by PDI, and force kill process in Windows. For using the TaskKill command line, you need to first open an elevated Command Prompt. To open it, follow the steps given below:
- Press the Windows + R keys to open the Run utility.
- Type cmd and press Ctrl + Shift + Enter to open an elevated Command prompt.
After you have opened an elevated Command Prompt, use the following commands to achieve the specified result that’s mentioned beside it.
- Type Tasklist | more and press Enter to see all the running processes and their PIDs. If all processes are not shown, keep press the Enter key until you find the process you want to close.
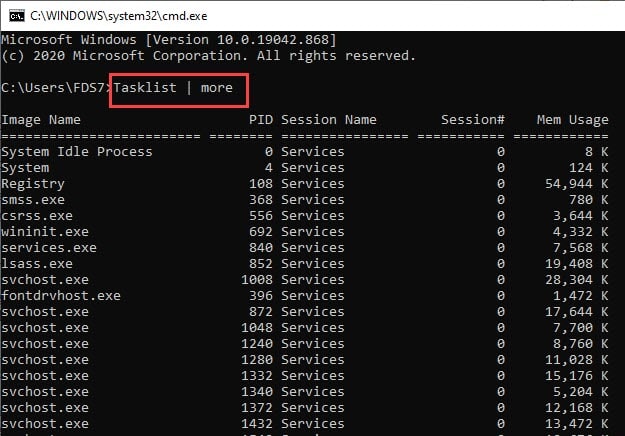
- Now, to kill process by name, use the following command:
taskkill /IM “name of the executable process” and press Enter.
for example: taskkill /IM chrome.exe for closing all executable processes of Chrome.
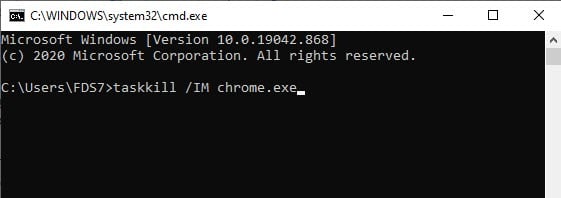
- To kill process by its PID, use the following command:
taskkill /PID “processID” and press Enter
for example: taskkill /PID 1256 for closing the process with the 1256 PID.
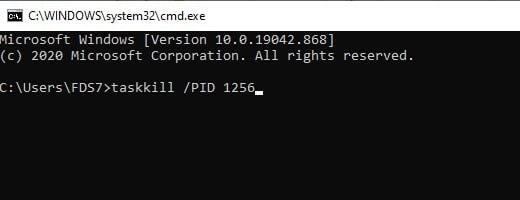
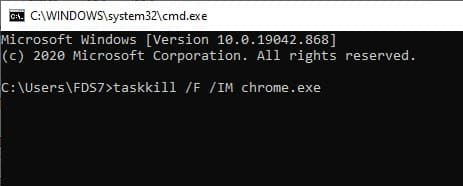
- To force kill process in Windows, use the following command:
taskkill /F /IM “name of the executable process”
for example: taskkill /F /IM chrome.exe
Some processes can ask permission before closing. By using the Force (/F) command, the process will get killed without the need for permission from the user.
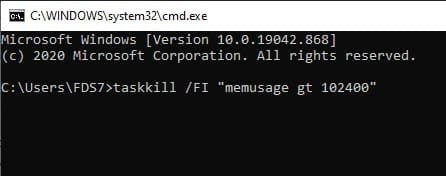
- To kill all processes consuming high amount, use the following command:
taskkill /FI “memusage gt value”
for example: taskkill /FI “memusage gt 102400” command will close all processes using more than 100 MB of memory.
- To kill all unresponsive processes, use the following command:
taskkill.exe /f /fi “status eq not responding” and press Enter.

These are the useful TaskKill commands to kill processes. You can also create a Taskkill shortcut for faster usage. For example, to create a TaskKill shortcut for closing all unresponsive processes, follow the steps given below:
- Right-click on the desktop.
- Select New >> Shortcut from the right-click context menu.
- In the Create Shortcut Wizard, type the following command:
taskkill.exe /f /fi “status eq not responding”
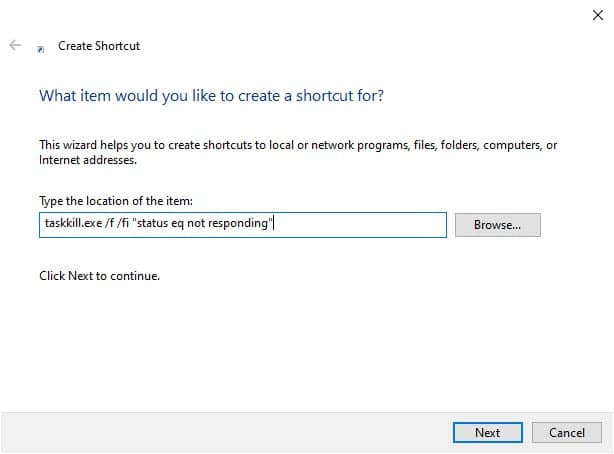
- Click on Next and give the shortcut a name.
- Finally, click on Finish and add an appropriate icon.
Now you can run this shortcut to close all unresponsive processes in your PC. Now you know how to kill process in Windows 10 using taskkill command line.
How To Kill Process In Windows Using PowerShell?
Windows PowerShell was introduced as the replacement for Command prompt. Soon, Windows may shift to PowerShell completely for running command lines. PowerShell can also be used for killing processes. To kill processes using PowerShell, follow the steps given below:
- Right-click on the Start Menu.
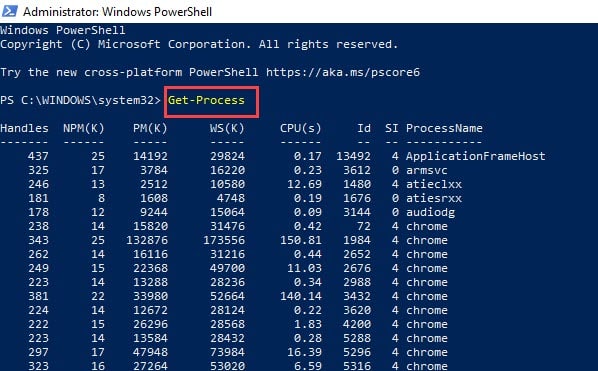
- Select the Windows PowerShell (Admin) option from the pop-up menu. This will open the Windows PowerShell with administrative privileges.
- Type Get-Process and press Enter to see the list of all running processes.
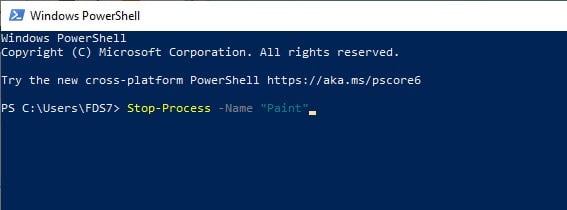
- To kill process by name, use the following command :
Stop-Process -Name “Name of the Process” and press Enter
for example: Stop-Process -Name “Paint” to stop all instances of the Paint process.
- To kill process by PID, use the following command:
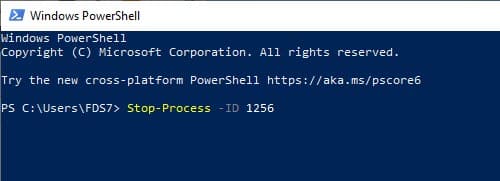
Stop-Process -ID “PID” and press Enter
for example: Stop-Process -ID 1256 to stop the process with PID 1256.
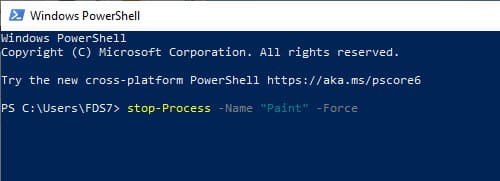
- To force kill process in Windows, use the following command:
Stop-Process -Name “Paint” -Force, to forcefully kill all the instances of the Paint process.
How To Kill Process In Windows Using 3rd Party Software?
Other than the methods mentioned above, you can also use 3rd party software to close processes on Windows 10. Process Hacker and Process Explorer are two extremely useful 3rd party process managing software. You may also call them as Task Manager alternatives.
Process Hacker: Process Hacker is designed to debug software, detect malware, and monitor system resources. You can use it to kill the unresponsive processes. Here is how you can do it:
- Download and install Process Hacker and then run the tool.
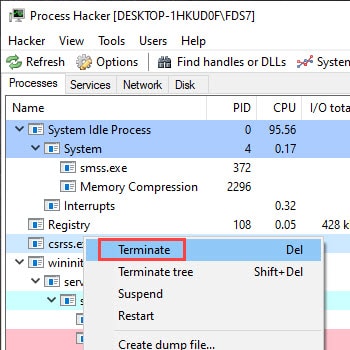
- You will find all the active processes listed once you open it. Locate the process you want to kill and right-click on it.
- Select the Terminate option to kill the unresponsive process.
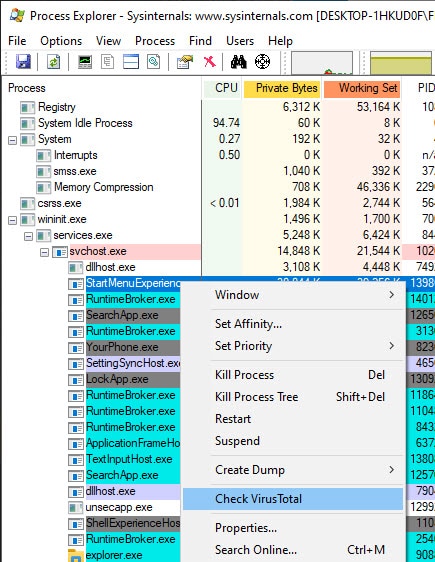
Process Explorer: Process Explorer is another process checking tool. The tool can change the permissions of the processes as well. To use it for killing processes, follow the steps given below:
- Download Process Explorer on your PC and then run the tool. You will need an unzipping app to access the compressed file.
- After the Process Explorer runs, it will show you a detailed list of the active processes running in the background.
- On the home screen of Process Explorer where all the processes are listed, right-click on the process that you want to kill.
- Select the Kill Process option.
Wrapping Up
So, there you have it. Now you know how to kill process in Windows 10 using various ways. If you have any further questions regarding this article, ask them in the comment section below.
Leave a Reply