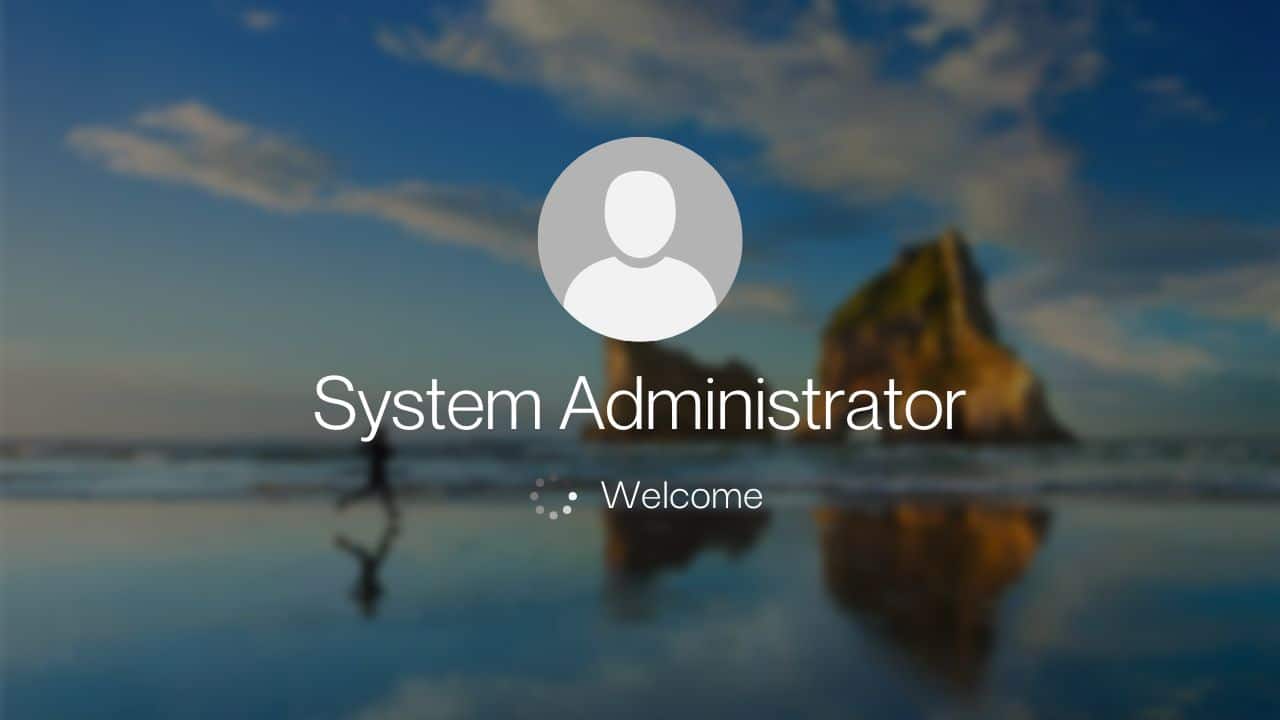
Windows usually get stuck on the welcome screen soon after updating your Windows.
Sometimes you can see ‘Please wait for the User Profile service’ message displayed on the welcome screen.
This happens when your PC tries to connect to the available network.
Nothing to worry about if you are into this weird problem, as here I have discussed the easy solutions to fix the issue. So, keep reading.
What To Do When Windows Is Stuck On Welcome Screen?
Contents
If your PC is stuck on the welcome screen on Windows 10, follow the solutions described below to fix the problem.
1) Disconnect Your PC From The Wi-Fi
When stuck on Windows Welcome screen, temporarily disconnect your device from Wi-Fi and then try to boot into Windows.
Sometimes disabling the Wi-Fi connection and reconnecting can fix the problem.
If you are not using any Wi-Fi connection, disconnect the Ethernet cable and see if this fixes the problem. If not, then unplug the USB devices from your PC.
2) Disconnect The USB Devices
Sometimes the USB devices attached to your PC, like the Bluetooth, Mouse, and Wi-Fi adapters, can conflict with your system and cause your Windows 10 PC to get stuck on the welcome screen.
So, it is recommended to disconnect any USB device attached to your Computer.
After disconnecting them try to boot to your PC. If you still cannot boot into your PC properly, go to the next step.
3) Perform Startup Repair
The Startup Repair can troubleshoot issues when you cannot boot into Windows correctly.
Boot your Computer using bootable media. When you see Windows Logo, click on Repair your computer option.
This will lead to the Advanced Startup Recovery menu.
If you don’t have a bootable device, restart the Computer 3 times by pressing the power button consecutively, and you should boot into the Advanced Startup Recovery menu.
- Enter the Advanced Startup Recovery menu and click on Troubleshoot.
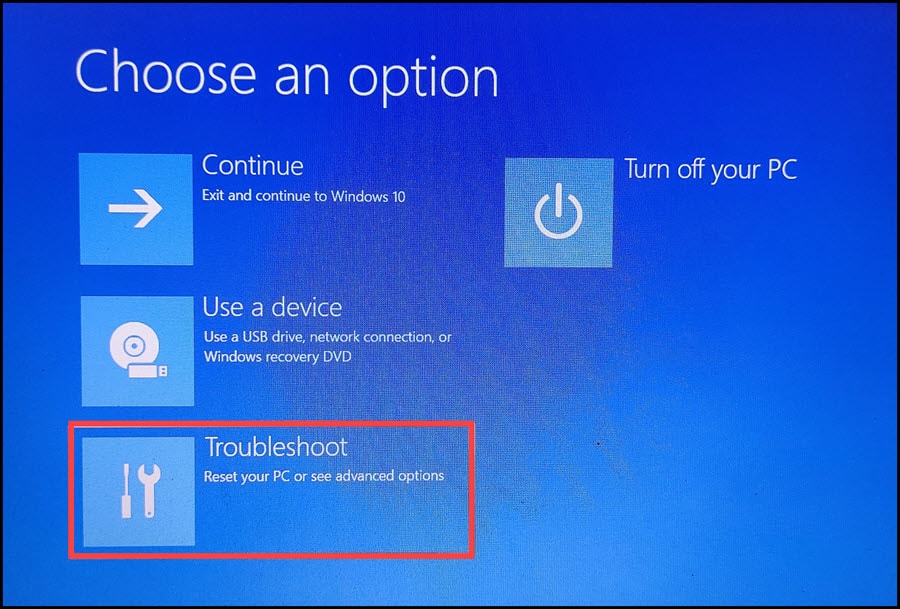
- Select Advanced Options > Startup Repair.
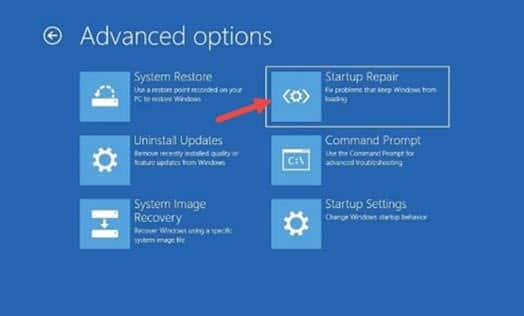
After running the repair process, if the problem still persists, enter into the Safe Mode and perform other solutions.
4) Enter Safe Mode
Safe Mode offers minimal functionalities. Entering the Safe Mode with minimal services is a safe way to identify the problem that is causing your Windows to load correctly.
By entering the Safe Mode, you can perform the other solutions provided below to fix the problem when you cannot boot into your Windows normally.
Follow the steps given below to boot into Windows 10 Safe Mode:
- Boot into the Advanced Startup Recovery menu, following solution 4, and go to the next steps:
- Select Troubleshoot > Advanced options.
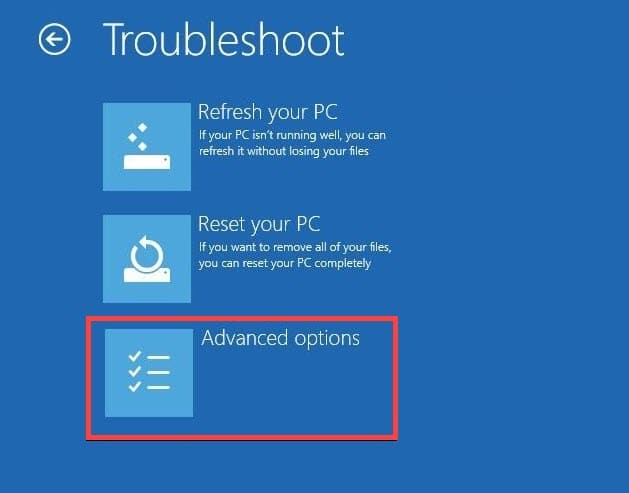
- Select Startup Settings and click on Restart.
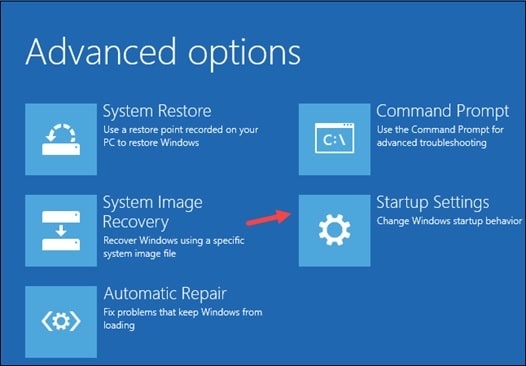
- Press the F5 key from your keyboard to enter Safe Mode with the networking.
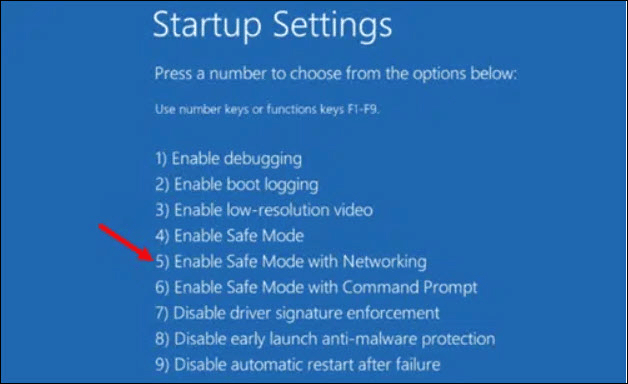
After entering into the Safe Mode, you are ready to perform the other solutions given in this article.
5) Perform A System Restore
If your system has a restore point before having this issue, revert to it.
In case you have not created any restore point for your PC, skip this solution and go to the next one.
Follow the steps given below to perform a system restore:
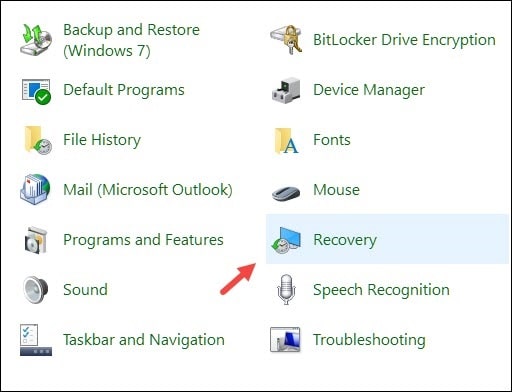
- Go to the Start menu and enter Control Panel. Select the top option. From the Control Panel window, click on Recovery.
- Select the Open System Restore > Next.
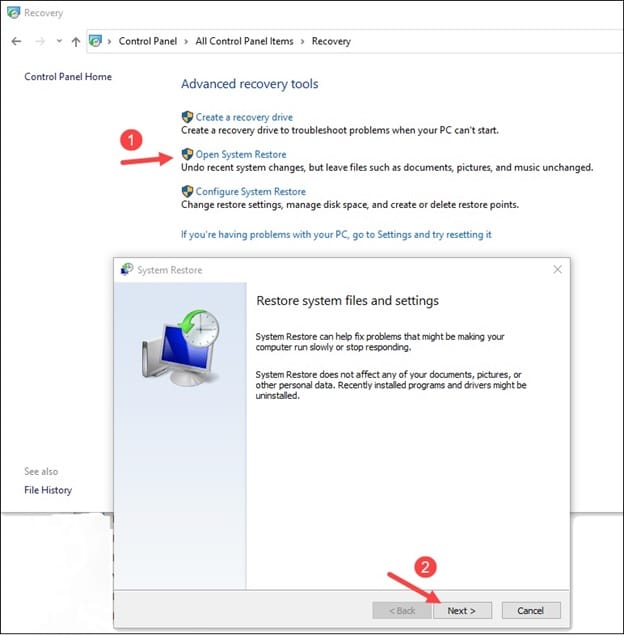
- Select a restore point and click on Next > Finish.
6) Delete NGC Directory
NGC folder stores and manages the PIN-related information. If this folder becomes corrupted, then you will not be able to use the PIN to log in to your PC. As a result, your Windows will be stuck at the welcome screen.
But this solution will only work if you have a PIN number to sign into your PC.
If you are not using any PIN number, then this solution may not work for you. In this case, skip this solution and follow the next one.
Now follow the process to delete the NGC folder:
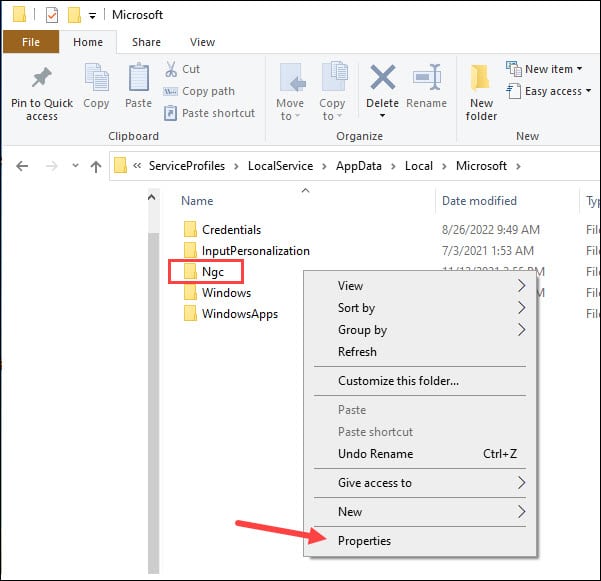
- Navigate to the following directory:
C:\Windows\ServiceProfiles\LocalService\AppData\Local\Microsoft
- Some of these files may be hidden so click on the View tab and check the box for Hidden items, as shown in the picture below.

- Locate the NGC folder and right-click on it. Select Properties.
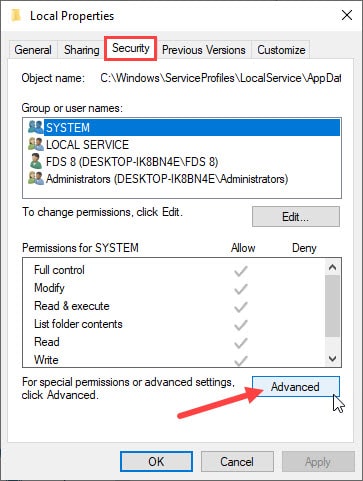
- Click on the Security tab > Advanced.
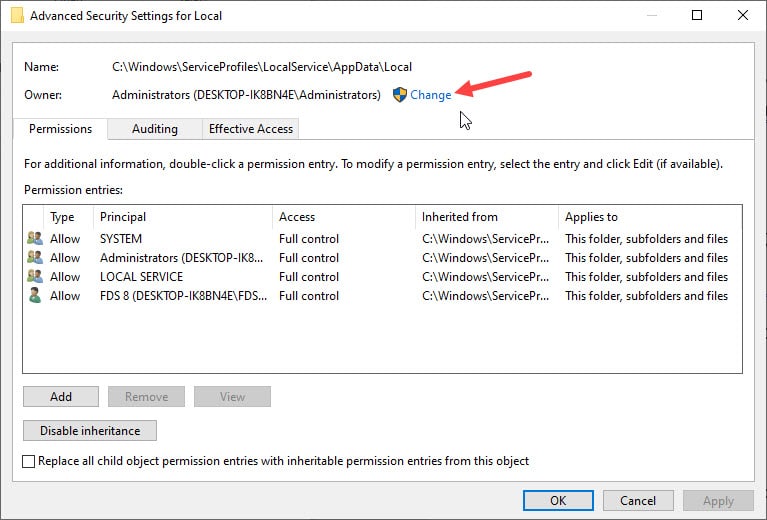
- To delete this folder, you need to take ownership first.
So, from the Advanced security settings window, click on the Change button from the owner section.
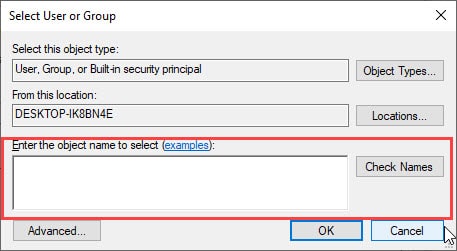
- In the Enter object name to select field, type your username and click on Check Names > OK.
- From the next window, check the box for Replace owner on sub-containers and objects. Click Apply > OK to save the changes.
- If you see a warning message, click on Yes to confirm your action.
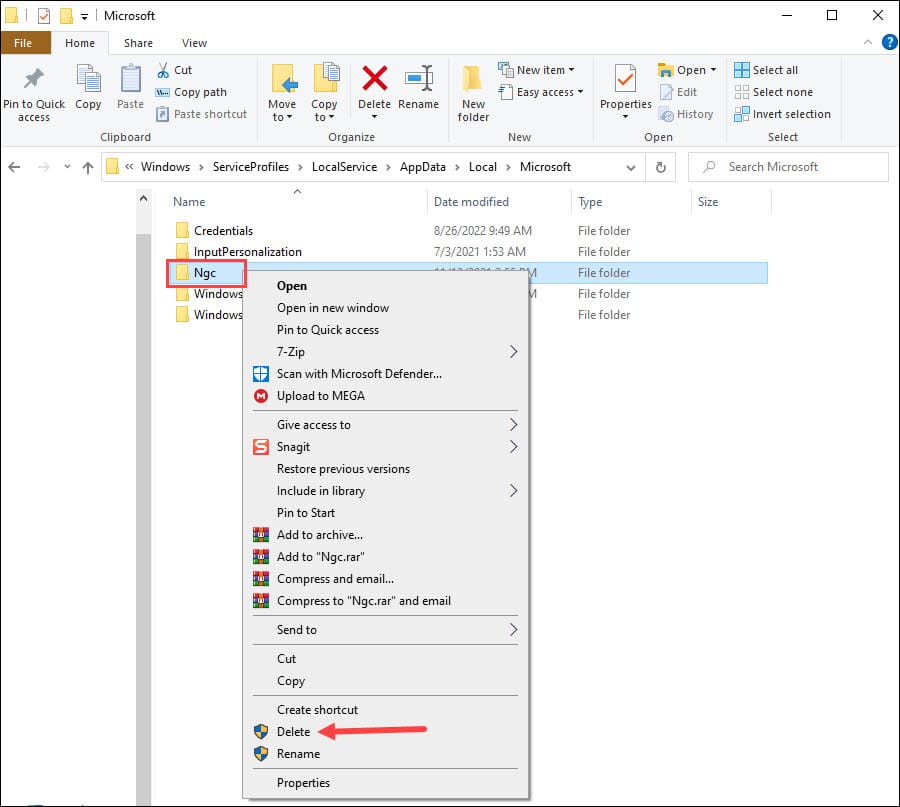
- After this, you will be able to delete the NGC folder. To do so, right-click on the NGC folder and click on Delete, as shown below.
If this solution does not apply to you or does not work, disable fast startup.
7) Disable Fast Startup
The Fast Startup Windows feature helps you to boot faster, but sometimes it can interfere with the restart & shutdown processes.
So, turn off this startup feature when you cannot boot into Windows 10 normally following the steps given below:
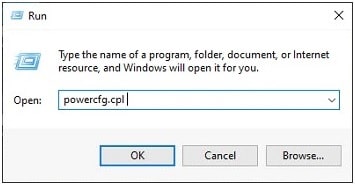
- Press the Win + R keys to launch the Run utility.
- Enter powergfg.cpl in the Run command box & press Enter.
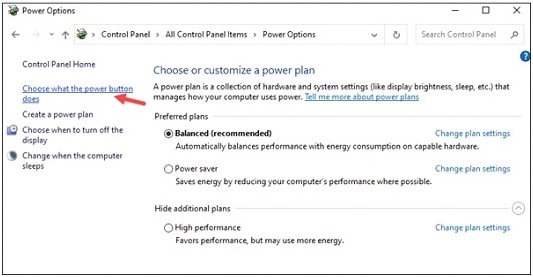
- From the next window that opens, click on Choose what power buttons do option.
- Next, click on Change settings that are currently unavailable.
- From the System Settings window, uncheck the checkbox for Turn on the Fast Startup (Recommended) option.
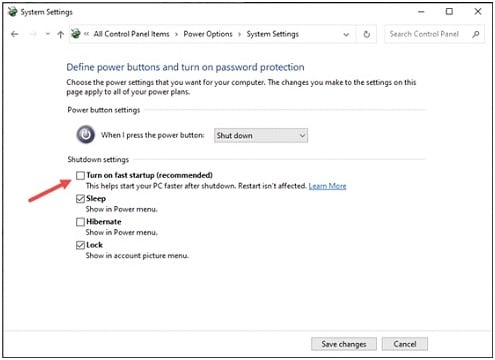
- Save the changes made and exit. Restart your PC and disable Credential Manager Service if you cannot boot into Windows this time.
8) Disable Credential Manager Service
Credential Manager allows you to view and delete all the saved credentials while logging into websites, networks or connected applications.
When you cannot log into Windows normally, disable this Credential manager service as any corruption in the stored data can prevent Windows from booting normally.
Now follow the steps given below to disable the Service:
- Open Run the utility and enter services.msc in the Run command box.
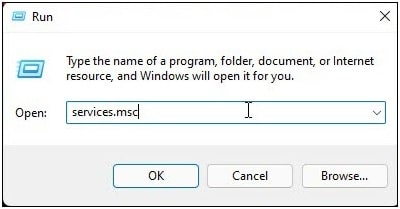
- Click OK or press Enter.
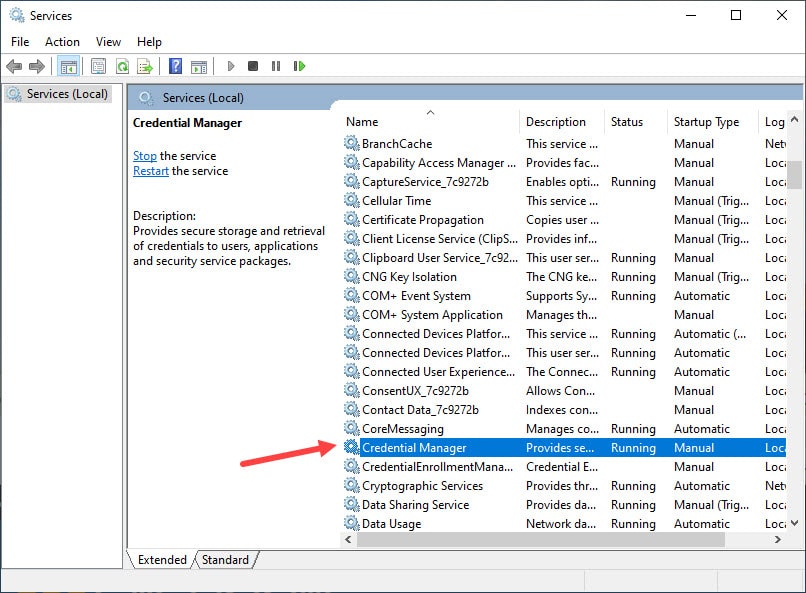
- From the Services window, find Credential Manager Service and double-click on it.
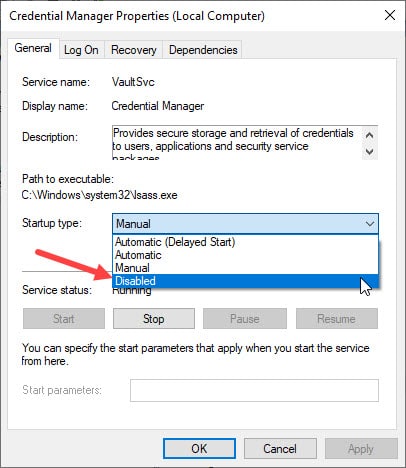
- This will expand its properties. Set the Startup type to Disabled and click on Apply > OK.
- Restart your Computer and see if the problem is fixed, or else run an SFC scan.
9) Run SFC Scan
Corrupted system files can also be the reason why Windows 10 PC is stuck on the welcome screen.
To fix the problem, run an SFC scan.
- Search for the Command Prompt in the Windows search box. Right-click on the first option and select Run As Administrator.
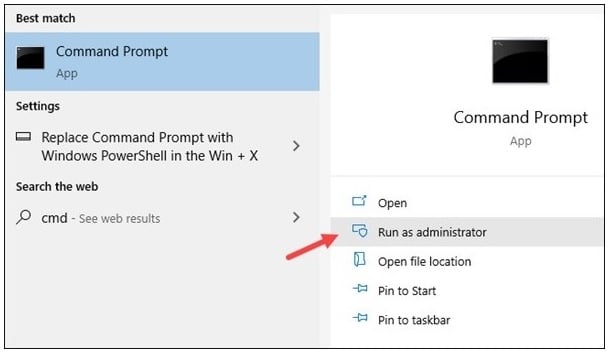
- Type sfc /scannow in the elevated Command Prompt window and hit Enter.

Wait till the scan finishes, and then restart your PC. Try to reset it again. After running the scan, restart your PC.
If this does not fix the problem, run Check Disk.
10) Run Check Disk Utility
Chkdsk utility can fix problems related to memory corruption. If this Windows problem is due to memory corruption, then follow the steps below to run the chkdsk command:
- Open an elevated Command Prompt window.
- Enter the following command in the elevated CMD window and press Enter:
chkdsk C: /f /r /x
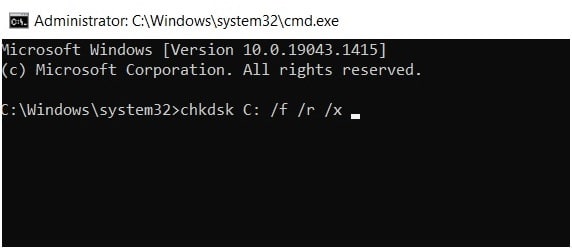
- Here ‘C’ represents my system drive letter. So, make sure to replace it accordingly.
11) Reset & Reboot The Boot Manager Service
If the Boot sector of your system partition is damaged, then also Windows 10 may get stuck on the Welcome screen.
To troubleshoot the problem, reset & repair the Boot Manager Service.
Follow the instructions as given to do that:
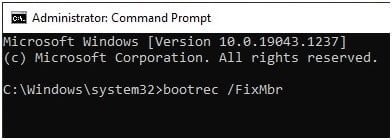
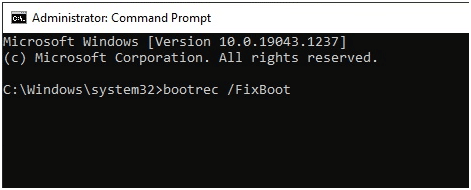
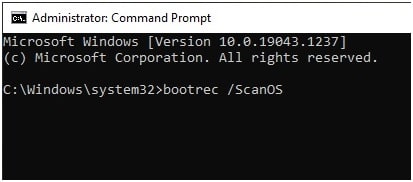
- Now, enter the following commands one by one and press Enter after each command:
bootrec /FixMbr
bootrec /FixBoot
bootrec /ScanOS
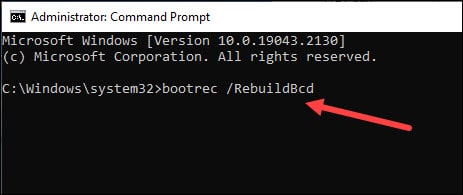
bootrec /RebuildBcd
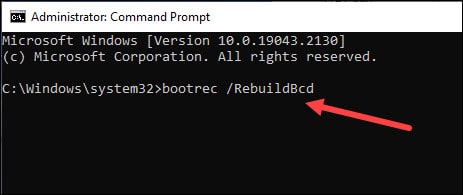
- After successfully running all the above commands, exit Command Prompt and restart your PC.
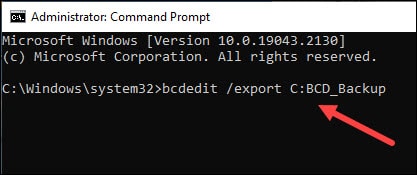
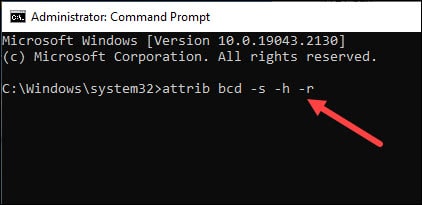
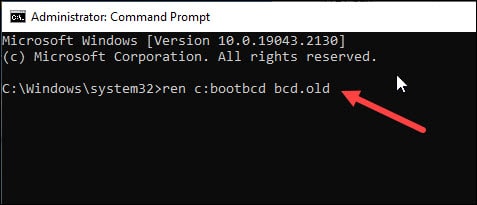
- If you still cannot boot into Windows normally, run the following commands in the elevated Command Prompt window:
bcdedit /export C:BCD_Backup
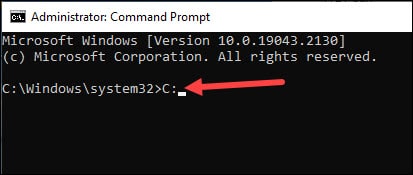
C:
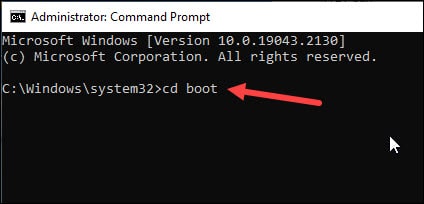
cd boot
attrib bcd -s -h -r
ren c:bootbcd bcd.old
bootrec /RebuildBcd
If this does not fix the problem, uninstall third-party applications.
12) Uninstall Third Party Applications
Some third-party applications like SmartPass can interfere with your OS and cause Windows to hang in the welcome screen.
To fix the problem, uninstall the application following the steps given below:
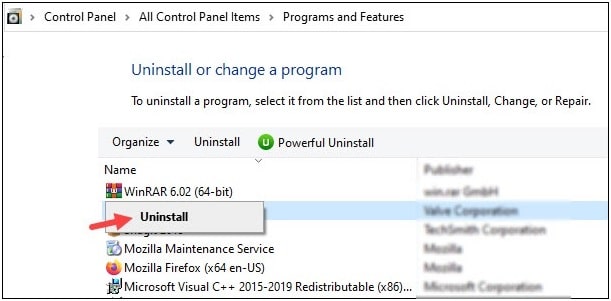
- Open Windows Control Panel and click on Programs and Features.
- From the installed apps list, locate SmartPass and right-click on it.
- Click Uninstall and follow the on-screen instructions to finish the process.
Restart your Computer and check if you can load into Windows normally. If not, reset Windows.
13) Reset Windows
If nothing helps you to fix the problem, reset Windows. But before you do so, make sure to back up all your important files.
Now follow the steps given below to reset Windows:
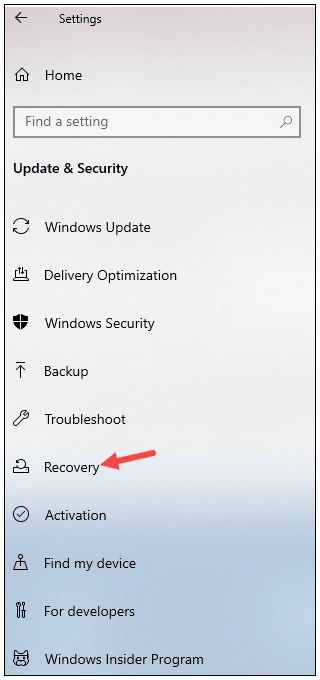
- Press Windows + I keys to open Settings. Click on Update & Security.
- Select the Recovery option from the left side pane.
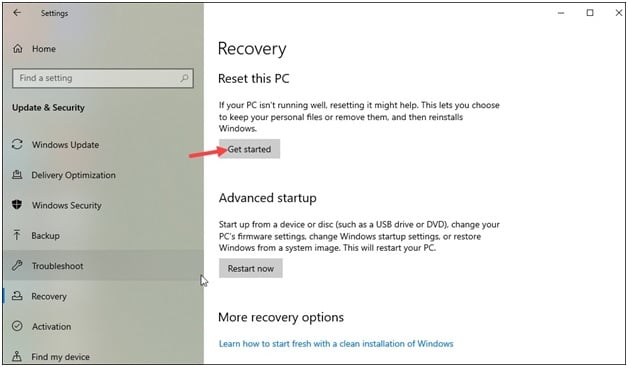
- Under Reset this PC option, click on Get Started option.
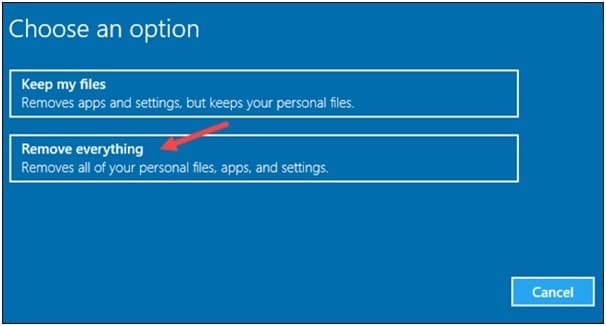
- Select Remove Everything > Only the drive where Windows is installed.
- Go to Additional Settings > Next.
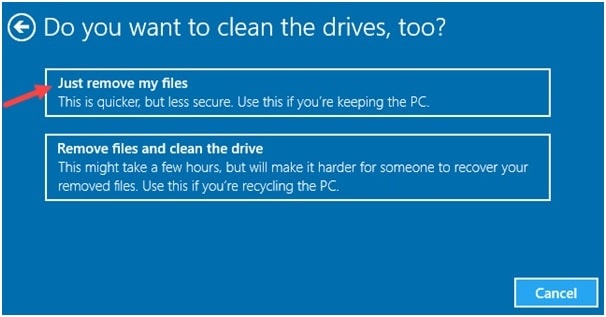
- From the next window, select Just remove My files option and follow the instructions given on-screen to fix the issue.
After finishing the process, reinstall the applications you need and restore all your backups.
Related:
Closing Up
Send us feedback on which of the above solutions helped you to fix your Windows problem.
For any related query, ask us in the comments section provided below, and we shall revert soon with answers.
Leave a Reply