SD cards and USB drives can be write-protected. Write protection prevents anyone from changing the files and media on the file. Thus, you can only view the files and not delete or add anything to it. Write protected occurs due to various reasons and mostly involuntarily from the users’ side.
When an SD card or USB drive is write-protected, it will show the media is write-protected error when the user tries to write or delete anything. In this article, I have discussed how to remove write protection from your USB and SD drive to fix it.
How Does A Media Become Write Protected?
Contents
If you find that any of your media has become write protected, it is likely due to a virus. Virus infection is the most common reason for involuntary write protection of a USB or SD card. Other than viruses, the files stored in the media can be corrupted or if the media is locked manually using the lock switch.
How To Fix The Media Is Write Protected Error?
There are various ways you can troubleshoot this error. Below I have instructed the procedure you should follow in order to fix this error. Remember to read the instructions carefully before executing them to avoid making mistakes.
Solution 1: Run Antivirus Scan
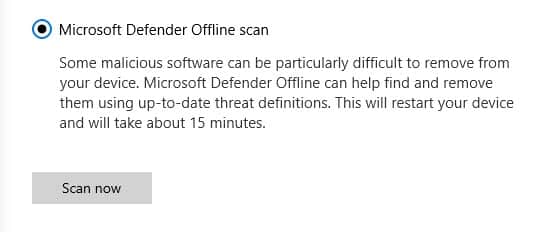
When you first come across the media is write-protected error, you need to run an antivirus scan. If you have a strong 3rd part antivirus, run a full PC scan with it. If you don’t have any 3rd party antivirus, you can run the Microsoft Defender Offline Scan. To run the Windows Defender offline scan, follow the steps given below:
- Type Windows Security in the Start menu and select the top result.
- Click on the Virus and threat protection option.
- Select the Scan options button.
- Check the Microsoft Offline scan option.
- Start the scan.
- Wait for the scan to finish. It will likely take some time. Do not close the scan before it is finished. After the scan is finished, Windows will restart on its own.
Solution 2: Run SFC And DISM Scan
Corrupted system files can also be the cause of this error. If this is the case, then you can try running the System File Checker scan and DISM scan. The SFC checks for corrupted system files and fixes them while the DISM scan will repair the Windows image. To run the SFC scan and DISM scan, follow the steps given below:
- Open the Run utility again.
- Type cmd and press Ctrl + Shift + Enter to open an elevated Command Prompt.
- Type the following command and press Enter:
sfc /scannow
- Wait for the scan to finish as it will take around 20-30 minutes. Do not close the Command Prompt prematurely.
- Restart the computer.
- Now, open the elevated command prompt again.
- Type the following commands and press Enter after finishing each one:
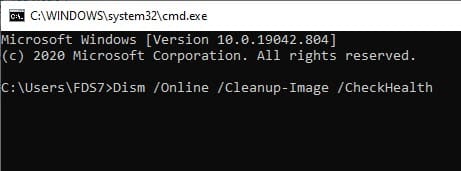
a) Dism /Online /Cleanup-Image /CheckHealth
b) Dism /Online /Cleanup-Image /ScanHealth
c) Dism /Online /Cleanup-Image /RestoreHealth
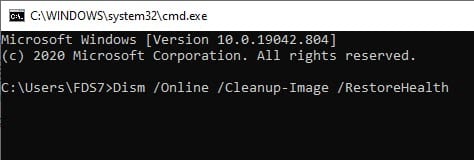
- Wait for the commands to finish running and then restart the computer.
Solution 3: Update Windows
Updating Windows is important as it installs bug fixes and security updates. Updating your PC can help you get rid of the hard drive write protected issue. To update your Windows, follow the steps given below:
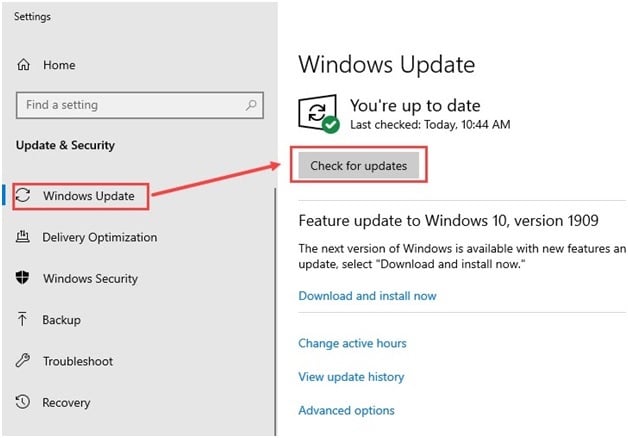
- Type Check for updates in the Start menu and select the top result.
- Click on the Check for updates option and wait for Windows 10 to finish checking.
- If any update is available, Windows should start downloading it automatically. After the download is complete, install it and restart your PC.
Solution 4: Check For Corrupting In The Memory
Corruption in memory is another known cause of this error. Fortunately, you can run the chkdsk scan in Windows 10 to check for memory corruption and fix it. To run the chkdsk scan, follow the steps given below:
- Open the Run utility again.
- Type cmd and press Ctrl + Shift + Enter to open an elevated Command Prompt.
- Type the following command and press Enter:
chkdsk - Wait for the scan to finish and close the command prompt.

You can also run the Memory Diagnostic tool with the chkdsk scan. To run the Memory diagnostic tool, follow the steps given below:
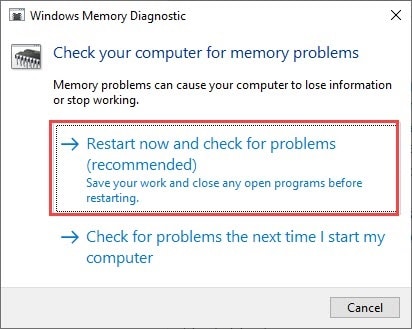
- Type Windows Memory Diagnostic in the Windows search bar and click on the appropriate option.
- Select the Restart now and check for problems (recommended) option.
- Wait for the scan to finish.
If any errors are found during the scan, then the RAM is the main culprit for the media is write protected error. Try removing and resetting the RAM to eliminate any possibility of loose connection and it also resets the RAM.
Solution 5: Restore To A Previous System Point
If system restore is enabled on your PC and you have saved a previous restore point before this error appeared, then you can restore to it. By restoring to a previous system point, you should be able to get rid of this error. To restore to a previous system point, follow the steps given below:
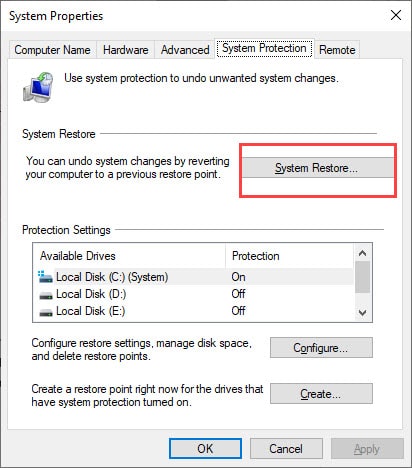
- Type Create a restore point in the start menu and select the top result. The System Properties will open on your screen.
- In the System Protection tab, select the System Restore option.
- Click on the restore point made before this error appeared and follow the on-screen information to restore your PC to that state.
Solution 6: Delete Junk Files Using Disk Cleanup
Disk Cleanup is an in-built junk file cleaner in your Windows. It basically searches and removes junk files from the selected drive. To use disk cleanup, follow the steps given below:
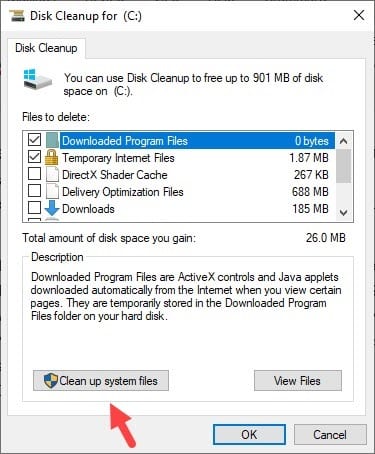
- Type Disk Cleanup in the Windows search bar and select the appropriate option.
- The Disk cleanup app will now be up on your screen. Select the drive from which you want to delete the junk files and then click on OK.
- Now, click on the Clean up system files The disk cleanup tool will now scan your selected drive for all the junk files.
- Once the scan finishes, select the files that you want to delete from the list and then click on OK.
Solution 7: Edit The StorageDevicePolicies Key In Windows Registry
When it comes to USB, SD cards, and external hard drives, this error can be even more annoying. One thing you can do to fix this is to edit the StorageDevicePolicies key in Windows Registry. However, Windows Registry has all the settings of Windows and you need to perform the following steps with extreme care. Also, backup the registry before following these steps.
After you have backed up the registry keys, follow the steps given below:
- Press the Windows + R keys to open the Run utility.
- Type regedit and press enter to open the Registry editor.
- Navigate to the following key:
HKEY_LOCAL_MACHINE\SYSTEM\CurrentControlSet\Control\StorageDevicePolicies - In the right-panel, double-click on the WriteProtect DWORD value.
- Edit the Value to 0 and click on OK to save the changes.
- Close Registry Editor and restart the PC.
If the StorageDevicePolicy key is absent, then follow the steps given below to create it:
- Press the Windows + R keys to open the Run utility.
- Type regedit and press enter to open the Registry editor.
- Navigate to the following key:
HKEY_LOCAL_MACHINE\SYSTEM\CurrentControlSet\Control - Right-click on the Control key and select New>>Key. Name the new key to StorageDevicePolicy.
- Select the StorageDevicePolicy key and in the right-panel, right-click on the white part and select New>>DWORD (32-bit) Value option.
- Name the new value to WriteProtect and double-click on it.
- Edit the Value to 0 and click on OK to save the changes.
- Close Registry Editor and restart the PC.
Solution 8: Remove Write Protection Using Diskpart
Diskpart is a command-line that can be used in this scenario to remove Write Protection from USB drives. To do it, follow the steps given below:
- Open the Run utility again.
- Type cmd and press Ctrl + Shift + Enter to open an elevated Command Prompt.
- Type the following command and press Enter:
diskpart - Now, enter the following command to list the disk drives in diskpart and press Enter:
list disk - In the list of drives, note the disk number of the USB drive that is causing this error.
- Enter the following command and press Enter to select the USB disk drive in diskpart:
select disk 1
Here 1 is the disk number. Change it to the disk number appropriate in your case. - Now, type in the following command and press Enter to clear the Write Protection in the USB disk drive:
attributes disk clear readonly - After the attribute is cleared successfully message is shown, type exit and press Enter to exit from diskpart.
- Close the Command Prompt.
Solution 9: Remove Write Protection Using Properties
One way to disable the Write Protection in USB drives is disabling the read-only attribute using Windows Explorer. To do it, follow the steps given below:
- Plugin the USB.
- Open the My Computer and right-click on the USB disk drive.
- Select the Properties option from the right-click context menu.
- Click on the Home tab and in the Attributes section, uncheck the Read-only box.
- Click on Apply and OK to save the changes.
Now the media is write protected error should get resolved.
Solution 10: Format The Disk Drive To NTFS File System
As a last-ditch method, you can try formatting the disk drive to the NTFS file system from FAT32. This will delete everything in the SD card but should be able to use it without errors from then on. If you are able to copy files from the USB, then you can create a backup and then format.
Wrapping Up
So, there you have it. Now you know how to fix the media is wr0ite-protected in Windows 10 error. The above solutions should be able to help you with this i0ssue. If you have any further questions regarding this article, ask them in the comment section below.


I was wondering if there was a way to remove the media is write protected in windows 10.