The old Windows Movie Maker video editing application that was bundled with the Live Essentials suite was finally discontinued in 2017. Still, many users prefer the old app as their primary video editor. However, because Windows Movie maker is no longer supported, those still using it are facing various issues. For many, Windows movie maker has stopped working and they are trying to find a way to revive it again.
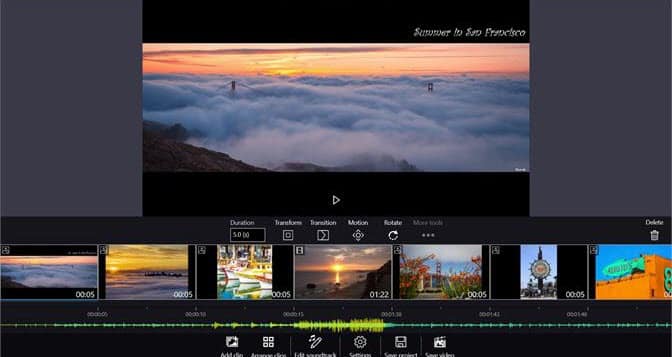
Others are facing audio or video rendering issues. In this article, I have discussed the various Windows Movie Maker troubleshooting methods that are still possible to do.
Windows Movie Maker Troubleshooting
Contents
Troubleshooting the Windows Movie Maker can only provide results as long as it’s a minor or a system related issue. If the issues are with the core files of Windows Movie Maker, like corrupted installation files, then other than reinstalling there is no solution. Sadly, reinstalling is no longer an option unless you have a copy of the setup file.
Our advice will be to use a different editing software. Adobe premiere pro is a great choice. It is one of the leading video editing software available on the market. Other than that you can check out this article and have a look at 5 more elite video editing software.
With that aside, now let’s have a look at what troubleshooting can be done on the old Windows Movie maker in order to fix its issues.
Solution 1: Update Your Graphics Drivers
If you are using the old Windows Movie Maker, there is a chance that you also haven’t updated your graphics drivers. If this is the case, first try updating the graphics drivers and then proceed to the other solutions. To update your graphics drivers, follow the steps given below:
- Press the Windows + R keys to open the Run utility.
- Type devmgmt.msc and press Enter to open the Device Manager.
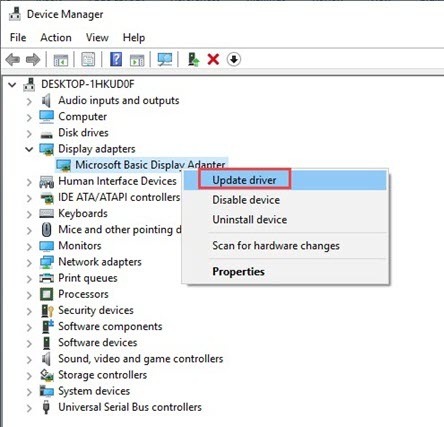
- Expand the Display adapters and right-click on the graphics driver.
- Select the Update Driver option.
- Click on the Search for updated drivers option.
- Follow the on-screen instructions to complete the process.
Once you have updated your driver, check if the Movie Maker problem has been solved.
Solution 2: Check For Interference From Other Applications
If Windows live Movie Maker has stopped working after you have installed an application, then it is likely the cause of this issue. Also, other background applications can interfere with Windows Movie Maker or simply hog system resources, producing the same result.
First, uninstall any recently installed programs around when the issue emerged. If you can’t recall any, then close down memory hogging processes in the background that are of no use.
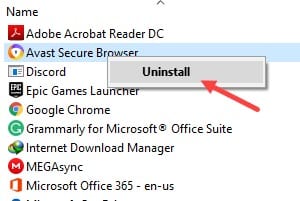
To uninstall a program, follow the steps given below:
- Press the Windows + R keys to open the Run utility. Type appwiz.cpl and press Enter to open the Programs and Features panel.
- Right-click on the application that you are suspicious of triggering this issue and select the Uninstall option.
- Follow the on-screen instructions to complete the process.
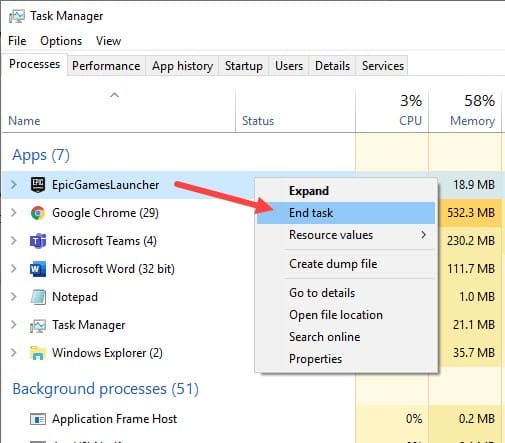
To close unnecessary background applications, follow the steps given below:
- Right-click on the Taskbar and select the Task Manager option.
- Click on the Processes tab. If no tabs are visible, select the More Details option.
- Locate the applications that are hogging a lot of memory.
- If they are unnecessary, right-click on them select the End Task option.
Solution 3: Start Windows Movie Maker In Safe Mode
3rd party video filters and other installed extensions can also lead to many Movie Maker problems. Try opening Movie Maker in safe mode, which will only allow the core features of the application to start. If Movie Maker has stopped working due to 3rd party extensions, it should work when you open it in safe mode.
To open the Windows Movie Maker in safe mode, follow the steps given below:
- Press the Windows + R keys to open Run.
- Type cmd in the search box and press Ctrl + Shift + Enter to open an elevated Command Prompt.
- Now, type the following command and press Enter to initiate it:
moviemk.exe /safemode - After Movie Maker opens in Safe Mode, click on the Tools tab.
- Select the Options button. This will open the Options window.
- Click on the Compatibility tab. Here you will find the list of the installed video filters.
- Deselect any filter that ends with the .ax extension.
- Restart Movie Maker normally.
If again Windows Live Movie Maker has stopped working, open the Movie Maker in safe mode again and deselect all the video filters.
Solution 4: Run Windows Movie Maker In Compatibility Mode
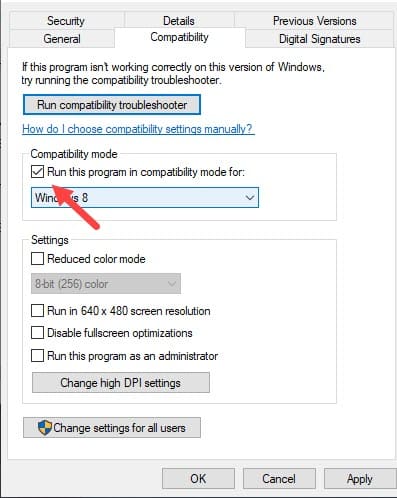
The next thing you can do is run the Windows Movie Maker in compatibility mode. It is possible that the latest Windows 10 versions don’t support the old Movie Maker app. Thus, running it in compatibility mode should work. To run Windows Movie Maker in compatibility mode, follow the steps given below:
- Right-click on the Movie Maker executable and select the Properties option.
- Select the Compatibility tab.
- Check the Run this program in compatibility mode for: box and select Windows 7 from the drop-down menu.
- Click on Apply and OK to save the changes.
Solution 5: Reinstall Codecs
If the videos are freezing or not all videos are playing on the Movie Maker, it can be due to corrupted or missing codecs. Try reinstalling the codecs from the internet in order to fix this issue.
Solution 6: Repair Movie Maker
If none of the above solutions work, it is likely that the installation files have become corrupt. Sadly, you cannot reinstall Movie Maker, which would have been the ideal solution at this moment unless you have saved the old setup file. What you can try is repair the application. To repair the Movie Maker, follow the steps given below:
- Press the Windows + R keys to open the Run utility. Type appwiz.cpl and press Enter to open the Programs and Features panel.
- Locate the Movie Maker among the other listed apps and right-click on it.
- Select the Uninstall/Change option from the right-click context menu. This will open the Uninstallation/repair Wizard.
- Check the Repair option and click on the Continue option.
- Follow the instructions on your screen to complete the process.
Wrapping Up
So, there you have it. Now you know the Windows Movie Maker troubleshooting methods to fix the many Movie Maker problems. If you have any questions regarding this topic, ask them in the comment section below.
Leave a Reply