If you are tired of your existing Rainmeter skin and want to change or modify it, then here is the perfect article for you. You definitely don’t want to be left out with a generic Rainmeter skin as creating and modifying skins are becoming quite popular these days, especially among the artistic community.
So, here I will show you how to easily change or modify your Rainmeter skin and give it a new look.
How To Change Your Rainmeter Skin?
Contents
There is an innumerable number of Rainmeters skins available to give your desktop a new look.
Choose the Rainmeter skin you wanted to apply on your desktop. Now, follow as shown below to change it.
You will have to perform some simple steps to modify or change the existing Rainmeter skin.
To modify or change your skin, follow the steps below:
- Download Rainmeter skin Jarvis from here. I have used this skin to show the following steps. This way you will be able to keep up.
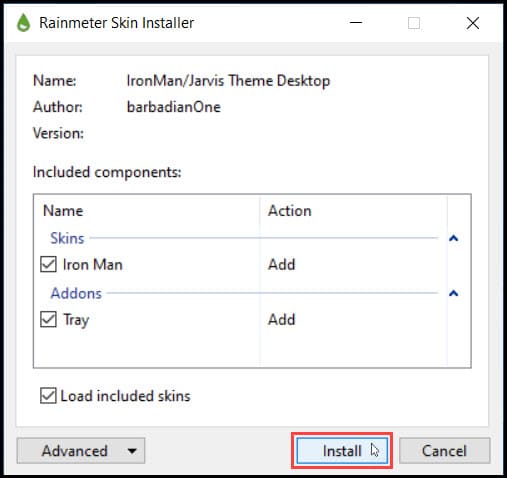
- Double-click on the downloaded file and click on the Install button.
- Set your background color and taskbar color. Here I have selected dark and black for a better experience. This also helps to hide all the desktop icons.
- Re-arrange the skin as per your preference. You can also auto-hide your taskbar.
Change Or Add Path
You can add a destination path on the existing elements. To do so, follow the steps below:
- Right-click on the particular folder name on the skin and select the Edit Skin option.
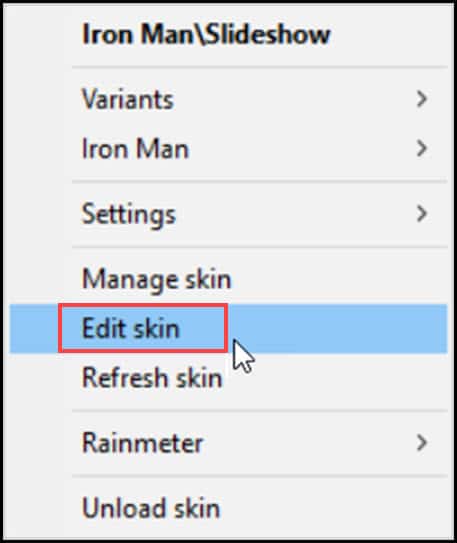
- After the notepad opens, enter the folder destination to the button command section, as shown in the image.
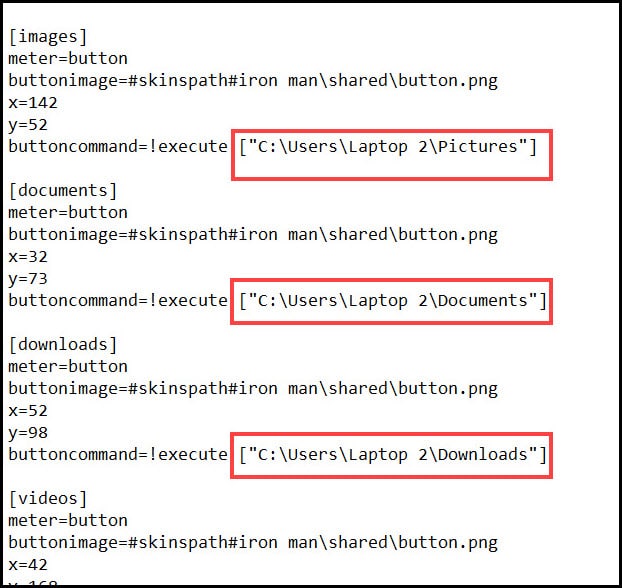
- Save the notepad and close it. Right-click on the skin and hit the Refresh button. Next click on the respective buttons to open the folders.
Move Skin
You can easily move the Rainmeter skin on your desktop.
To move the skin, follow the steps below:
- Just hold the left mouse button and drag it to the position you want.
The Rainmeter skin will remember where you kept it and maintain the position after shut down.
Lock Skin
In case you don’t want to move your skin and lock it to the same position, follow the steps below:
- Right-click on the Rainmeter skin and select the Manage Skin option.
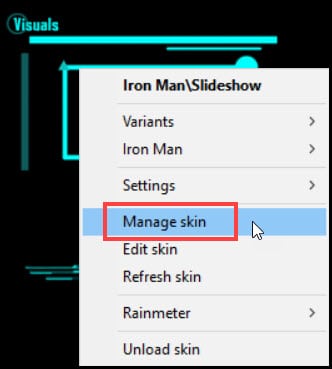
- Navigate to the Display monitor section and uncheck the Draggable box to lock the skin on its position.
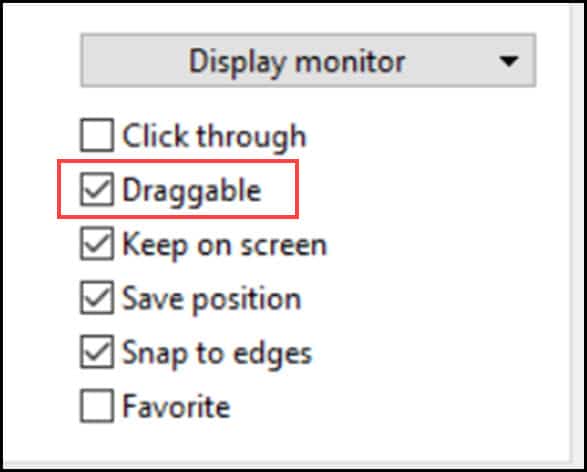
You can also alter other options like,
Click-through– If you check this box, you can click through the skin.
Save option – Check this box to save the skin’s position on the screen.
Keep on-screen – Check this box to keep the skin within the screen space.
Change Color And Font Size
You can also change the color of the skin by adding the color parameter. Here is how you can do it:
- Right-click on the Rainmeter skin and select the Edit Skin option.

- After the notepad opens, enter the color value you want to set for the text.
Like to change the color to yellow, I have entered 174,197,35.
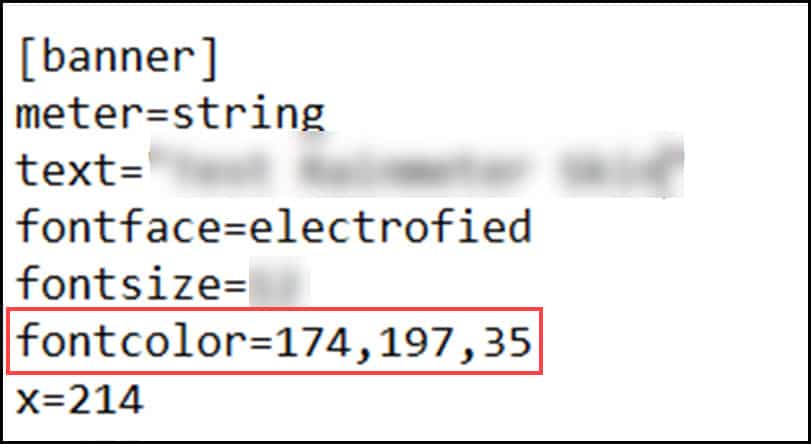
You can find the RGB color value from the Internet, Microsoft Office, Paint, etc.
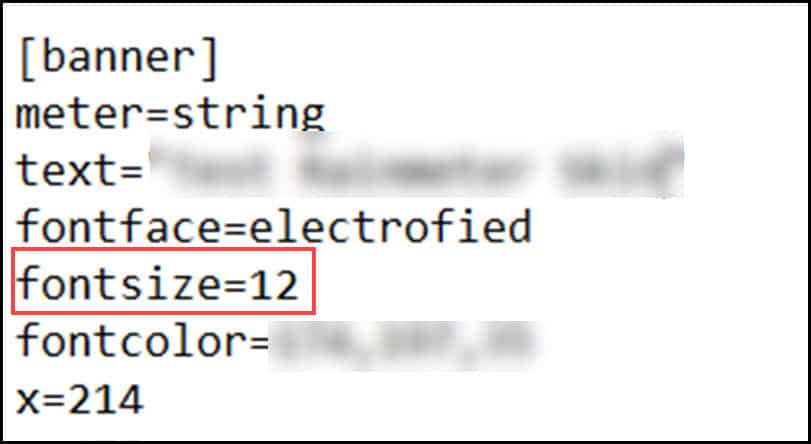
- To change the text size, enter the size you want for the Font Size option. Like here, I have entered 12.
- You can also add any text to the Rainmeter skin like I have given “Test Rainmeter Skin”. Whatever you write here will be displayed on the screen.
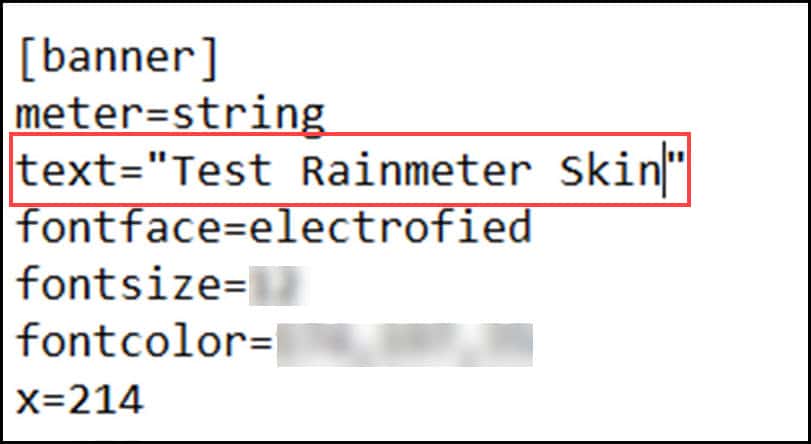
- Press Ctrl + S to save the changes and refresh the skin to see the changes.
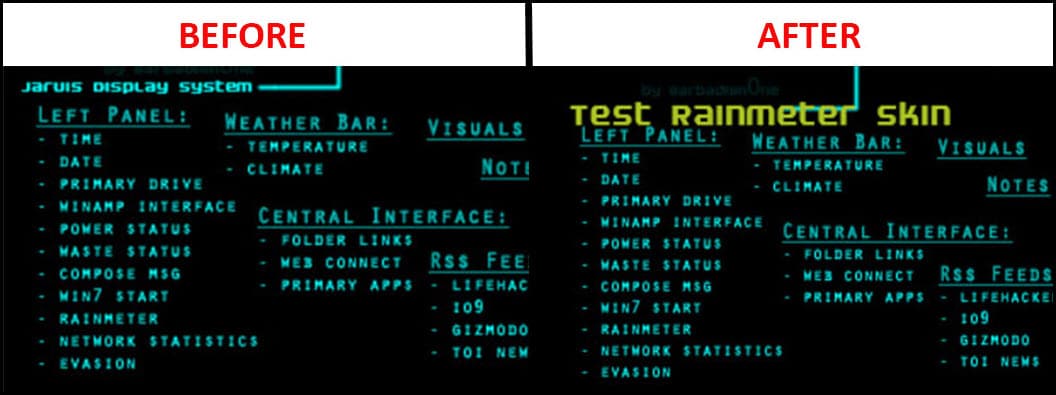
If you want to change the color of an image, then here is how you can do it:
- Go to the root folder(C:\Users\Laptop 2\Documents\Rainmeter\Skins\Iron Man\Shared) and select the image you want to change.
- Open it on a picture editing application and edit the picture as per your preference. (Here, I changed the color of Central Interference)
- Save the edited picture in the root folder and Refresh the skin. You will see the changes made appear on your screen.

Customize Icons
If you want to customize your Desktop icons, you have to install an icon-based Rainmeter skin.
Here I have selected the circle launcher Rainmeter skin.
Now if you want to customize one of these icons, follow the steps given below:
Here, I have selected the YouTube icon for customization.
- Select the photo you wanted to assign as a new icon.
- Paste the image on the root image folder of the Rainmeter skin.
[C:\Users\Laptop 2\Documents\Rainmeter\Skins\Circle Launcher\Youtube]
- Rename the image (I renamed it as 5).
- Now right-click on the icon and select the Edit Skin
- After the Notepad opens, change the Button Image parameter to the name of the image.
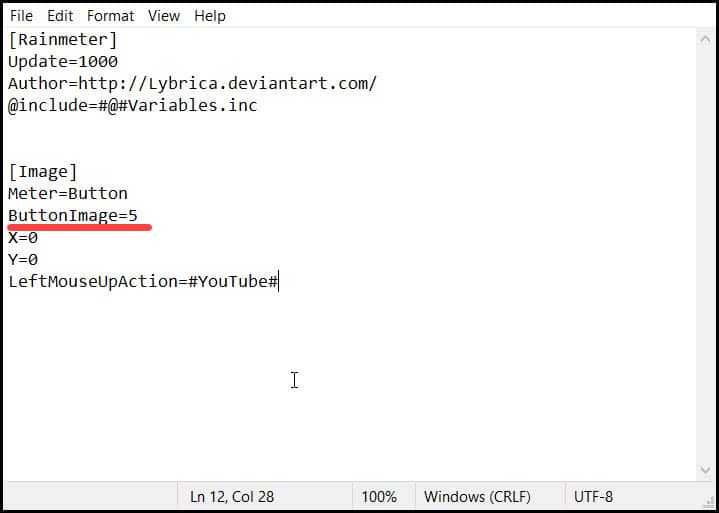
- Save the file.

- Refresh the skin and load it again.

Conclusion
So, there you have it. Now you know how to change a Rainmeter skin. If you still have queries regarding this topic, ask us in the comments section provided below.
Stay connected and feel free to share your thoughts with us.
Leave a Reply