CoD Warzone is one of the most popular video games around the world.
But sometimes it may get stuck while checking for updates which is a common problem faced by the users.
So, if you have encountered such problem, follow this article and learn how to easily resolve the issue.
Also read: Fix: Fortnite Stuck Checking For Updates
How To Fix Warzone Checking For Updates Error?
Contents
There are some easy hacks to fix the Warzone update issue. Follow the methods shown below to easily do it.
1. Check The Internet Connection
If the Warzone update is stuck, the first thing you need to do is to check if you have a stable internet connection.
To check the internet connection, follow the steps given below:
At first, make sure that the light of the router is stable and the connection is firmly established.
You can also check the internet speed by clicking on the link.
Try to connect with an alternative internet source, and restart the updating process.
If you are using a Wi-Fi connection, try using an Ethernet cable because Ethernet provides more stable connection than Wi-Fi.
2. Change Warzone Compatibility Settings
If you are still stuck on the Checking for update message, then run the game as an administrator.
Follow the steps below to do so:
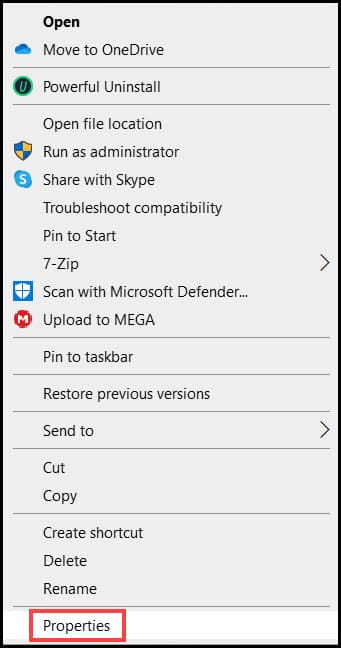
- Right-click on the game desktop icon and select Properties.
- Click on the Compatibility tab. Check the Disable full screen optimizations and Run this program as an administrator boxes.
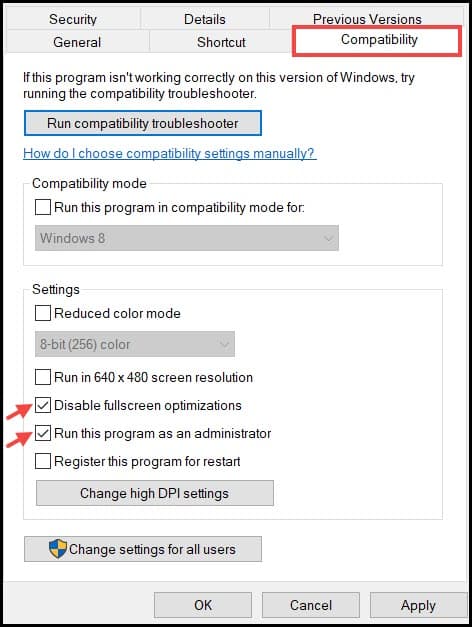
- Click on the Apply button and select Ok to complete the process.
Now, start try to update warzone again and if you get the same issue again, go to the next solution.
3. Check DNS Settings
Wrong DNS settings can also trigger the Warzone update issue.
Configure the settings and check if this solves the problem. To do so, follow the steps below:
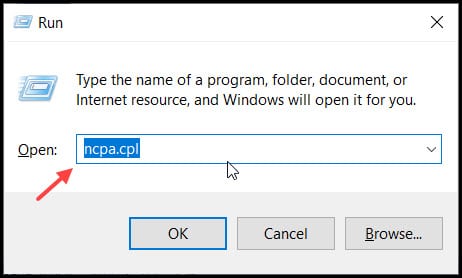
- Press Windows + R to open the Run utility box.
- Type or copy-paste the ncpa.cpl in the Run command box and hit the Enter button.
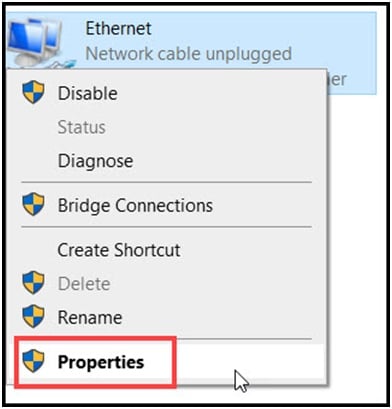
- Right-click on the Ethernet option and then click on Properties.
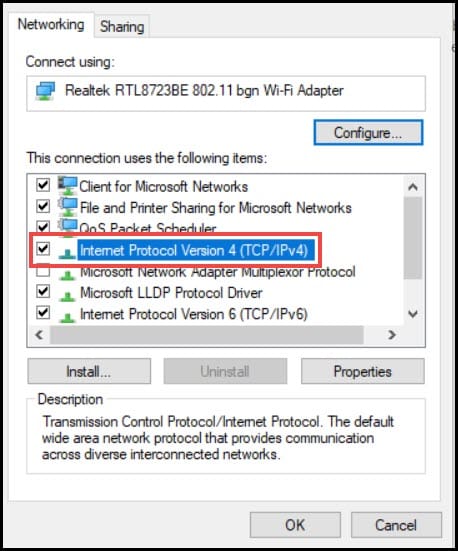
- Double click on the Internet Protocol Version 4 (TCP/IPv4) option to open the Internet Protocol Version 4 ( TCP/IPv4) properties window.
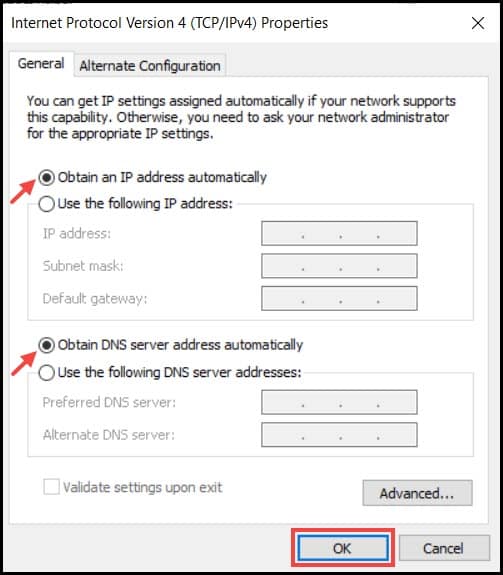
- Next select the Obtain an IP address automatically and Obtain DNS server address automatically options and click on Ok.
If the error persists after finishing this process, try the following:
- Open the Internet Protocol Version 4 ( TCP/IPv4) properties window and click on the Use the following DNS server addresses option.
- Enter the address as (8.8.8.8 / 8.8.4.4).
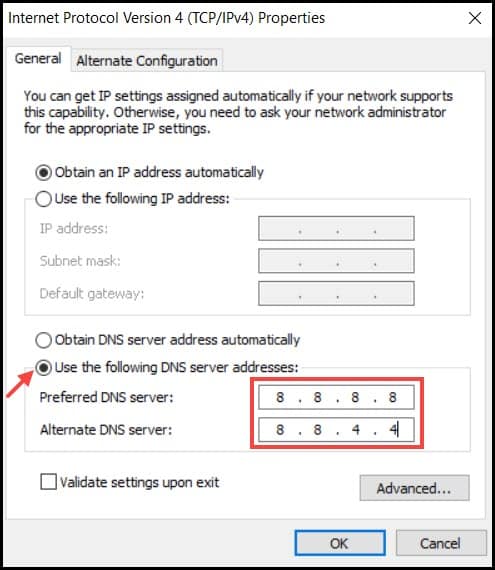
- Click on Ok to complete the process. Now, restart your PC and restart the Update.
4. Reset Network Settings
If the above-mentioned solutions couldn’t solve the issue, then try to reset your network settings.
To do so, follow the steps below:
- Type cmd on the Windows search bar and right-click on the first displayed option. Select Run as administrator.
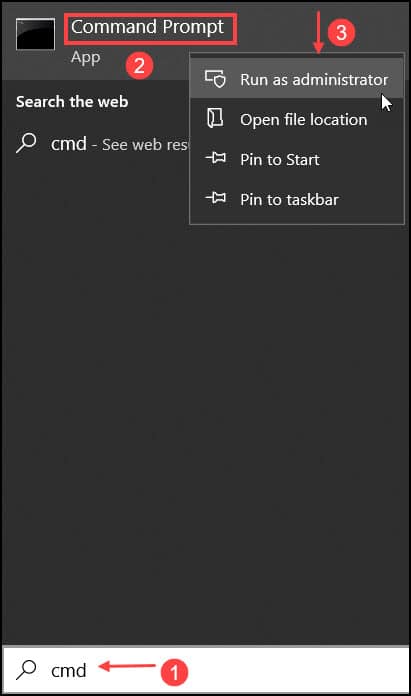
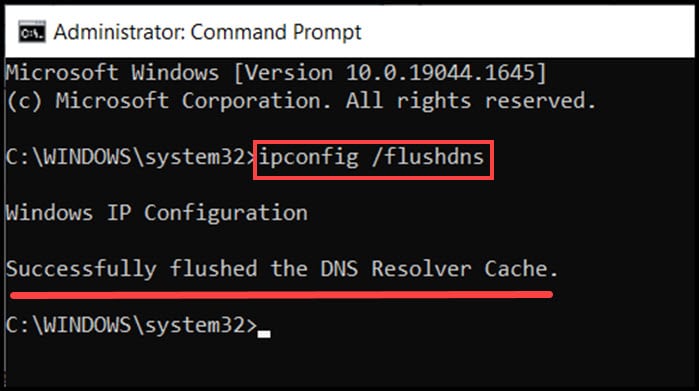
- In the Command Prompt window, enter the following commands and hit Enter each time:
ipconfig /flushdns
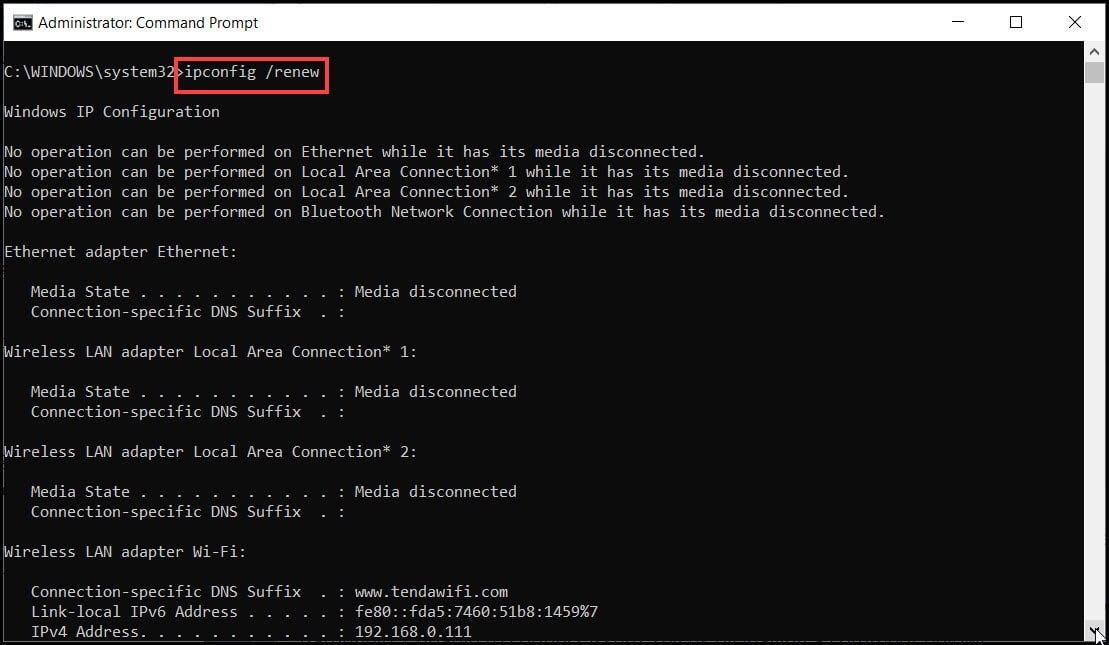
ipconfig /renew
ipconfig /registerdns

Finally, restart your PC and connect to the Warzone update program. Check if the issue is resolved, otherwise go to the next solution.
5. Clear The Cache
If the game is overloaded with the cache files then you might be stuck in between updates.
To clear the cache, follow the steps below:
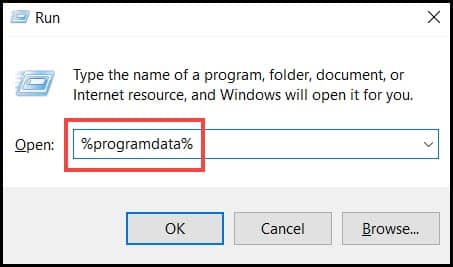
- Exit the game. Press Windows + R from the keyboard and open the Run utility.
- Type or copy-paste %programdata% and hit the Enter key.
- After the folder opens, locate to the Battle.net folder and Delete it.
Now, launch your game and check the problem is resolved.
6. Disable Firewall
Sometimes the Firewall can block the game’s functionality.
So, you can temporarily disable the Firewall and check if that resolves the issue.
To do so follow the steps:
- Type Control Panel on the Windows Search bar and select the first option.
- Now, navigate to the Windows Defender Firewall option from the list and click on it.
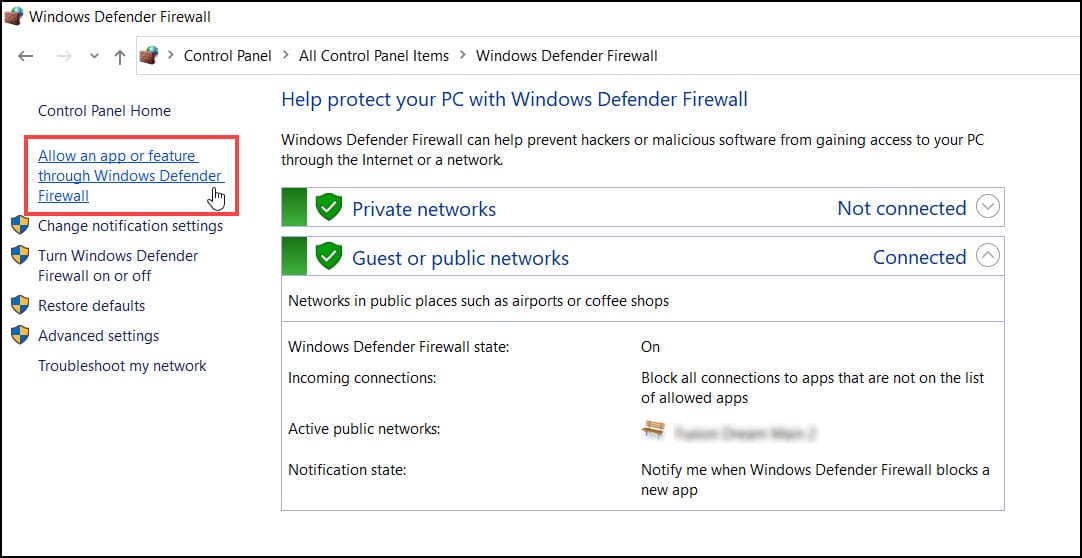
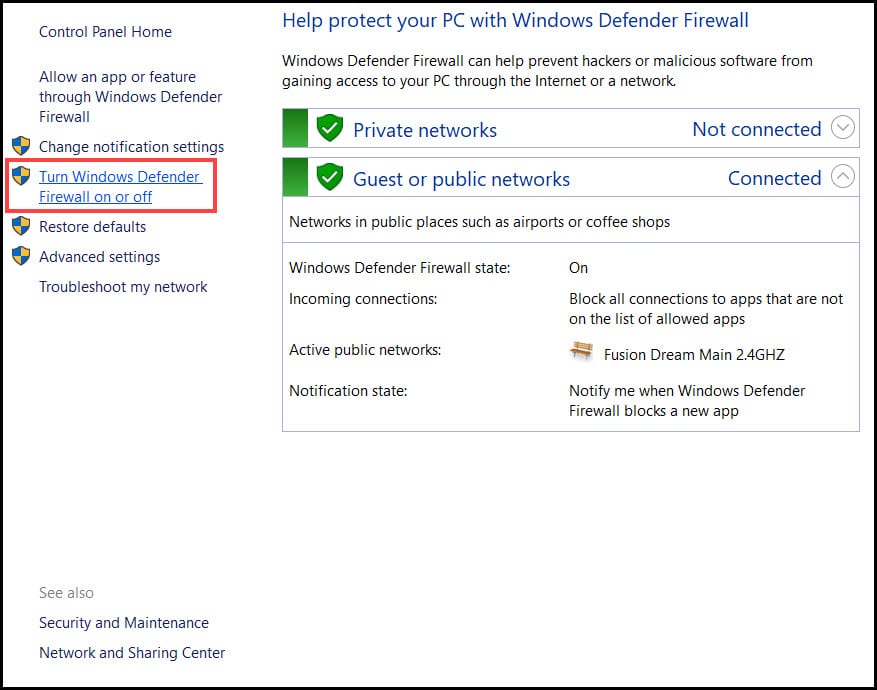
- Click on Turn Windows Defender Firewall on or off option from the left panel.
- From the next page, click the Turn off Windows Defender Firewall (not recommended) for both network settings.
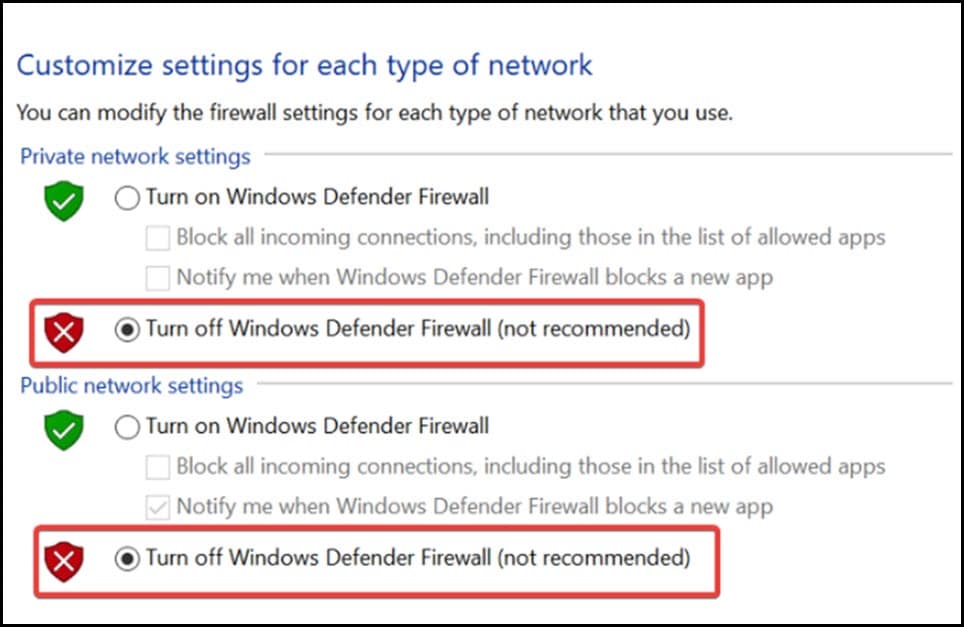
Restart the PC and check the issue is resolved and now try to update Warzone again.
9. Use VPN
Use a VPN when you are stuck in between the CoD Warzone update.
VPN not only protects your original location and IP address, but also helps you to connect to the game servers.
There are several VPNs available in the market. So, you can pick one as per your preference.
Install the VPN application in your system and connect it with a VPN server. This should resolve the problem.
Conclusion
Hope after performing the steps given in this article, you now know what to do when Warzone is stuck on checking for updates.
Let us know in the comments section which procedure worked for you.
Feel free to ask us about any kind of tech-related issue and we will revert soon with solutions.
Leave a Reply