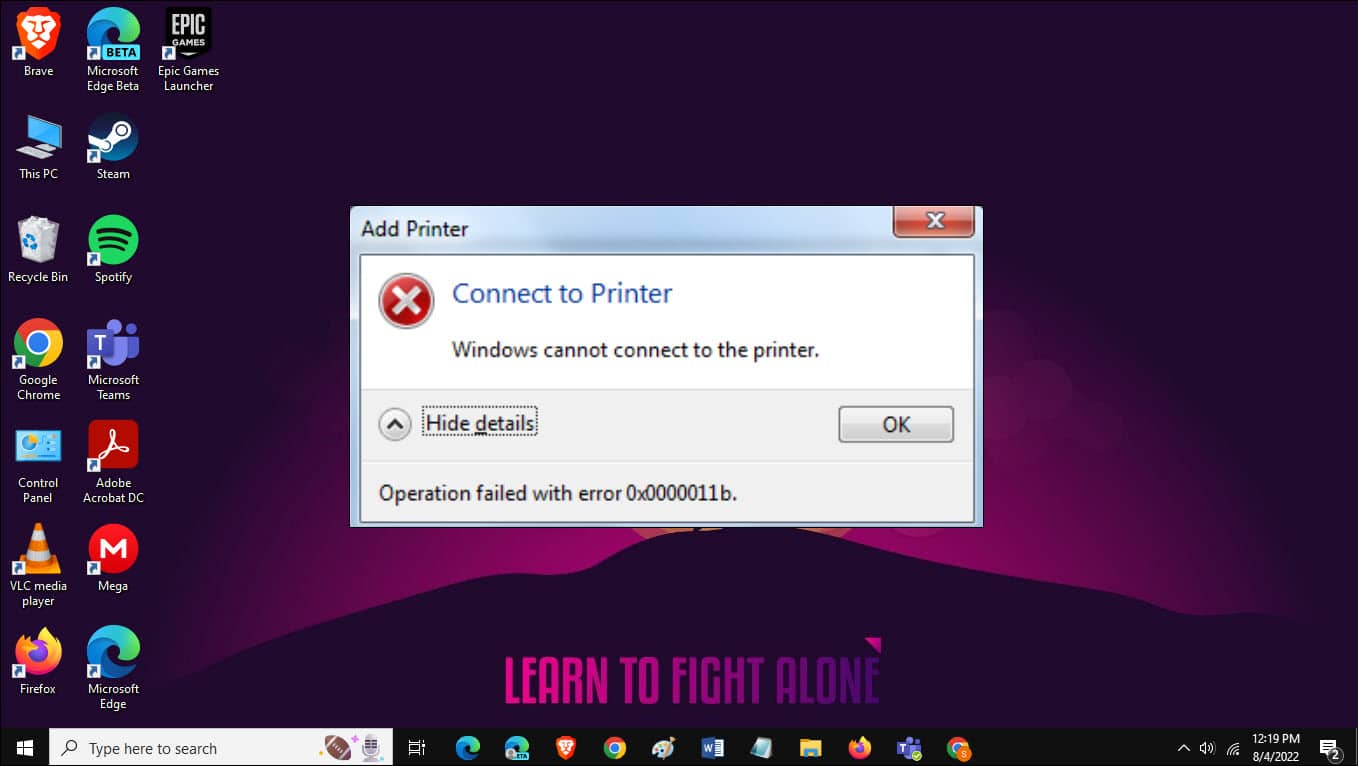
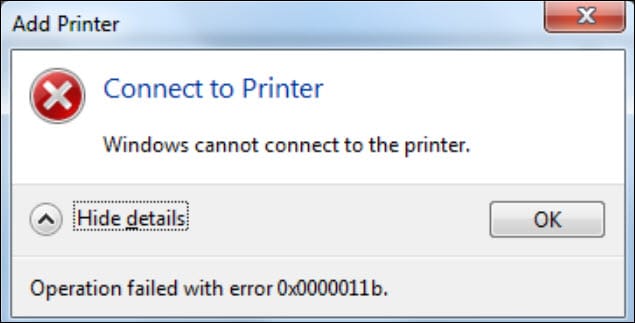
While connecting the printer over the network, many users encounter operation failed 0x0000011B error.
The issue started after Windows released some security patches for both Windows 10 and 11 versions.
So, if you are facing the same issue, then follow the troubleshooting steps given in this article to fix it.
Also read: What Is Printer Fuser And When Should You Change It?
How To Fix The Operation Failed 0x0000011B Error?
Contents
Follow the instructions below when you get the 0x0000011B error while trying to connect the printer over a network.
1. Run The Printer Troubleshooter
Windows have an in-built printer troubleshooter which detects and fixes such issues.
To run the printer troubleshooter, follow the steps given below:
- Press Windows + I to open Settings.
- Click on the Update & Security option from the list.
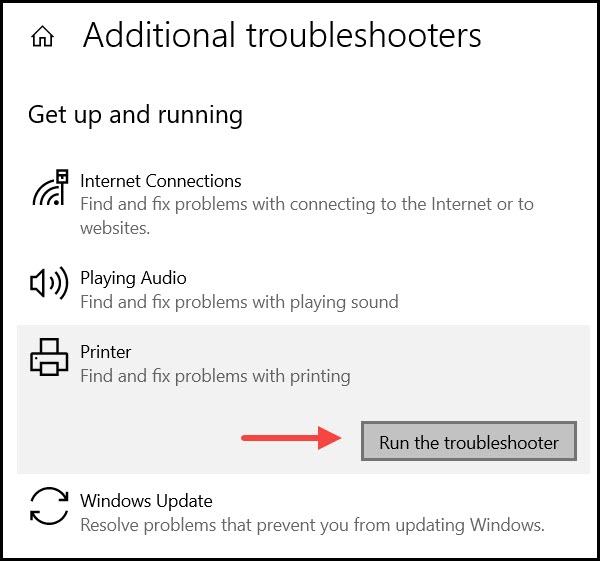
- From the left panel, select Troubleshoot. Next click on Additional troubleshooters.

- Choose the problematic Printer from the list and click on the Run the Troubleshooter option.
- Follow the on-screen instructions to complete the process.
2. Add Printer Manually
You should add the printer manually if you are getting the printer error repeatedly. Follow the steps below to do so:
- Press the Windows + I to open the Windows Settings menu.
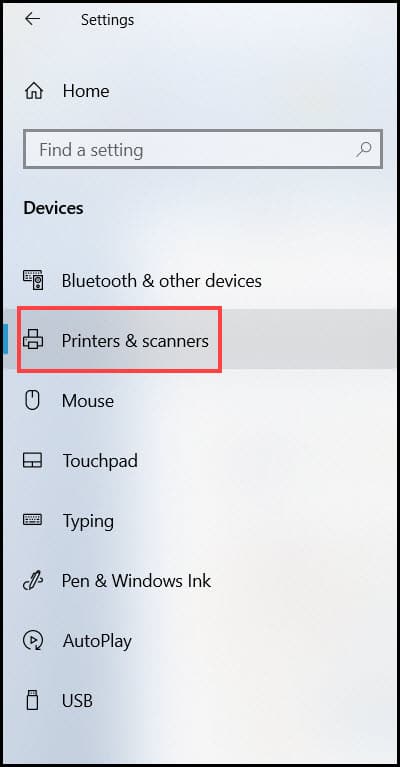
- Select Devices from the list.

- Now, from the left panel select the Printers and Scanners option.
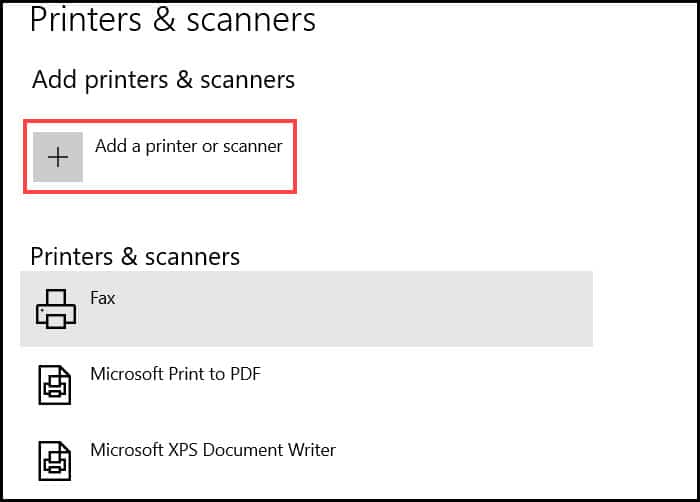
- Click on the Add a printer or scanner option from the right panel.
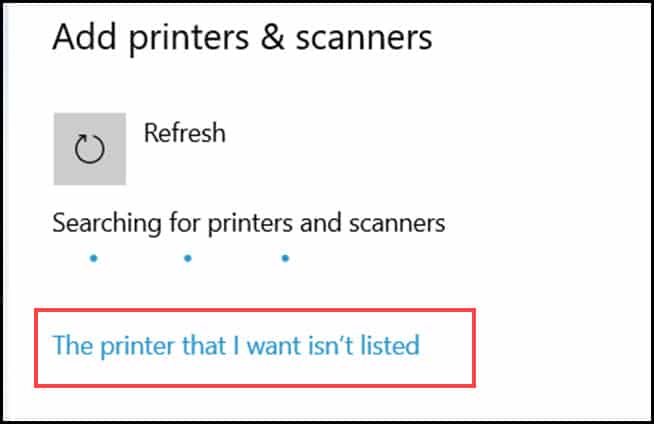
- Select The printer that I want isn’t listed option.
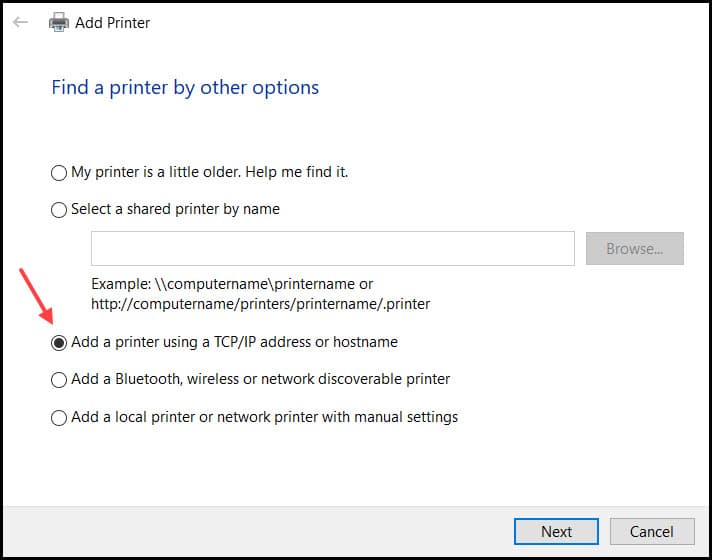
- Choose the Add Printer
- Select the Add a printer using a TCP/IP or hostname option from the list and click on the Next button.
- Enter the IP address and port name in the next Window and click on the Ok button to save.
- From the next menu, select the manufacturer’s name and device and click the Next button again.
If your printer is not listed here, then click on the Have Disk option.
- Finally, choose a name for the local printer driver and click on the Next button again.
Wait for the process to complete and after that the problem should be fixed. If not then go to the next step.
3. Update Windows
If your system is not updated to the latest version, then your printer can show these errors.
So, update your Windows follow the steps below:
- Open Windows Settings.
- Select Update & Security from the list of options.

- Click on Windows update and then click on Check for the updates to search for the latest patches.

If there is any update available then you’ll be notified, click on the Download and install buttons to initiate the process.
Restart the PC and now check if the printer issue is solved.
4. Uninstall Problematic Windows Update
If the problem starts after you have updated Windows, then rollback the last update and see if that fixes the issue.
To rollback Windows updates from the system, follow the steps given below:
- Press Windows + R to open the Run utility.
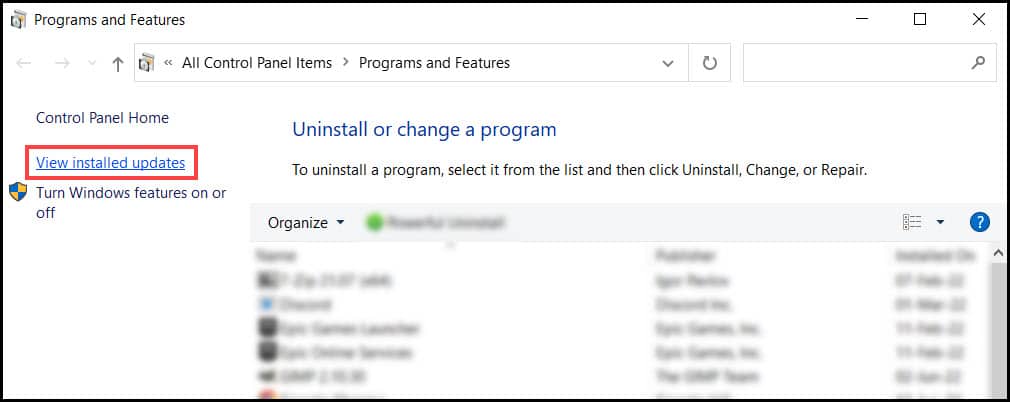
- Type appwiz.cpl in the Run box and hit the Enter key.
- Click on the View installed Updates option from the left panel.
- Now search for the update after which you are getting the printer error.
- Right-click on it and select the Uninstall button to remove it from the system.
- Follow the on-screen instructions to complete the process and then restart the PC.
5. Edit Registry
You can also fix the printer 0x0000011B error by tweaking the registry. To do so, follow the instructions below:
- Open Run again and type regedit in the Run box. Hit the Enter key to open the Registry Editor.
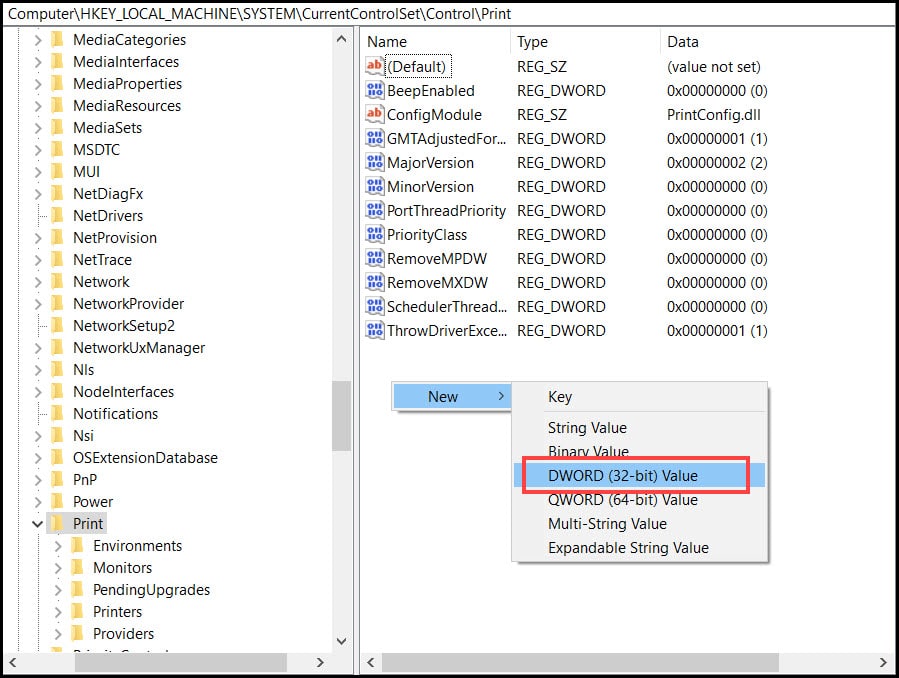
- After the registry editor opens, navigate to the following key:
HKEY_LOCAL_MACHINE\System\CurrentControlSet\Control\Print
- Now, right-click on the right panel and select New and then DWORD (32-bit) Value.
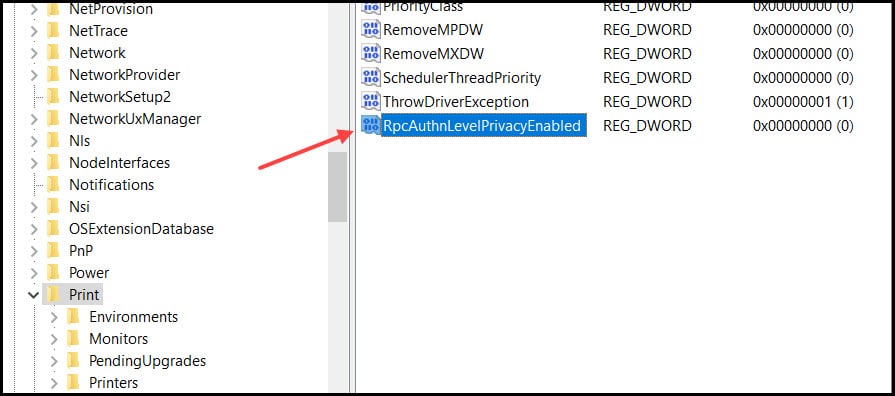
- Name it as RpcAuthnLevelPrivacyEnabled and press the Enter key to save.
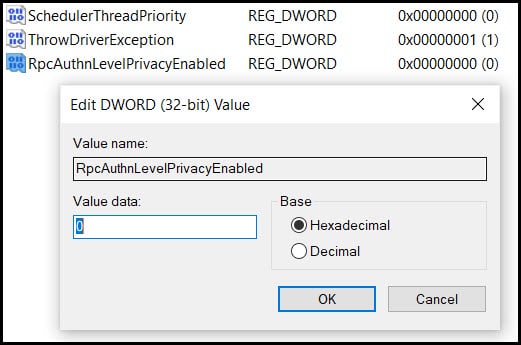
- Now double-click on the newly created value.
- Once the Edit menu opens, select the base value as Hexadecimal and value data as 0. Click Ok to save the changes.
After the modification completes, restart your PC and see if the problem is solved.
6. Reinstall The Printer Driver
If you are still getting the same printer error, then try reinstalling the printer driver.
Follow the instructions given below to do so:
- Open Run and enter devmgmt.msc in the dialog box. Hit Enter.
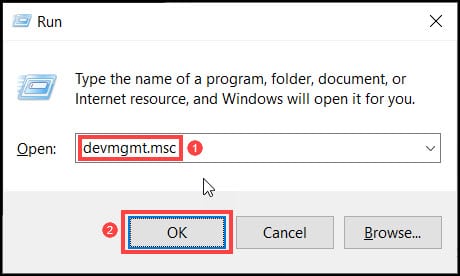
- After the Device Manager opens, select the problematic Printer from the list.
- Right-click on the printer and select the Update driver option.

- Select the Search for automatically for drivers option from the list.
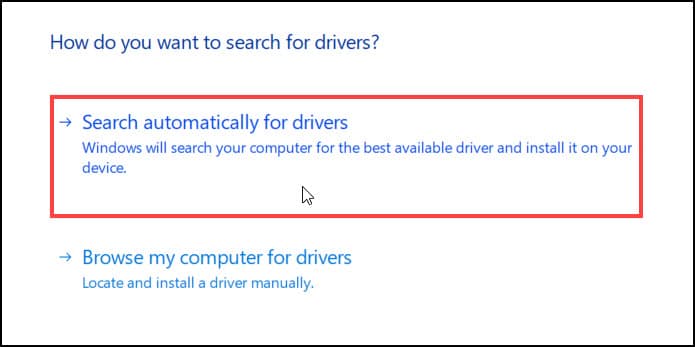
Follow the on-screen instructions to complete the process.
After the process completes, restart the PC and check if the problem is fixed.
Frequently Asked Questions [FAQs]
1. Why Can’t I Connect To Printer And Instead Get Operation Failed Error 0x0000011B?
Some users reported that after a newly released update, Windows cannot connect to the printer and shows a 0x0000011B error. This error is related to network printing.
2. How Do You Fix Windows Cannot Connect To The Printer issue?
You can easily repair the issue by updating the printer driver, checking printer settings, updating Windows, editing the registry, and manually adding the printer.
3. How Do I Fix Error Operation Failed With Error 0x0000011B?
To fix the error 0x0000011B edit the registry option. Navigate the Print element under the control section of the registry and add the DWORD RpcAuthnLevelPrivacyEnabled value as 0, then restart the print spooler.
Final Words
So now you know how to repair the printer 0x0000011B error.
If you still have any queries regarding the issue, ask us in the comments section below.
Leave a Reply