If you want to disable or completely get rid of Xbox Game Bar on your Windows 11 PC but don’t know how to, follow this guide.
We have already covered how to do it for Windows 10, so here we will only focus on Windows 11.
How To Disable Xbox Game Bar On Windows 11?
Contents
If you aren’t a gamer and don’t use the Xbox Game Bar, then removing or uninstalling it won’t lead to any major issues.
Now, without wasting any time, let’s dive deep into how to disable it.
1) Disable Through Settings
This is one of the easiest and most convenient ways to disable the Xbox Game Bar on your Windows 11.
So now we are going to disable Xbox Game Bar from settings and this is how you can do it:
- First, you need to open Settings with the help of your Search menu.
- Then, from the left panel, open Gaming.
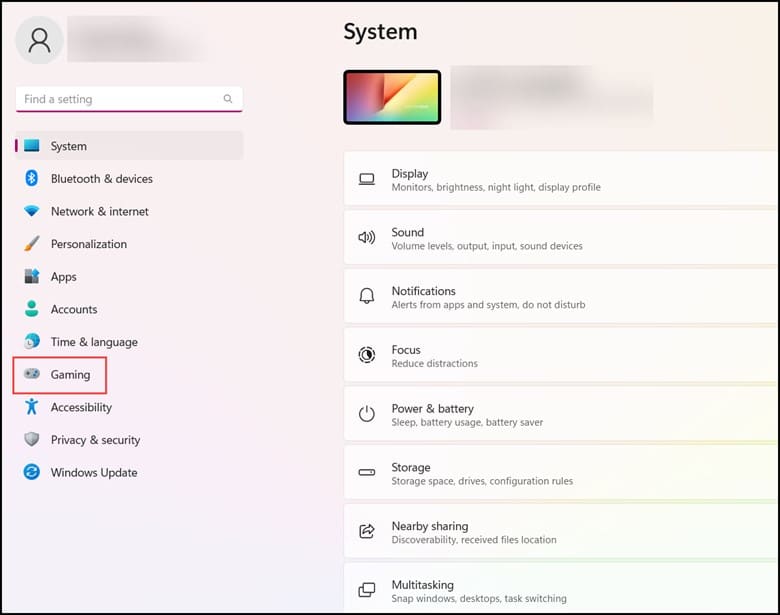
- Next, click on Xbox Game Bar and then turn off the Xbox Game Bar using this button on a controller.
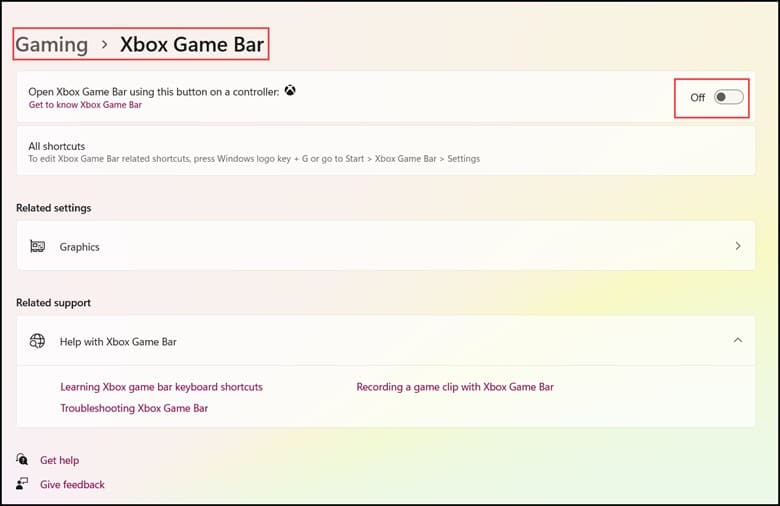
- After you have performed the above step then, check whether the issue still persists.
2) Disable Through Apps And Features
If you want to disable the Xbox Game bar then it that can be done through the apps and features option.
Follow the steps to do it:
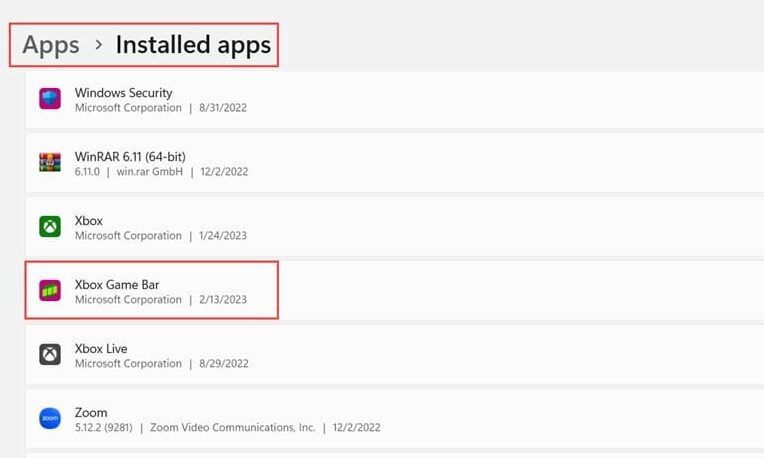
- First, you need to open Settings and then click on Apps from the left panel.
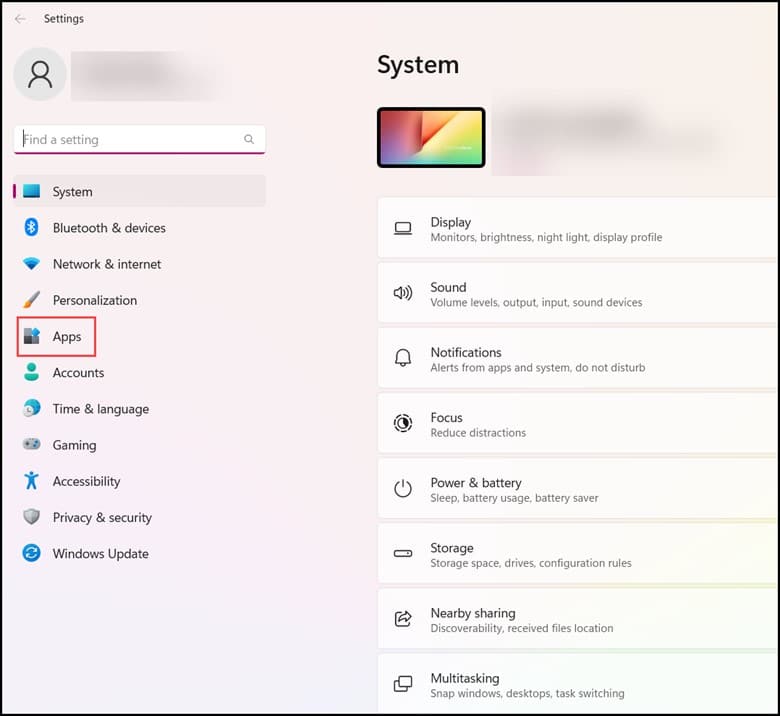
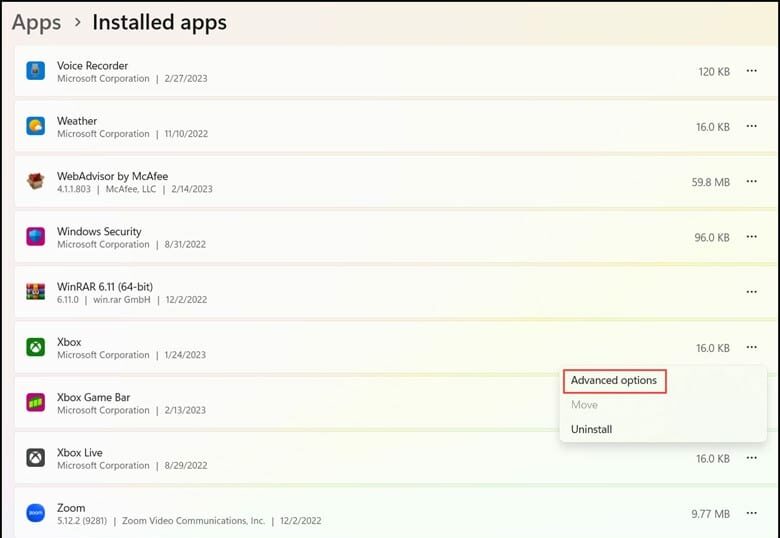
- Next, click on the Installed Apps from the left panel and scroll down to find the Xbox Game Bar app.
- Then, click on the three dots menu and select the Advanced options.
- Search for background app permission, expand the dropdown, and choose “Never.”
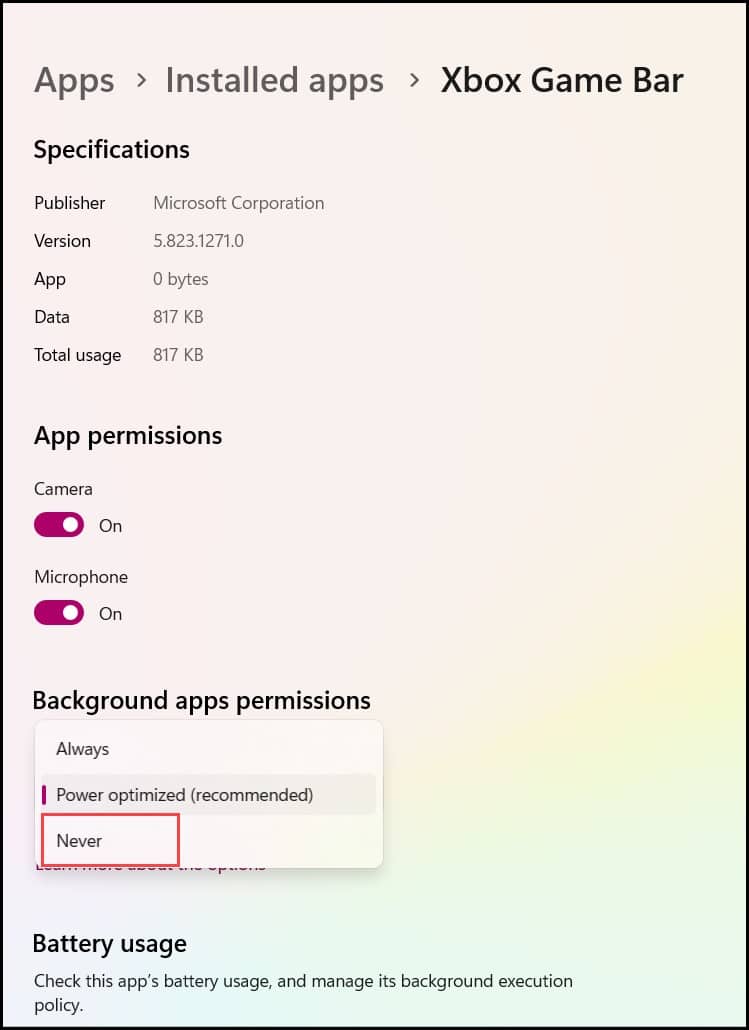
- Scroll down until you find the “Terminate” button, then click on it.
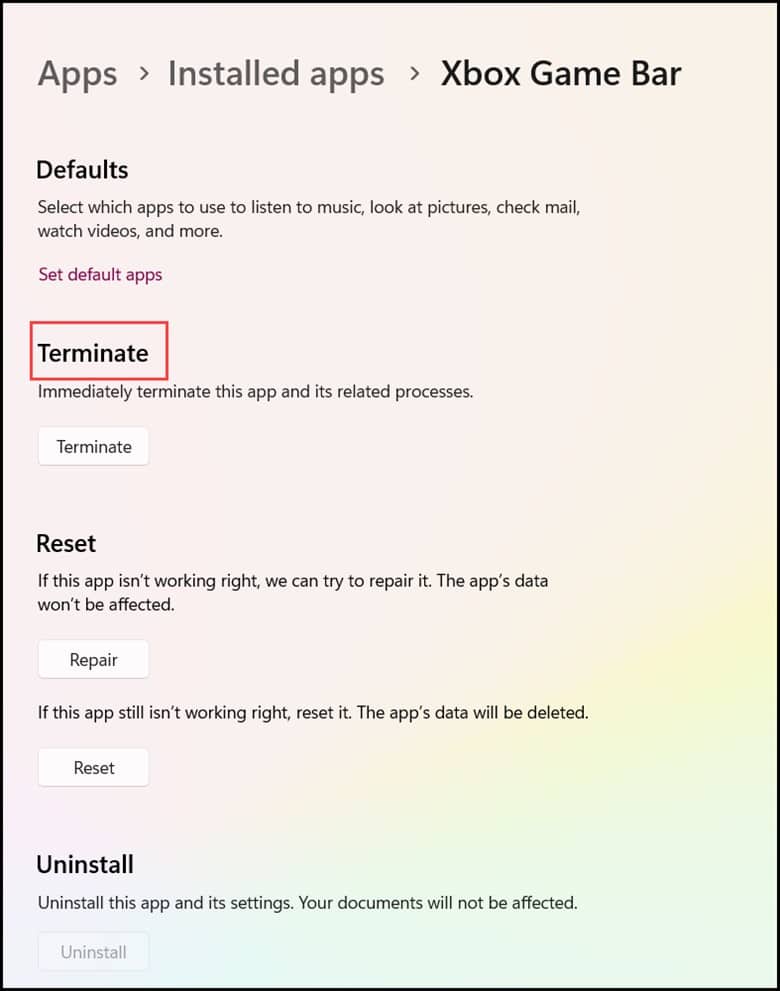
- The moment you do this, it will terminate all the processes related to the App.
3) Disable Through Group Policy Editor
This is the last and final method by which you can also disable the Xbox game pass.
Disabling the Xbox Game Bar app through the Group Policy Editor isn’t a difficult task.
All you need to do is to follow the steps mentioned below:
- First, you need to type “gpedit” in the Windows Search bar and then press Enter.
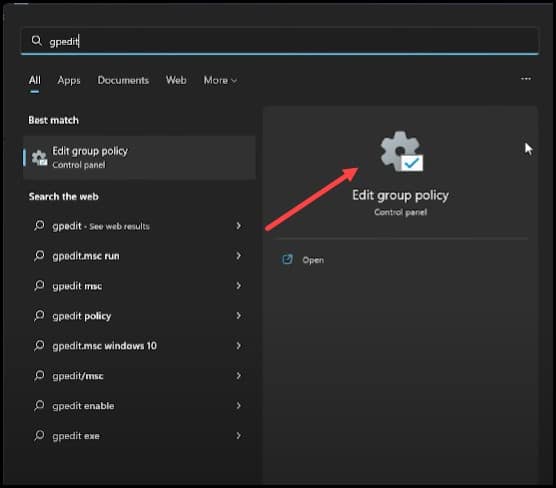
- This particular step is known to open the “Local Group Policy” editor.
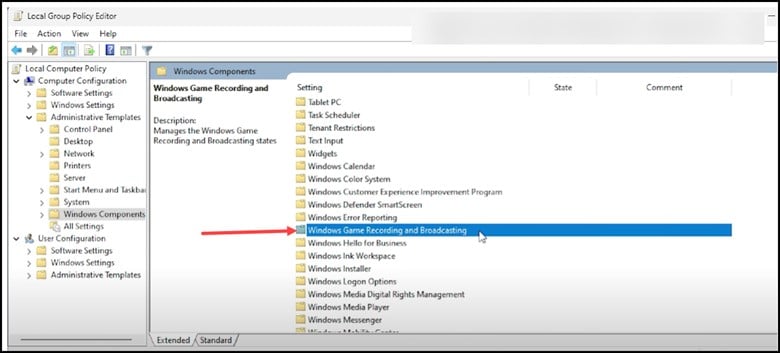
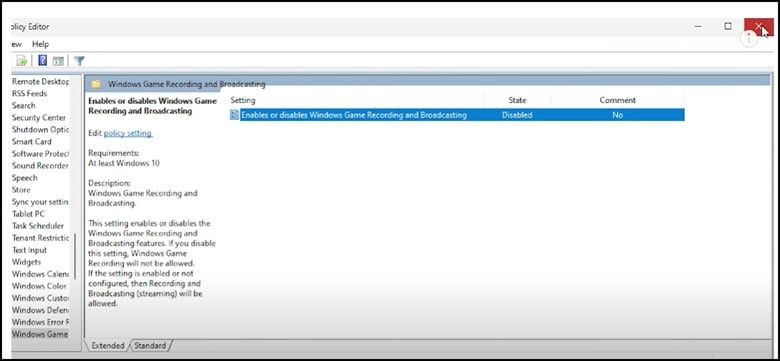
- Next, navigate to Computer configuration and click on Administrative Templates, followed by Windows Components and Windows Game Recording and Broadcasting.
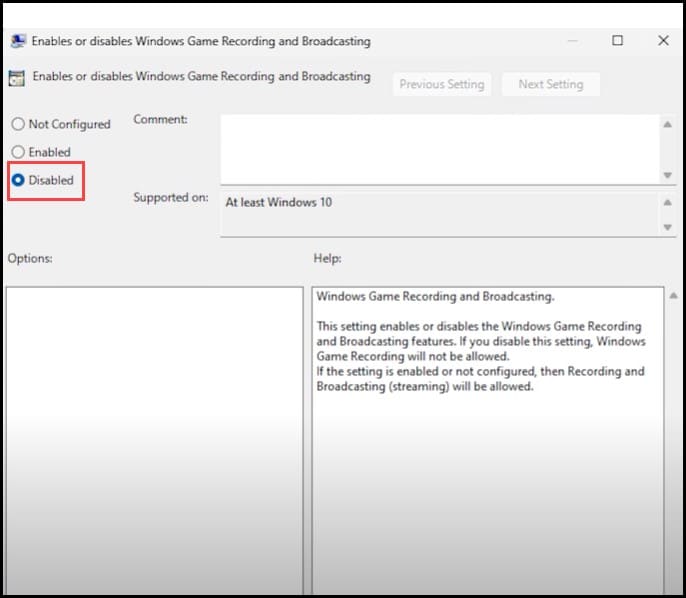
- Then, double-click on Enables or Disables Windows Game Recording and Broadcasting from the right panel.
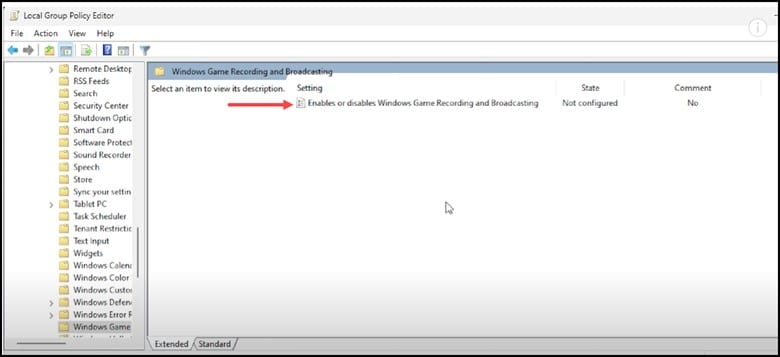
- Next, select Disabled and click on Apply and then OK to save the Changes.
- Exit the local group policy editor window and then restart your PC.
Bottomline
If you still have any concerns regarding this topic then write to us in the comment section below.
We will try our best to address your problem.
Leave a Reply