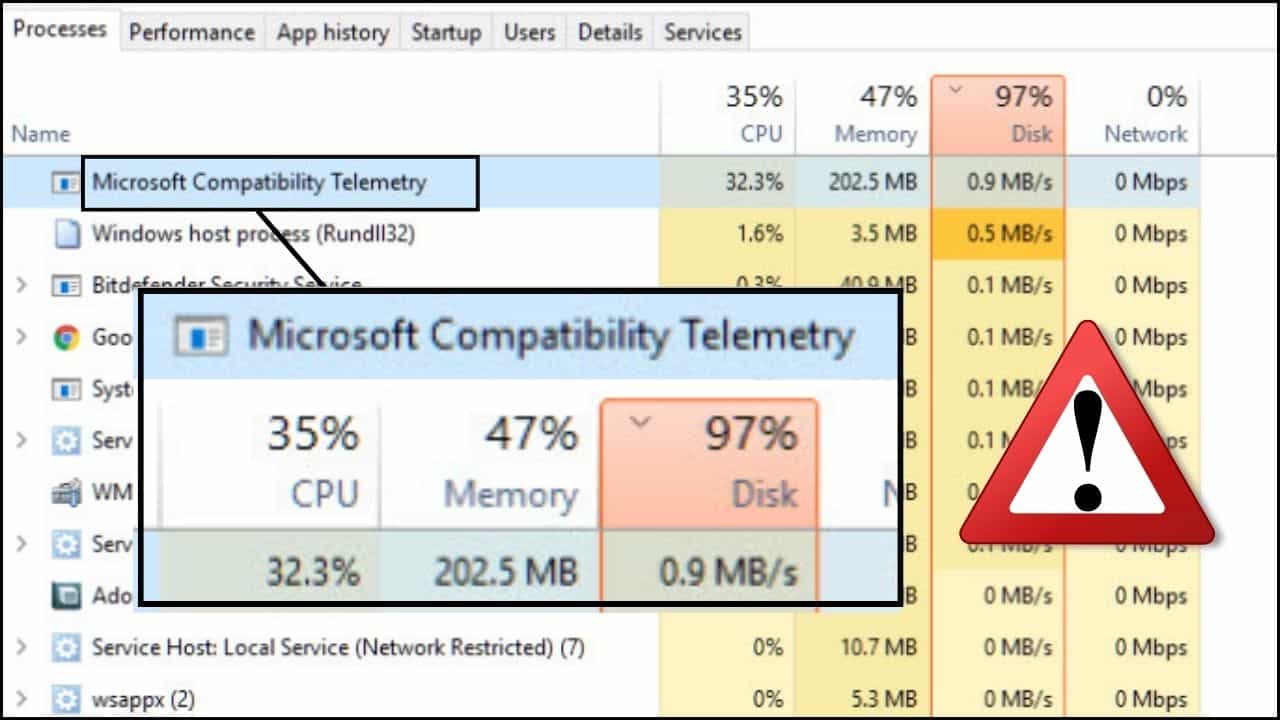
Microsoft Compatibility Telemetry collects and sends the performance & processing data of your Windows to Microsoft.
Windows collect all the performance data and analyzes it. Then it addresses the problems and provides better updates.
Microsoft Compatibility Telemetry process is also known as CompatTelRunner.exe in the system.
This automatic startup process starts at the time you start your system.
Sometimes Telemetry can consume high CPU resources, lagging the system and even crashing other programs.
Here we have shown how to solve the Microsoft Compatibility Telemetry consuming high CPU resources issue. So, keep reading and perform as shown!
How To Reduce Microsoft Compatibility Telemetry High CPU Usage?
Contents
Follow the methods given below to fix high CPU usage from Microsoft Compatibility Telemetry.
1. Check The Windows Settings
To reduce the high CPU usage by the Microsoft Compatibility Telemetry process, disable it from Windows Settings.
Here is how you can do it:
- Press Windows key + I from the keyboard to open Settings.
- Select the Privacy option from the list.

- From the left panel, choose the Diagnostic & feedback option.
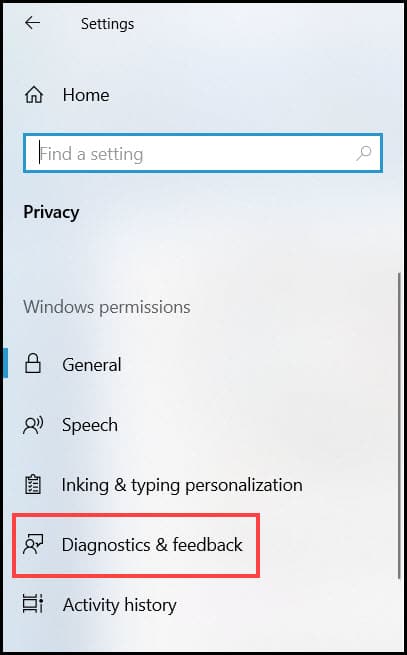
- Next, go to the right panel and check the box for Required diagnostic data under the Diagnostic data option.
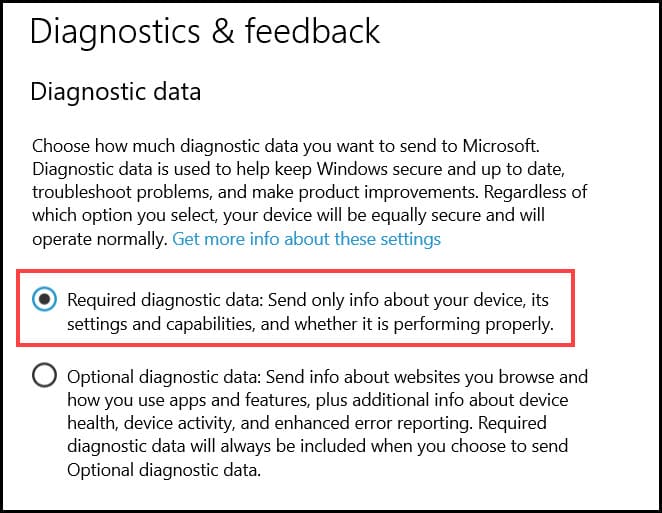
This way, the Microsoft Compatibility Telemetry service will collect limited data and use lesser system resources. If Telemetry still keeps running, then follow this article to completely disable it.
2. Disable Using Task Scheduler
You also need to disable the Microsoft Compatibility Telemetry process from the Task Scheduler. Follow the steps given below to do so:
- Press Windows + R to open the Run utility.
- Type taskschd.msc and press the Enter key to open the Task Scheduler.
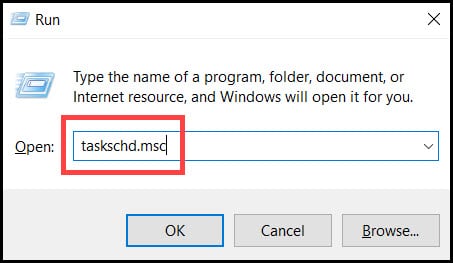
- Navigate to the following path – Task Scheduler Library > Microsoft > Windows > Application Experience.
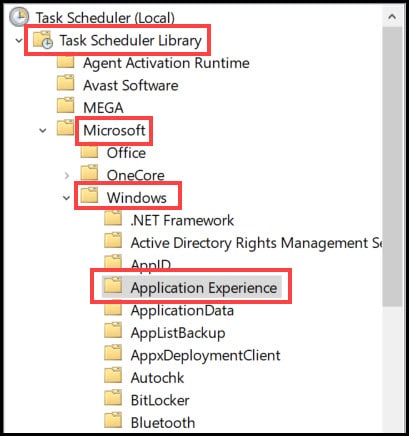
- Now, you’ll find a task called Microsoft Compatibility Appraiser in the right panel.
- Right-click on the task and click on the Disable option.

3. Delete CompatTelRunner Executable
Next you can try deleting the CompatTelRunner.exe file if disabling it using the above methods doesn’t solve the problem. You need to sign in as an administrator to perform the following steps:
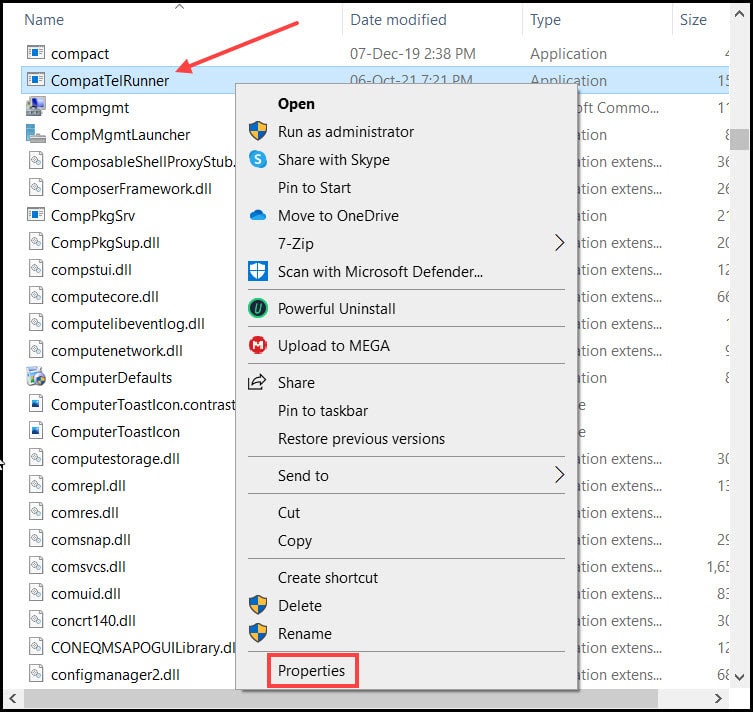
- On the Windows search bar, type CompatTelRunner and right-click on the 1st option. Select Open File Location.

- Right-click on CompatTelRunner.exe and open its Properties.
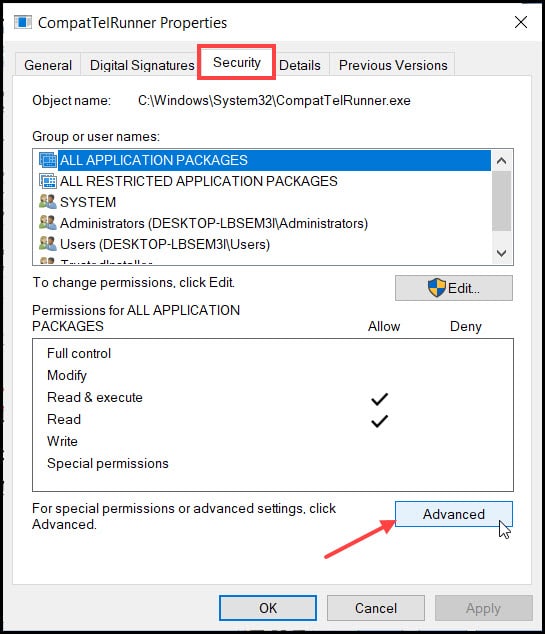
- When the Properties window opens, go to the Security tab and click on the Advanced button.
- Click on the Change button under the Owner section.
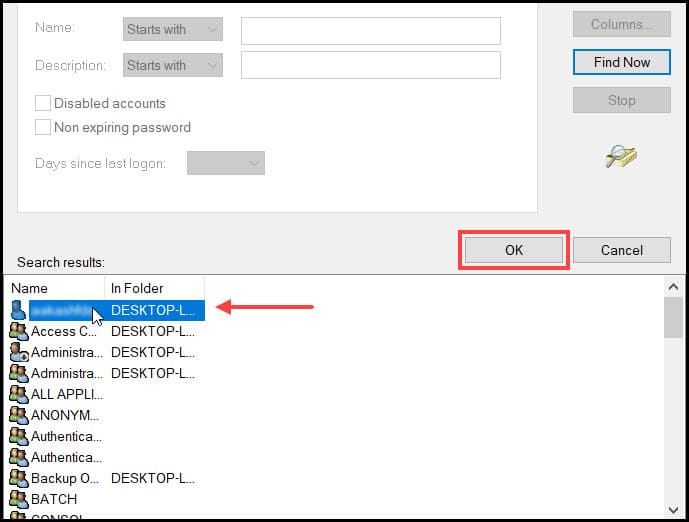
- A new window will open. Click on the Advanced option and then select the Find Now button as shown below.
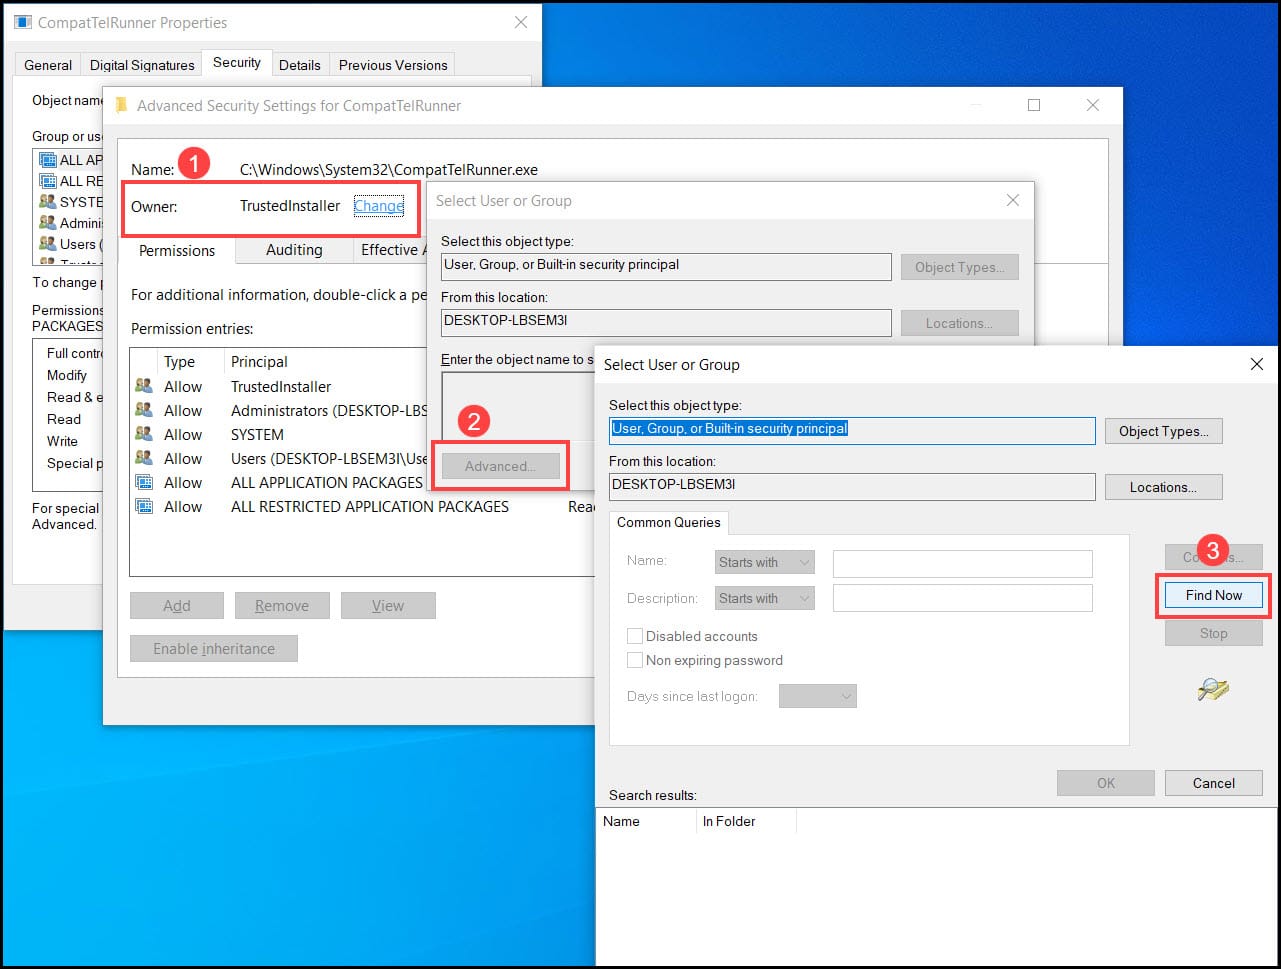
- A list of owners will be displayed. Select the system you are using right now and click on OK.
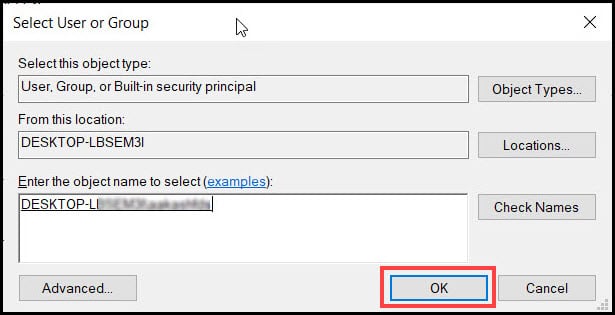
- From the Select User or Group box click on Ok.
- This will open Advanced Security Settings for CompatTelRunner.exe. Click on the Apply button followed by Ok.
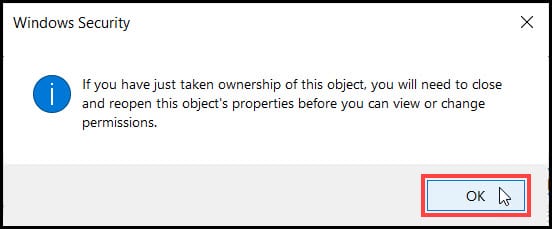
Now, that you have ownership of the file, a warning will pop up. Click on Ok.
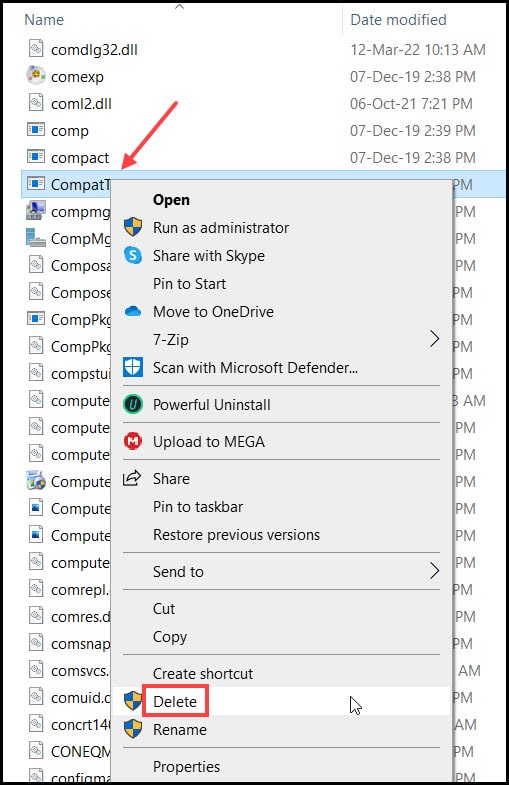
- Close all the windows except the CompatTelRunner file location folder. Select the file, right-click on it and choose the Delete option.
Restart your PC and check if the problem is resolved. If not, then go to the next solution.
4. Disable The Element Using Group Policy Editor
Follow the methods to disable the Microsoft Compatibility Telemetry using the Group Policy editor:
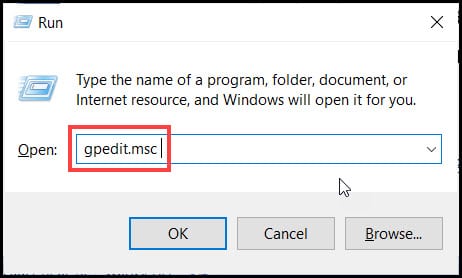
- Open the Run utility and enter gpedit.msc in the dialog box. Hit the Enter button.
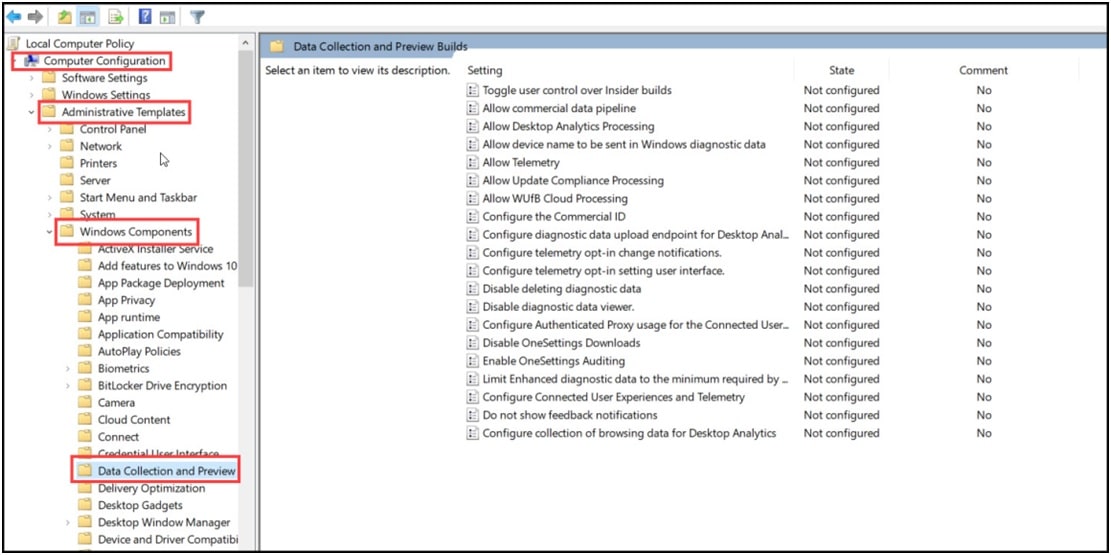
- Follow the path to open the Telemetry service:
Computer Configuration > Administrative Templates > Windows Components > Data Collection and Preview Builds
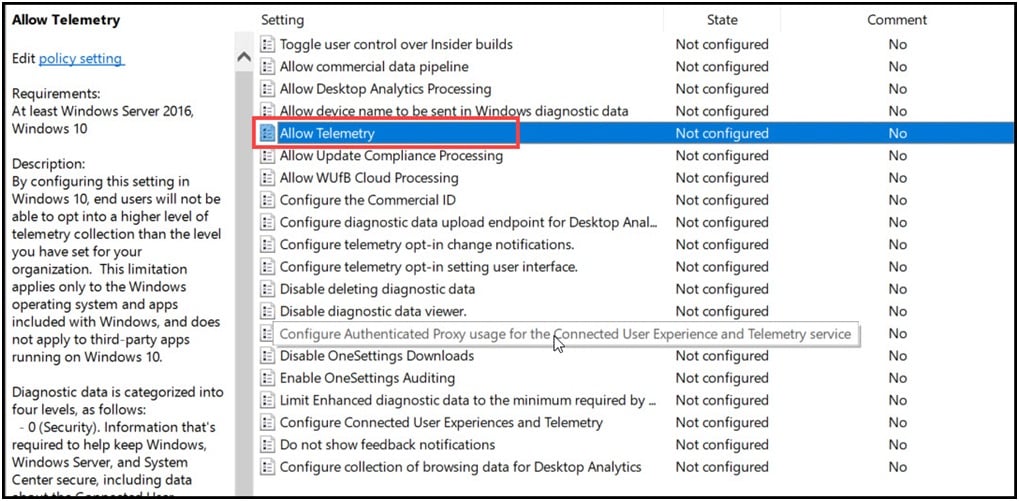
- Here you will find Allow Telemetry option.
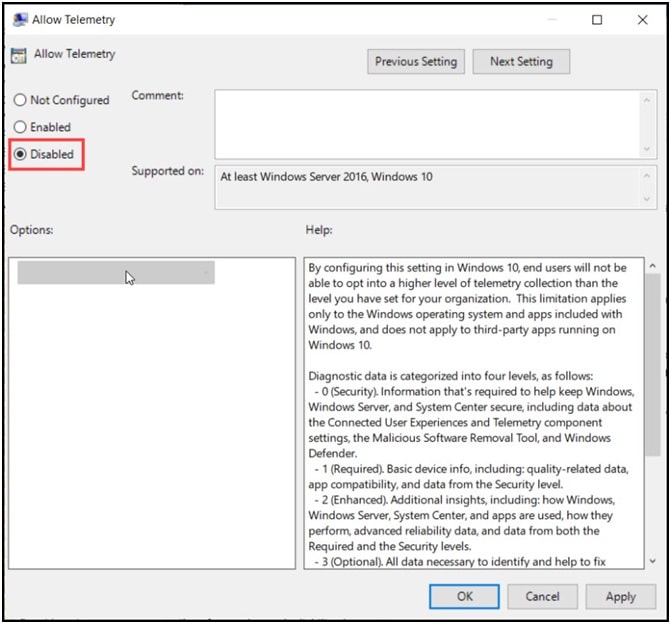
- Double-click on the element and select the Disabled option from the next Window.
- Click on Apply and then Ok to save the changes.
5. Run CHKDSK
High CPU usage can also be caused by memory corruption. Run the chkdsk scan and see if it finds anything. Chkdsk scan will check fir corruption in the memory and fix it. Here is how you can do it:
- Type cmd on the Windows search bar and right-click on the 1st option. Choose Run as administrator.
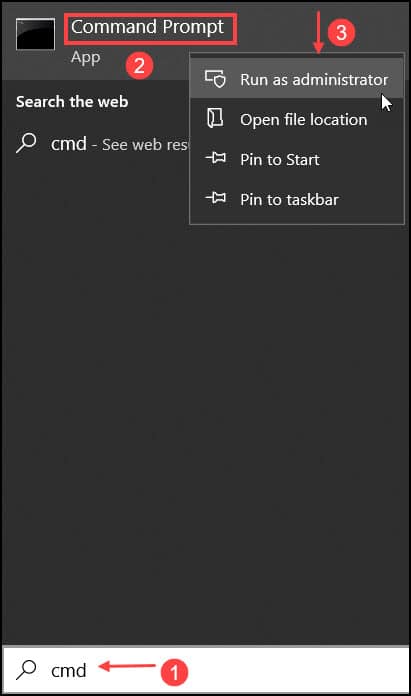
- In the elevated Command Prompt window, type or copy-paste the following command. Hit the Enter button after the command.
chkdsk C: /f/r/x
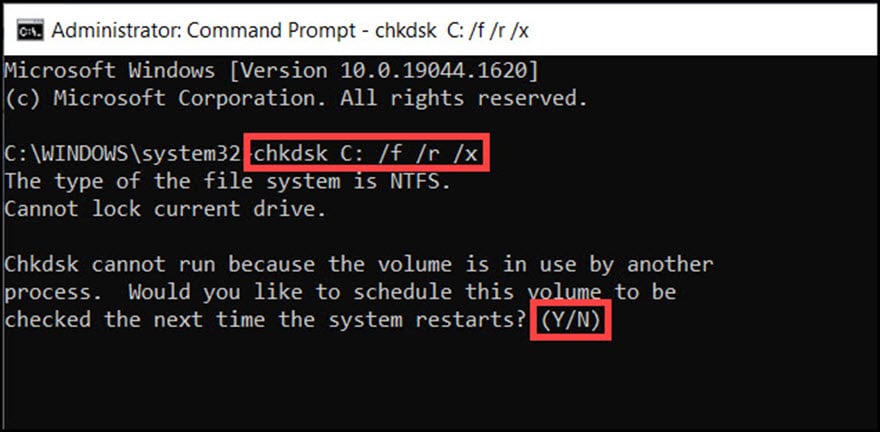
- Press Y from the keyboard to schedule the scan after the PC restarts.
- Restart the PC to initiate the check.
Here, letter C represents the drive letter, so replace it accordingly with the systems drive letter.
6. Update Your Windows
The outdated version of the OS can also trigger these kinds of problems, so check if there is any update available and install it.
Follow the steps below to do so:
- Press Windows + I keys to open the Windows Settings.
- Select Update & Security.

- Click on the Check for updates option to search for the latest update of your system.

- If there is any update available, download and install it.
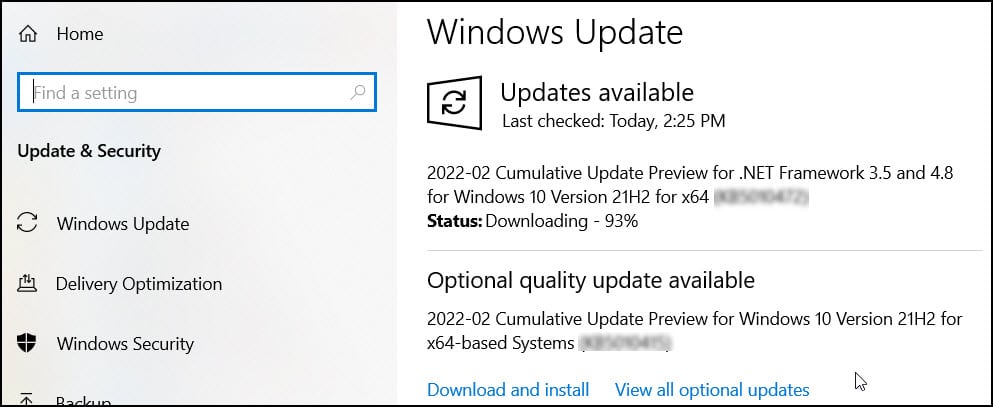
Complete the process and restart your PC.
Conclusion
So, this is how you fix Microsoft Compatibility Telemetry High CPU usage problem.
If you have queries regarding this topic, ask us in the comments section provided below.
Stay connected and feel free to share your thoughts with us.
Leave a Reply