Maintaining different networks that you have accessed in your computer can really become an issue, especially when Windows will save all the different networks connected to as Network 1, Network 3, Network 8 and other similar names.

It can get really hard to distinguish which one is the home network and which one is the work network. It would have been very simple if you could change their names as you like, wouldn’t it? Well in this article, we will discuss how to easily change network name in Windows 10.
Here Is How You Can Change Network Name In Windows 10
Contents
You can rename network in Windows 10 via two easy methods:
- Changing from the Registry files.
- Changing from the Local security policy.
Solution 1: Change Profile Name In Registry Files
To change profile name in registry files, follow the steps given below:
- Press the Windows + R keys to open the Run utility.
- Type regedit and press Enter. This will open the Registry Editor.

- Navigate to the address given below in Registry Editor:
HKEY_LOCAL_MACHINE\SOFTWARE\Microsoft\Windows NT\CurrentVersion\NetworkList\Profiles
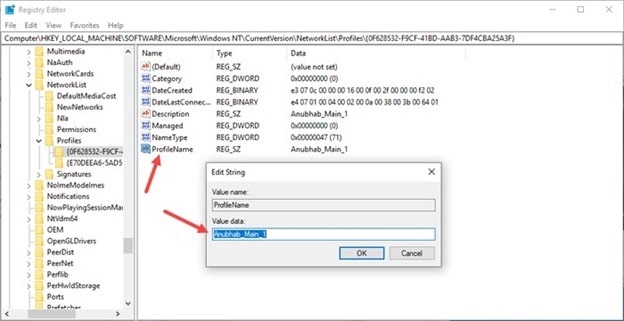
- Double click on the ProfileName string value and change the name value to what you prefer.
- Continue doing this for all the GUIDs.
Solution 2: Change The Name From The Local Security Policy
To change the name from the Local Security Policy, follow the steps given below:
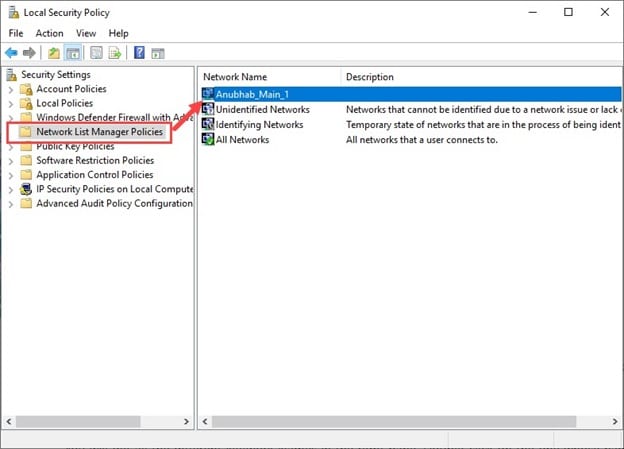
- Open the Run utility again.
- Type secpol.msc and press Enter to open the Local Security Policy.

- Select the Network List Manager Policies option.
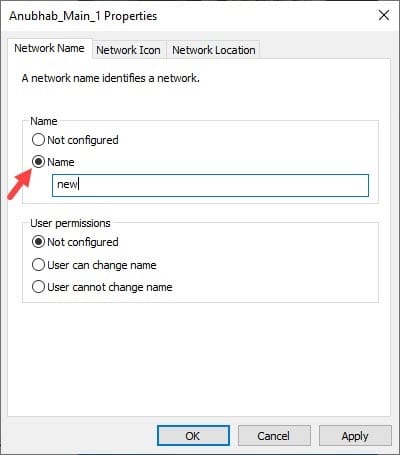
- Then, double click on the Network’s name.
- Select the Name option and type the name you prefer.
- Finally, click on Apply and OK to save the changes.
Wrapping Up
So, we have come to the end of this post and now you know how to change network name in Windows 10 easily. You can also use the above solutions to change ethernet network name. Don’t forget to share your views on this article in the comment section below.
Leave a Reply