TRIM is one of the essential features of an SSD that keeps its top performance and ensures the drive lasts much longer. If you want to enable this feature on Windows, you are in the perfect place.
Here I have given a step-by-step guide on how to enable TRIM on Windows. So, let’s get started.
What Is TRIM and What Does It Do?
Contents
Solid State Drives, or SSDs, redefined the PC experience for all of us. It made our PC at least four times faster, changing the entire perspective of using PCs and even having the capability of reviving old computers.
SSDs need optimizations, and TRIM was designed to keep the SSDs at optimal performance throughout their lifespan.
It notifies the SSD on which data blocks are not in use and can be wiped safely to make it writable again. Doing this keeps the SSDs in their optimal state and ensures they last longer.
How To Enable TRIM
Enabling TRIM is simple and can be done by running some simple commands. Here is how you can do it:
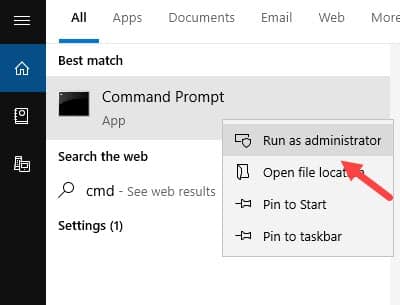
- Type Command Prompt in the search bar and right-click on the top result.
- Select the Run as administrator option.
- Type the following command and press Enter to run it:
fsutil behavior query DisableDeleteNotify
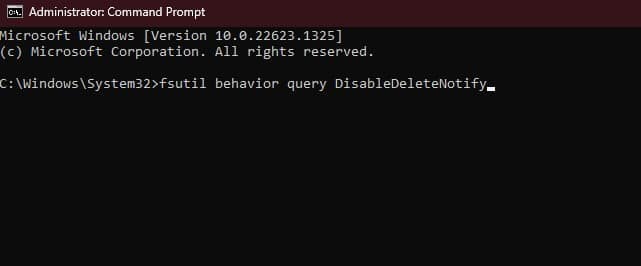
If you get the result 0, it means TRIM is already enabled on your PC. If it provides 1, then it means TRIM is disabled.
- When you see that TRIM is disabled on your PC, run Command Prompt as an administrator again.
- Type the following command and press Enter to run it:
fsutil behavior set DisableDeleteNotify 0
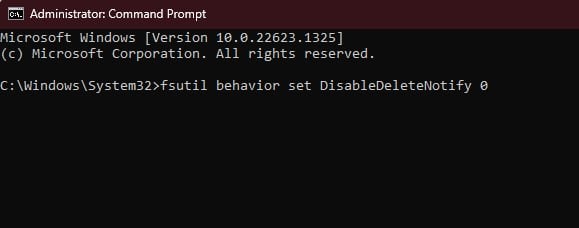
Doing this will enable TRIM on your PC. If you want to disable TRIM, then run the following command instead:
fsutil behavior set DisableDeleteNotify 1
Wrapping Up
So, that’s it. If you have any questions regarding this topic, ask us in the command section, and we will try to help you.
Leave a Reply