Fed up with entering and re-entering the user ID and password to log into your PC? Then, you are reading the right article.
If you value time-saving features, then Automatic Login is what you need to simplify your computing experience.
In this detailed write-up, we will explore how to set up and enable Automatic Login in Windows 11.
Also read: Windows 11 Is So Much Better After One Year Of Its Release
What Is The Auto Login Feature In Windows 11?
Contents
The Auto Login features in Windows 11 give the liberty to users to access the computer without putting any login credentials or passwords.
This time-saving feature eliminates the need for repetitive credential input and allows you to start your computing experience easily and efficiently.
You can bypass thus the traditional login screen and will be able to access your desktop.
It is beneficial if you have a long password assigned to your account and detaste entering it each time in your system.
But if you share your system with multiple users or if your system isn’t secured, then you aren’t advised to enable this feature.
Also, enabling this feature will put your privacy and data stored on your PC at risk. Read through to learn how to do it.
How Can I Enable Automatic Login In Windows 11?
Go through the steps below to enable Automatic Login in Windows 11 only if your system is secured.
Execute each step as explained.
1) Use Windows Settings
The Auto Login feature in Windows 11 can be enabled by taking the help of Windows Settings.
Here are the general steps for enabling it:
- From the Windows Start button, select the Settings option.

- Now, select Accounts from the left pane and click on Sign-in options.
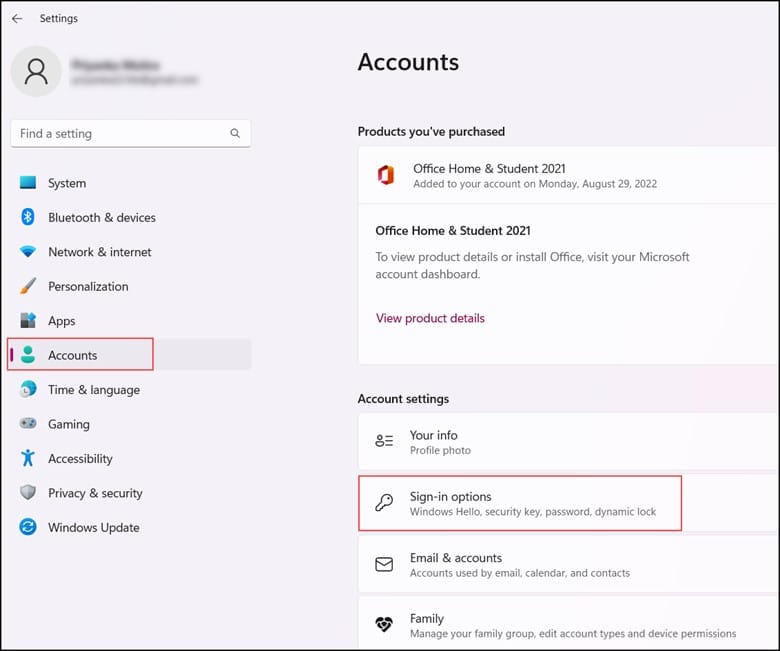
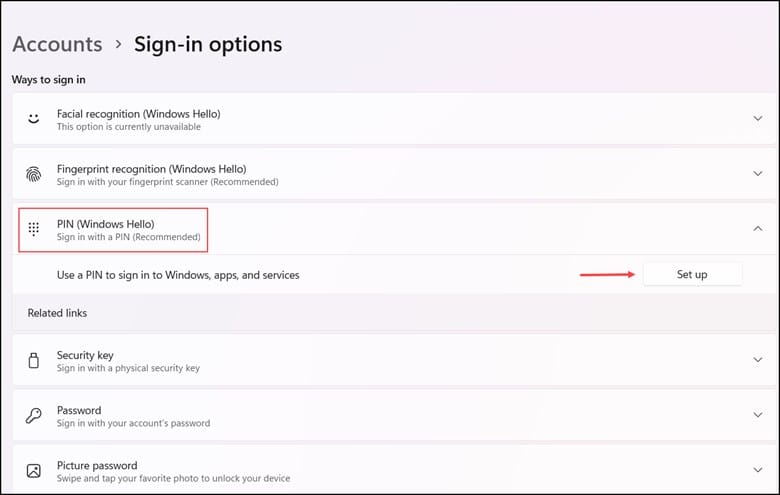
- Then, add a Windows Hello PIN or a facial or fingerprint recognition to your account.
- Then, turn off the toggle button for the “For improved security, only allow Windows Hello sign-in for Microsoft” option under Additional Settings.
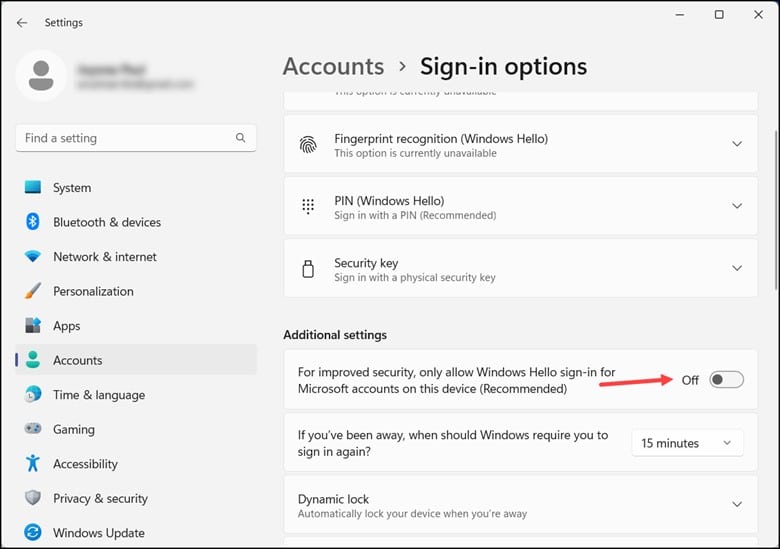
- If the option is greyed out, sign out and then sign in again for changing it.
2) User Accounts Window
To log in automatically at the Windows 11 startup.
Here is how to do so:
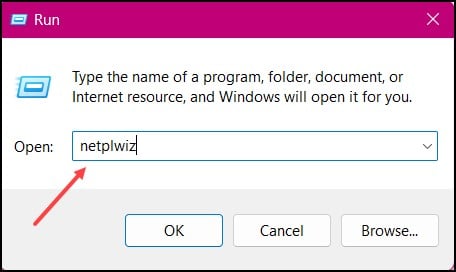
- Open the Run utility by pressing the Windows + R keys on your keyboard.
- Type “netplwiz” in the run utility and press Enter or click OK.
- Now, if you haven’t assigned any password, you need to uncheck the option “Users must enter a username and a password to use this computer.”
The below image is of a PC where the user has been assigned a password.
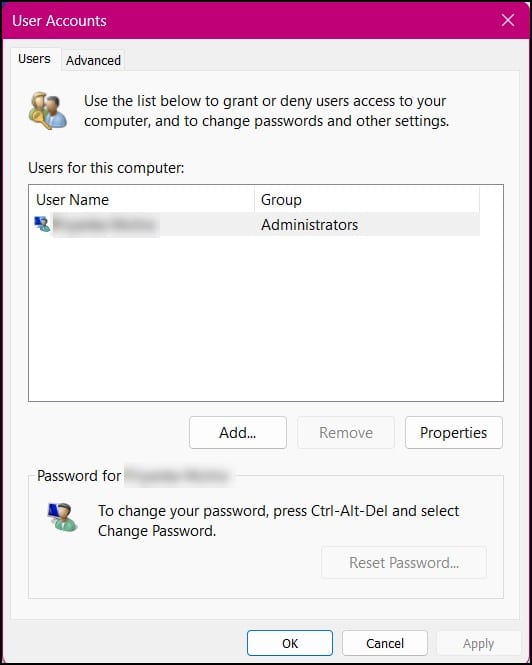
- If you haven’t assigned any password, then you need to click on “Apply” and re-enter your password to validate the change.
- When you restart your PC, you will automatically log in without entering a password.
3) Use Windows Registry
Windows Registry will also be helpful in case you want to enable the Automatic login feature in Windows 11.
There are two methods by which it can be done.
Tweak the Windows registry to enable auto-login on Windows 11. Here are the steps to do so:
- On the Windows Search button, type “regedit” and press “Enter” to open it.
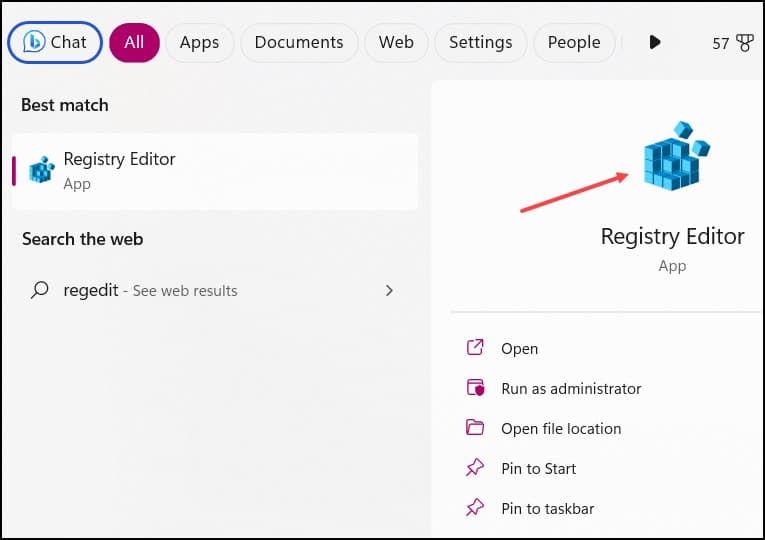
- Next, navigate to this path
“Computer\HKEY_LOCAL_MACHINE\SOFTWARE\Microsoft\Windows NT\CurrentVersion\PasswordLess\Device”
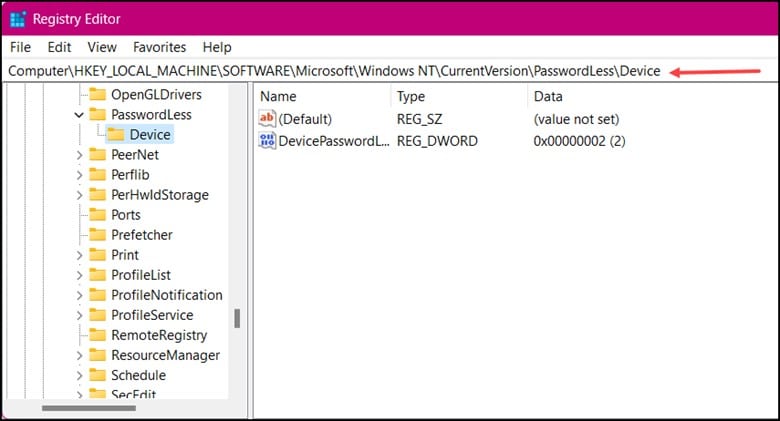
- Search for “DWORD” and change the value data to 0 from 2.
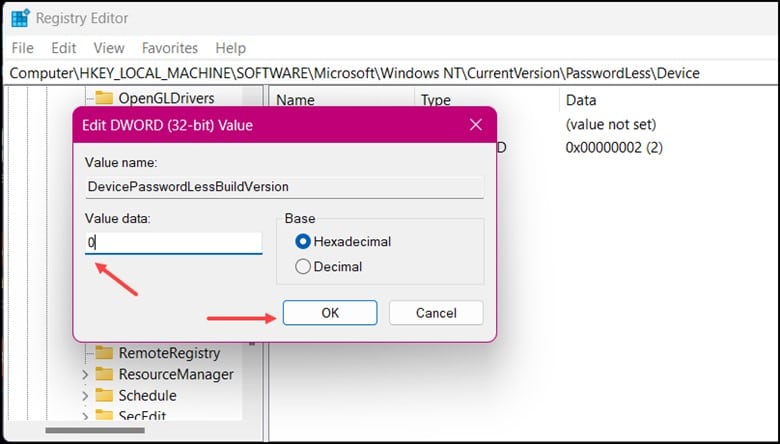
- Finally, click on “OK” and wait for the changes to take place.
You can also make changes in the Windows Registry to turn on Windows 11 automatic login keyword. Here is how to do so:
- In the Windows Registry Editor, search the path shown below.
“HKEY_LOCAL_MACHINE\SOFTWARE\Microsoft\Windows NT\CurrentVersion\Winlogon”
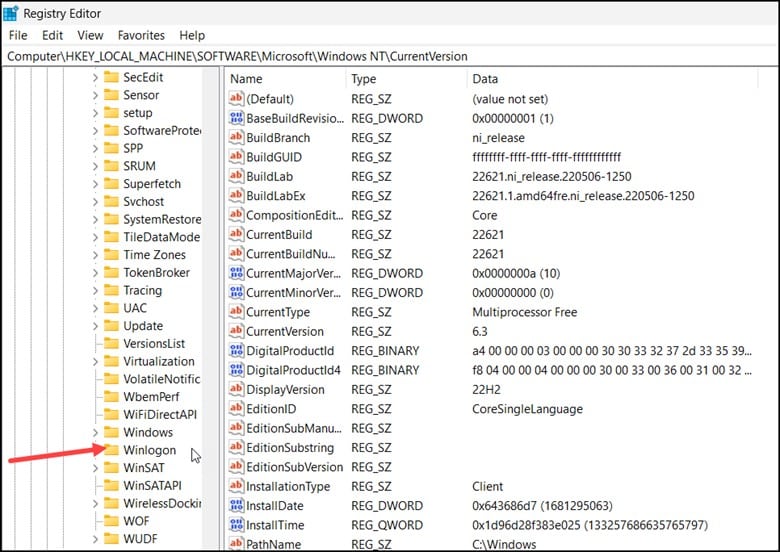
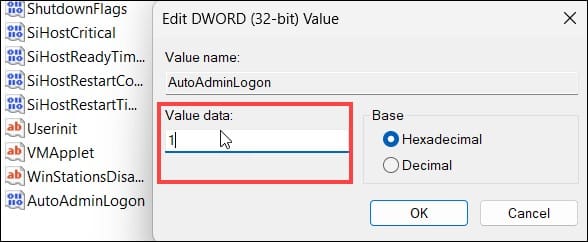
- Right-click on “Winlogon” and select New>DWORD 32 Bit value.

- Name the new value “AutoAdminLogon” Double-click on the right pane and select the value as 1.
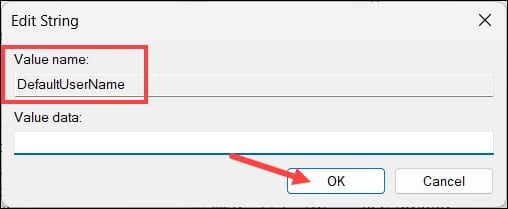
- Right-click “Winlogon,” select “New>string Value,” and name it “DefaultUserName.”

- Double-click on it and insert your “User Name” under “Value Name,” and click “OK.”
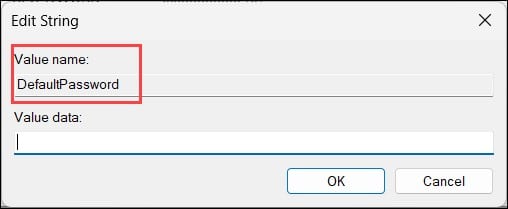
- Right-click “Winlogon” again and click “New>String Value.”
- Now, name the value “DefaultPassword,” enter your user password under “Value Name,” and click “OK.”
- After you have finished all the steps, the Auto Login for Windows will be enabled.
4) Use Autologon Tool
The Autologon tool will help you in managing the auto-login mechanism of Windows 11.
To use the Autologon Tool, follow the steps:
- First, download the Autologon tool on your device and extract the zip files to a known location.
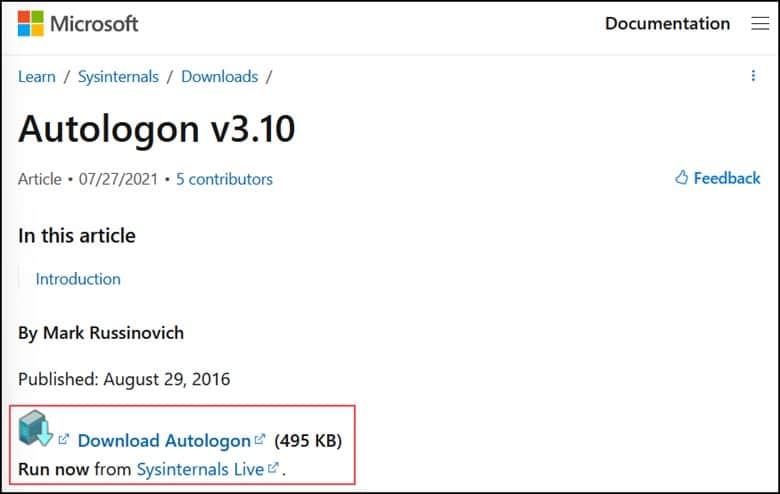
- Search for a suitable file for your PC and double-click to Run it. Press Yes to continue.

- Enter the password and press Yes > Agree to continue.
- Enter your password and click on “Enable” in the next window.
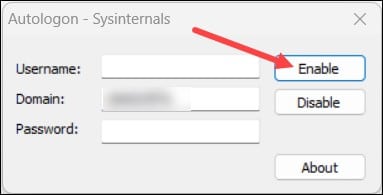
- In the message box, you will encounter a message that says “Autologin successfully configured” will appear, and click on “OK.”
- Finally, restart your system for the changes to take effect, and soon your Windows Autologin will be enabled.
Frequently Asked Questions (FAQs)
- Is It Safe To Use Automatic Login In Windows 11?
Automatic Login can pose a security threat if your computer is shared or accessible to others.
It is advised to use this feature only on personal devices that are protected from unauthorized individuals.
- Can I Switch Back To Manual Login After Enabling Automatic Login?
Yes, you can easily switch back to manual login in Windows 11 after you have enabled Automatic Login.
- Does Automatic Login Work For Multiple User Accounts?
Yes, Automatic Login can be enabled for multiple user accounts on a Windows 11 computer.
Wrap Up
Automatic Login in Windows 11 is a game changer as it offers a significant improvement to the user experience, thereby eliminating the need for manual login.
Reach out to us with your valuable inputs or comments, if any, in the section provided below.
Leave a Reply