Windows loop update errors are the worst. They sabotage your PC, stopping you from even booting into the desktop. In Windows 10 “Couldn’t complete the updates, undoing changes” is one such error. This error arises if the Windows update gets stopped due to some reason.
The Windows couldn’t complete updates error has been around for many years, causing many issues for users. If you are a victim of this error and looking for a solution to fix it, then you have come to the right place. In this article, I have discussed how to troubleshoot the Windows 10 couldn’t complete the updates error.
What Causes “We Couldn’t Complete The Updates, Undoing Changes” Error In Windows 10?
Contents
The Windows couldn’t complete updates error arises when the Windows update fails to finish. It can fail due to various reasons, some of them are:
- The Windows update files can be corrupted or not properly downloaded.
- Your PC may have insufficient disk space, which stops Windows from installing the updates.
- If your PC was shut off due to power failure during a Windows update, it can lead to this issue.
- Corrupt system files can stop the Windows update from finishing.
These are some of the reasons that can lead to Windows 10 not being able to finish the update. Now, I have given some troubleshooting methods that can help you fix this issue. Read the instructions in the solutions properly before executing it.
How To Fix Windows 10 Couldn’t Complete The Updates Error?
To troubleshoot Windows 10 couldn’t complete update error, you first need access to your computer. With the boot process in the loop, you cannot enter the normal Windows 10 mode. In these situations, you need to enter the Safe Mode to get access to your computer. How to enter Safe mode? Follow the steps given below to do it.
If you are using a dual-boot system:
- Click on the “Change defaults or choose other options” option during boot.
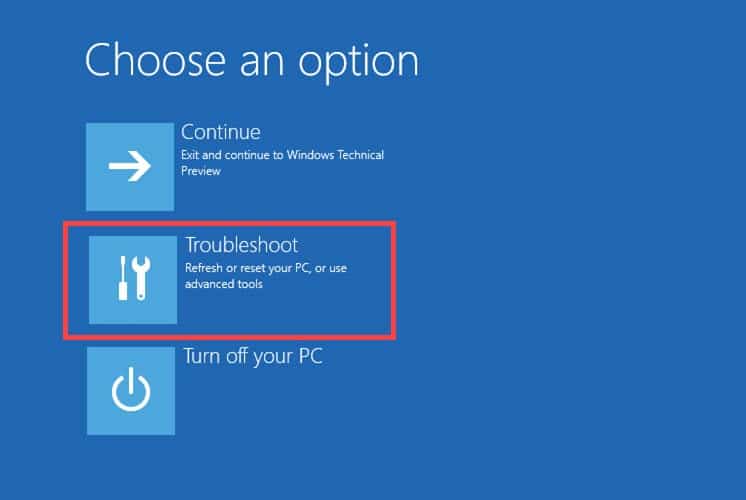
- Select the Troubleshoot option.
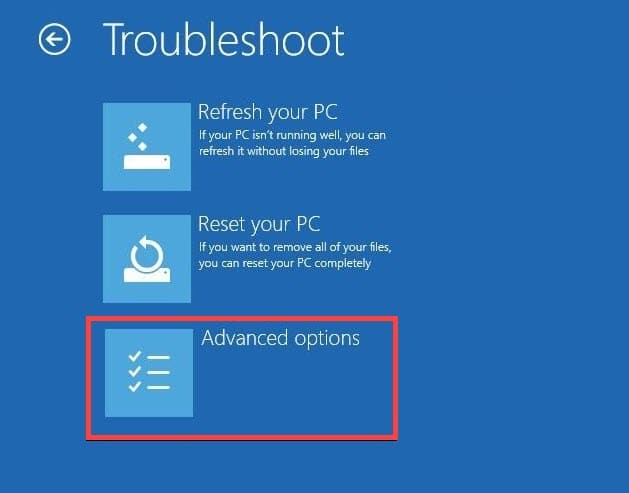
- Next, click on Advanced option.
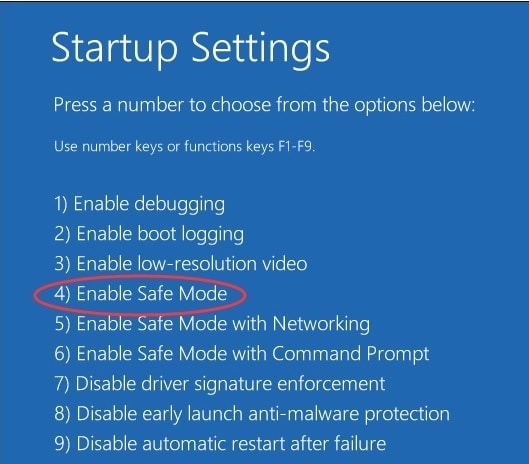
- Select the Startup Settings option and press the F4 key on your keyboard to enter Safe Mode.
Otherwise, do this:
- Press F8, F9, or F11 (varies in different cases) during boot or wait for Windows to boot 3 times after which it will automatically open the recovery settings.
- Now, follow steps 2-4 from above to enter Safe Mode.
After you have boot into Safe Mode, now you can execute the following troubleshooting methods easily.
1) Use System Restore Point
If you had created a system restore point before updating Windows, then you can easily return your computer to that state of time by loading the system restore point. However, if you had no system restore point was created before the “We couldn’t complete the updates, undoing changes” error arose, then skip to solution 2.
To load a system restore point, follow the steps given below:
- Type Create a restore point in the search bar. Select the top option. This will open the System Properties.
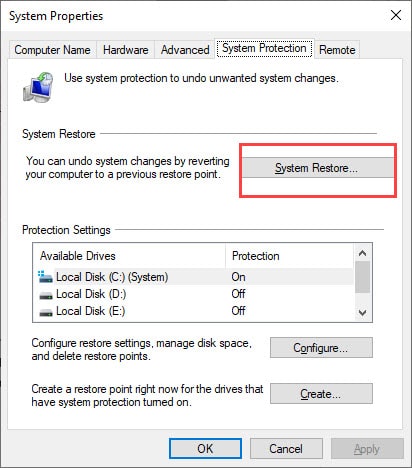
- In the System Protection tab, select the System Restore option.
- Follow the instructions on your screen and select the earlier restore point you had created.
After the computer returns to its earlier state, update the computer again, and see if Windows 10 couldn’t complete the updates error also arises this time.
2) Run Windows Update Troubleshooter
Windows update troubleshooter can solve any issues regarding the Windows update. When you are stuck in a “We couldn’t complete the updates” error loop, this is the first solution you should try. To run the Windows update troubleshooter, follow the steps given below:
- Open the Windows search bar and type Troubleshoot settings. Select the top option.
- After the Troubleshoot Settings opens, select the Windows Update option in the Get up and running section.
- Next, click on Run the troubleshooter button to initiate the Windows update troubleshooter.
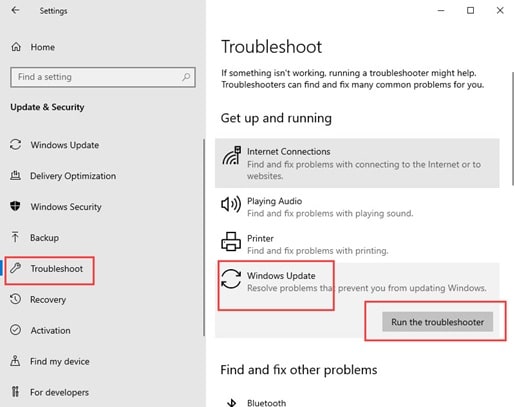
- Follow the instructions on your screen to finish the process.
3) Run Startup Repair
If running the Windows Update troubleshooter didn’t work, try running the Startup Repair. Startup Repair is a diagnostic troubleshooting tool for Windows that repairs the operating system if it keeps failing to boot into Windows 10. To run it, follow the steps given below:
- Enter the Recovery options as you did for entering Safe Mode.
- Select the Troubleshooting option and then click on Advanced options.
- Now, click on the Automatic Repair option.
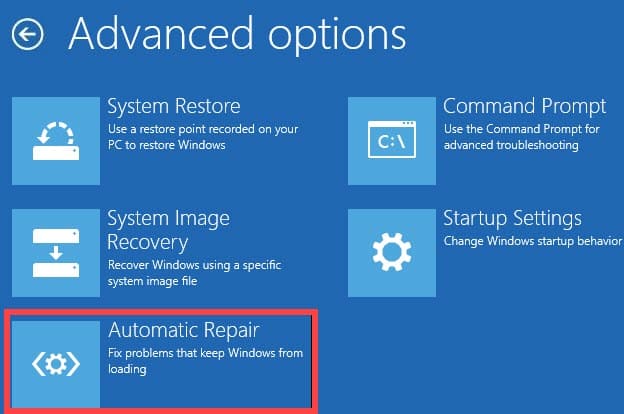
- Wait for the Automatic Repair process to finish. It will take some time, so don’t become impatient.
The Startup Repair should find and fix any issues causing the Windows couldn’t complete updates error. If it doesn’t, then try running the DISM and SFC scans given below.
4) Run DISM And SFC Scans
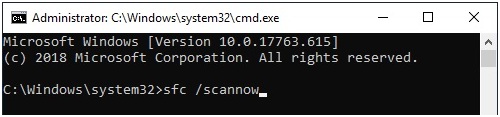
Running DISM and SFC scans (System File Checker) should fix any corrupted system files that can cause the Windows 10 couldn’t complete the updates error. To run the SFC scan, follow the steps given below:
- Open the Run utility again.
- Type cmd and press Ctrl + Shift + Enter to open an elevated Command Prompt.
- Now, type sfc /scannow and press Enter. It will take a long time to finish this process after which the computer will restart on its own.
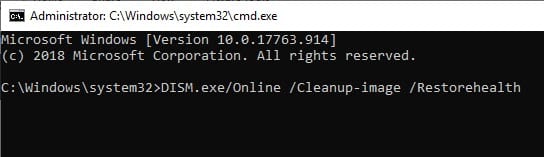
If the error persists after the PC restarts, run the DISM scan by following the steps given below:
- Repeat the steps 1 and 2 from above to open the elevated Command Prompts again.
- Type the following command and press Enter to initiate it:
DISM /Online /Cleanup-Image /RestoreHealth - After the process is finished, restart your PC.
Running the SFC scan and DISM scan should fix any issues caused by corrupted system files.
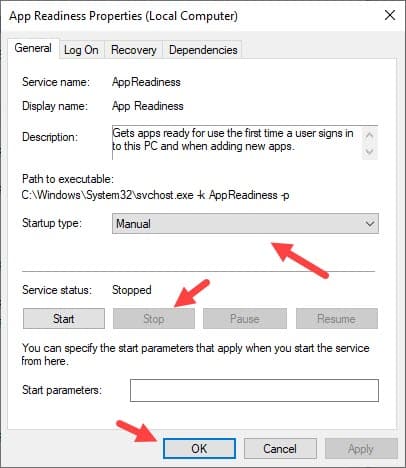
5) Enable App Readiness Service
App Readiness Service is important for conducting Windows updates. If this service is disabled, then Windows couldn’t complete updates error can arise. Changing the startup type for this service to automatic can fix this error. To do it, follow the steps given below:
- Press Windows + R keys to open the Run utility.
- Type services.msc and press Enter to open the Services app.
- Locate the App Readiness service and double-click on it.
- Change the Startup Type to Automatic.

- Click on Apply and Ok to save the changes.
- Finally, restart your computer.
If you find the Windows 10 we couldn’t complete the updates error after your computer restarts, then enter the Safe Mode again and try the next solution.
6) Delete Software Distribution Folder
All the Windows update files are stored in the SoftwareDistribution folder. If the Windows update files are corrupted or broken, then it can lead to the Windows 10 couldn’t complete the update error. In these situations, deleting the contents in the SoftwareDistribution folder can fix this issue.
To delete the contents in the SoftwareDistribution folder, follow the steps given below:
- Open the elevated Command Prompt again.
- Type in the following commands:
a) net stop wuauserv press Enter.
b) net stop bits press Enter.
c) net stop cryptSvc press Enter.
d) net stop msiserver press Enter. - After the process finishes, navigate to the following location in your computer:
C:\Windows\SoftwareDistribution - Delete everything in the SoftwareDistribution folder.
- Now, open the elevated Command Prompt again and enter the following commands:
a) net start wuauserv press Enter.
b) net start bits press Enter.
c) net start cryptSvc press Enter.
d) net start msiserver press Enter. - Finally, restart your computer.
7) Disable The Automatic Windows Update Service
If none of the above solutions worked, you can try disabling the automatic Windows Update service and see if it fixes this error. To do it, follow the steps given below:
- Open the Services app again.
- Find the Windows Update service and double-click on it.
- Change the Startup Type to Disabled.
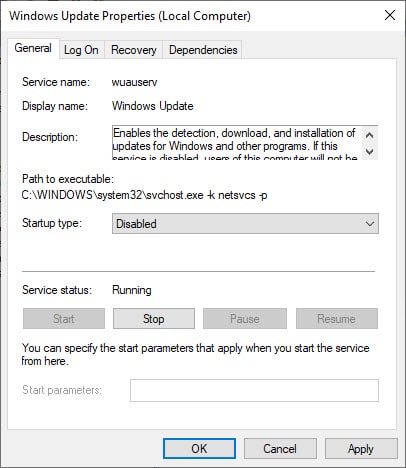
- Click on Apply and OK to save the changes.
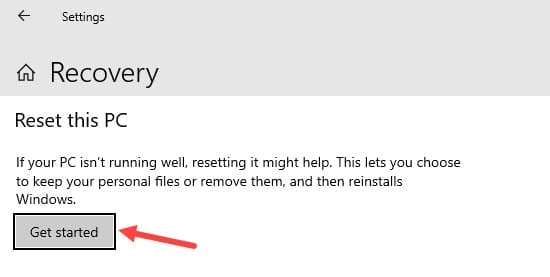
8) Reset Your PC
If disabling the Windows update service also failed, then the only thing you can do is reset your PC. To do it, follow the steps given below:
- Type Reset this PC in the search bar and select the appropriate option.
- Click on the Get started option in the Reset this PC section.
- Follow the instructions on your screen to reset your PC successfully.
Wrapping Up
So, there you have it. Now you know how to fix the Windows 10 couldn’t complete the updates, undoing changes error. Any of the above solutions or a combination of a few should be able to fix this issue for you. If you have any questions regarding this article, ask them in the comment section below.
Leave a Reply