This article has been updated to be relevant for Windows 11 users.
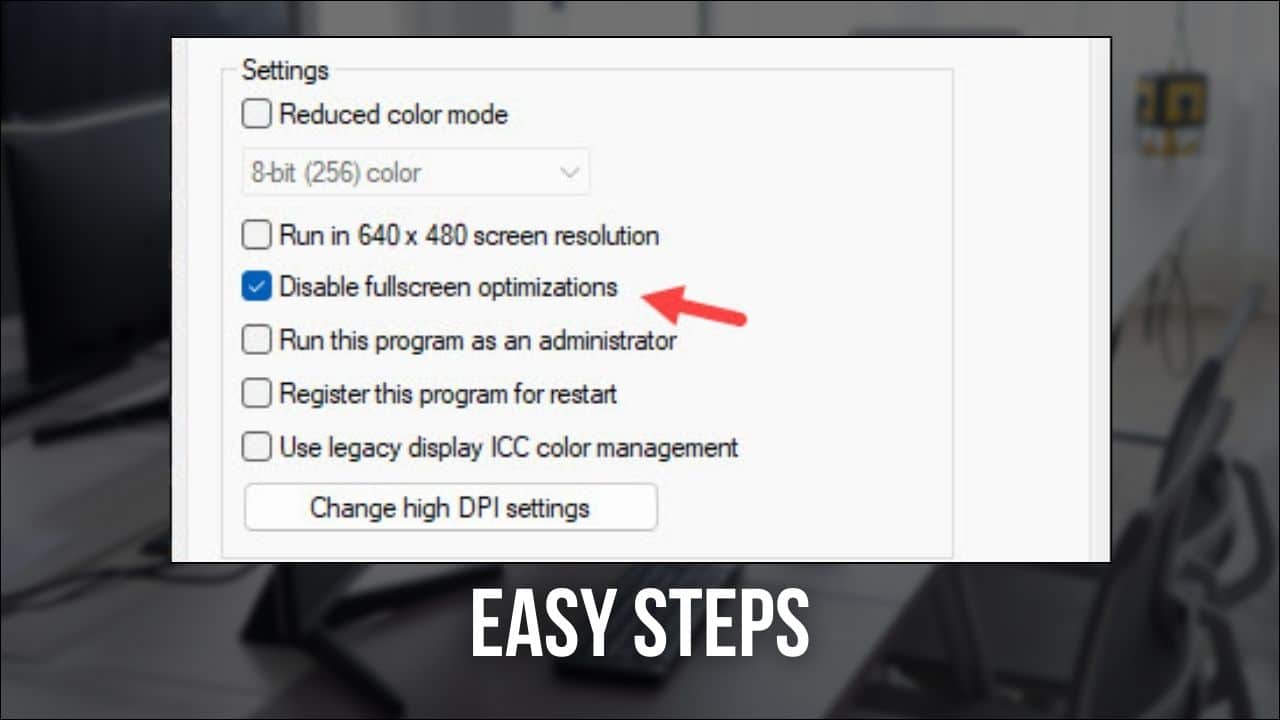
The Fullscreen optimization feature in Windows 11 and 10 was introduced to make the gaming and video playing experience better for users.
When the Fullscreen Optimization feature is enabled, your PC prioritizes the CPU and GPU resources to enhance the games and playback videos.
But, this feature was soon reported to be responsible for FPS drops and other bugs.
Here, I have shown how to disable Fullscreen Optimization in Windows 10 and 11. So, keep reading.
Disable Fullscreen Optimizations In Windows 11/10
Contents
Earlier, it was quite easy to disable the Fullscreen Optimization on Windows, as there was a dedicated option for it.
Later, the option was removed, and now Windows 10 and 11 use the Fullscreen Optimization feature by default. There is still a registry trick to disable it for all apps, which I have shown, but it’s not foolproof.
However, Windows allows users to disable Fullscreen optimation for individual apps. Here is how you can do it!
Turn Off Fullscreen Optimization For A Single Application
The option to disable Fullscreen Optimization for all apps may have been removed on Windows 10 and 11 by conventional means, but you can still disable it for individual apps. Here is how you can do it:
- Right-click on the app or game that you want to start without Fullscreen Optimization.
- Click on the Properties option from the right-click context menu.
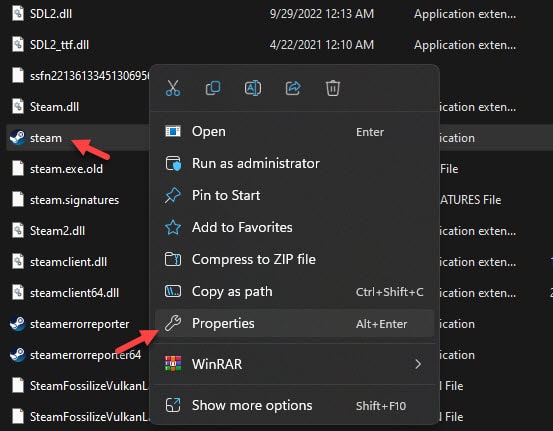
- Select the Compatibility option.
- In the Settings section, check the Disable fullscreen optimizations option.
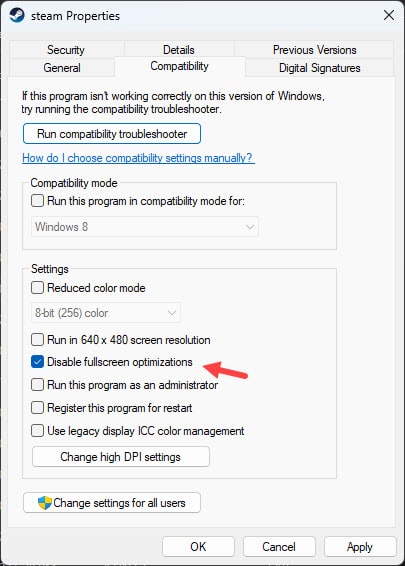
- Click on Apply and OK to save the changes.
Now the application will start without using the Fullscreen Optimizations feature.
This will be the case every time you open this app in that particular user account until you uncheck the Disable fullscreen optimization box from properties.
However, this won’t be the case for all the user accounts on your PC. To disable the Fullscreen Optimization for a particular app or game in all the user accounts in your PC, follow the steps given below:
- Open the Compatibility tab in the Properties of the app or game as mentioned above.
- Click on the Change settings for all users option.
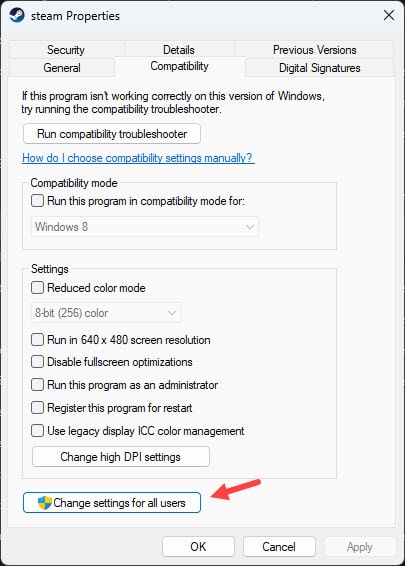
- Check the Disable fullscreen optimizations option.
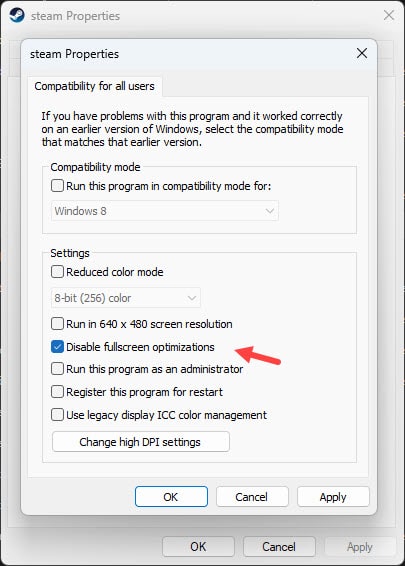
- Click on Apply and OK to save the changes.
Turn Off Fullscreen Optimization From Registry
To disable it for all apps in the latest Windows 10 version and Windows 11, you must make some changes in the Registry.
Windows Registry is the place where all the Windows settings are stored. When you make a Registry change, you need to be extra careful as even a small mistake can lead to a complete system crash.
NOTE: Before following the steps given below, backup the Registry keys or create a system restore point. This will allow you to restore any mistakes you make in the Registry.
Now, to disable Fullscreen Optimization from Registry, follow the steps given below:
- Press the Windows + R keys to open the Run utility.
- Type regedit and press Enter to open the Registry Editor.

- Navigate to the following registry key:
HKEY_CURRENT_USER\System\GameConfigStore - On the right panel, right-click on the empty white area and select New >> DWORD (32-bit) Value. This will create a new DWORD.
- Name the new DWORD GameDVR_DSEBehavior and double-click on it.
- Set 2 as the value to disable Fullscreen Optimization. Click on OK to save the changes.
If you want to enable Fullscreen Optimization again, then simply change the value to 0 from 2. - Finally, close the Registry Editor and restart the computer.
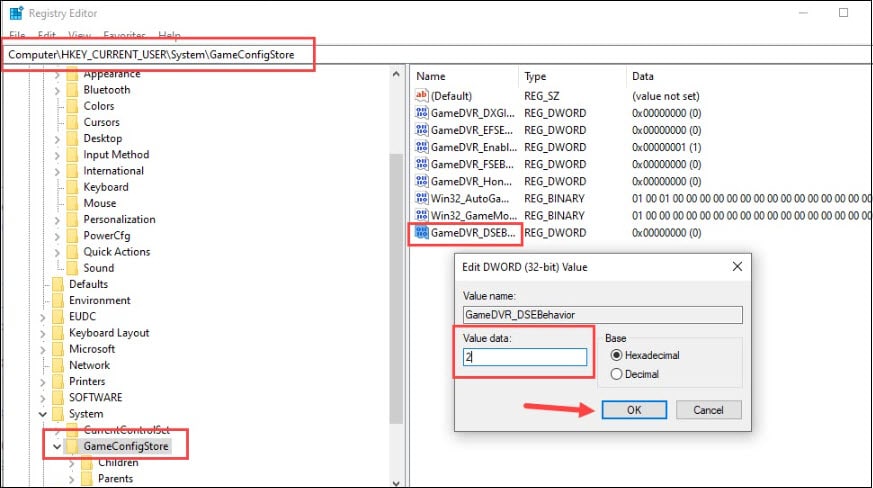
After the computer starts, Fullscreen Optimization will be disabled.
Turn Off Fullscreen Optimization From Settings (For Users With Older Windows 10 Versions)
The following methods no longer work for the latest versions of Windows 10 and 11. But if you are using an older version of Windows 10, then you can still use it.
Here is how you can do it:
- Right-click on the Start menu and select the Settings option. This will open the Settings app on your screen.
- In the Settings app, click on the System option.
- Next, click on the Display option.
- Scroll down and select the Advanced Graphics settings option.
- Now, uncheck the Enable Fullscreen Optimization box in the Fullscreen Optimization section.
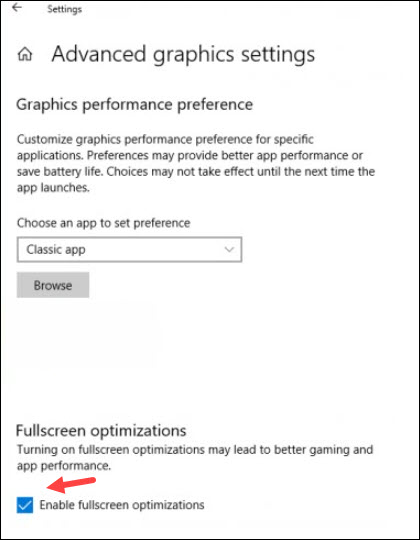
If this option is unavailable on your PC, then try the next two methods.
Wrapping Up
So, there you have it. Now you know how to disable Fullscreen Optimizations in Windows 10 and 11.
Remember to backup your Registry or create a system restore point before editing the Registry keys.
If you have any other questions regarding this article, ask them in the comment section below.
Dont do it. Keep it on. it helps fps.
it actually decreases it a little, 2 to 4 %, but the idea is to be able to use overlays and to alt tab faster, it’s pretty buggy though, if i’m using it while playing vindictus and i dare to alt tab there’s a very high chance of it getting stucked, leaving me with no options but hard restart.
i would recommand anyone to disable it .
Thanks for helping us to give this informative post. Could you tell me some more detailed information about fullscreen optimization?
Disabling fullscreen optimization uncaps FPS with Intel HD Graphics which helps a lot.. now i can play without stupid auto 30fps/60fps locks
Fullscreen optimizations can sometimes cause FPS drops, is that true? If yes, could you please tell me the appropriate solution for FPS drops?