Windows install error – 0x80070103ocuurs while installing Windows update.
This can happen if you are trying to install a driver already installed in your system or if the version of the driver is not compatible with the system. The Windows installation can get stuck and trigger these types of installation errors.
So, what to do if you get such an error?
Here is a complete guide that will provide all the solutions to fix the error.
What To Do When I Get Install Error 0x80070103?
Contents
Errors during Windows installation are common. So, don’t worry if you are getting install error 0x80070103. Follow these methods to fix it easily.
1) Pause and Resume the Windows Update
When you get install error – 0x80070103 for Windows 11, pause the update and resume it.
Click on the Retry option beside the update showing you the error.
Pause the update and then immediately resume it. This simple trick can fix the issue and the update will get installed.
2) Run The Update Troubleshooter
Windows has in-built update troubleshooters to fix update-related issues. So, when you get install error 0x80070103, run the Windows update troubleshooter.
Here is how to run the troubleshooter:
- Press Windows + I keys to open Windows Settings.
- Choose Troubleshoot from System.
- Next, select Other Troubleshooters.
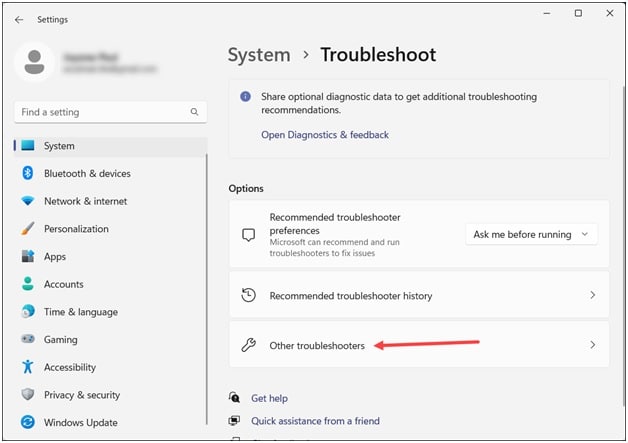
- Click on the Run button beside Windows Update. Wait till the troubleshooter gets completed.

3) Run A System File Checker
Due to the corrupted system files, you can also get Windows install error – 0x80070103.
So, run an SFC scan and this should fix the issue. Here is how to run the scan:
- Go to the Windows search box and type CMD. Press the Enter key.
- Now copy & paste the following command in the elevated Command Prompt window & hit Enter:
sfc /scannow

- Let the scan finish and then try to install the Windows update.
If you still cannot do so, run a DISM scan. If the error is happening due to broken or corrupted Windows images, then that will get fixed with a DISM scan.
- To run a DISM scan, type the following command in the elevated Command Prompt window:
DISM /Online /Cleanup-Image /CheckHealth

- Once the scan is complete, try to install the Windows update and see if this can fix the issue.
4) Reset Windows Update Components
Due to corruption in the Windows Update components, you can also get error codes during Windows update.
To fix the issue, reset the Windows Update components. Here is how you can do it:
- Open an elevated Command Prompt window.
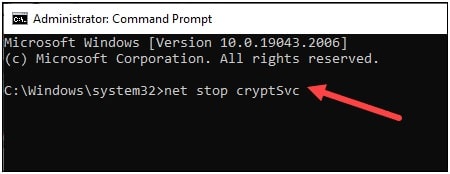
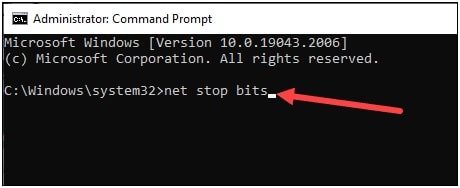
- Type the following line of commands in the elevated CMD window & press Enter after each command:
net stop wuauserv

net stop cryptSvc
net stop bits
net stop msiserver
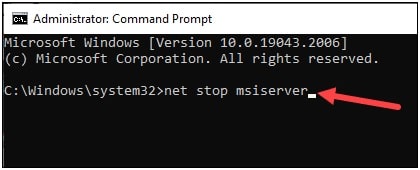
Once you run all these commands, the WU Services, BITS MSI Installer, Services, and Cryptographic Services will stop.
Now empty the directories that store the WU component’s updated files and rename them.
This will compel your system to have new fresh uncorrupted files.
To do that, copy & paste the following commands in the elevated Command Prompt window &hit Enter:
ren C:\Windows\SoftwareDistribution SoftwareDistribution.old

ren C:\Windows\System32\catroot2 Catroot2.old

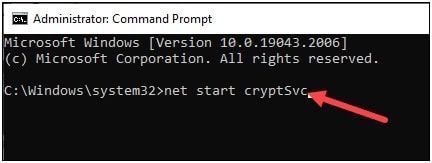
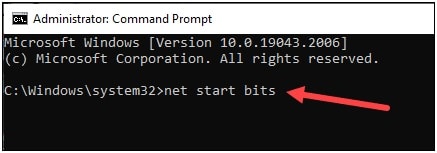
Once done, enter these commands to re-enable the Windows Update components:
net start wuauserv

net start cryptSvc
net start bits
net start msiserver

After running the above commands successfully, try to install the Windows update. If you still get the error, delete the temporary files.
5) Delete Temporary Files
You can get error – 0x80070103 during a Windows update if the temporary files on your system get corrupted.
So, delete the temporary files to fix the error. To do so, follow these steps:
- Press Windows + R keys to launch the Run utility. Type %temp% in the Run command box & press Enter.

- Select all the temporary files by pressing Ctrl + A and select the Delete option from the drop-down menu.
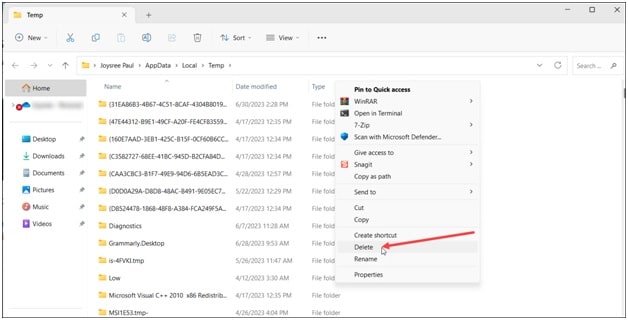
- Once done, restart your system and check if the error persists. If yes, disable Firewall.
6) Disable Firewall Temporarily
Sometimes Windows Firewall or the antivirus program you are running can interfere with the update process.
This can be the reason why you get an update error.
Here is how to disable Windows Firewall:
- Go to the Windows Search menu and enter Windows Defender Firewall and select the top option.
- Click on Turn Windows Defender Firewall on or off option.
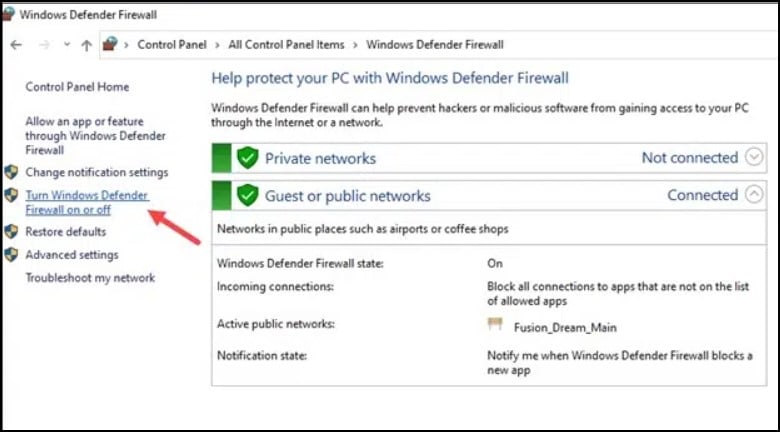
- Select Turn off Windows Defender Firewall (not recommended) buttons for both Private network settings and Public network settings.
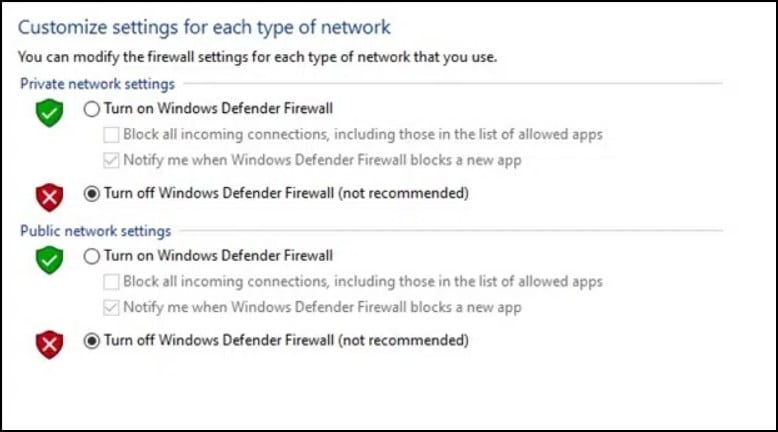
If If you are using any antivirus software, disable that too.
Make sure you enable the antivirus and firewall soon after you install the updates, as your system is vulnerable to malicious threats without them.
Frequently Asked Questions [FAQs]
- What is error code 0x80070570 on Windows?
You can get error code 0x80070570 on Windows if the installation file is corrupted, which may have occurred due to an unstable internet connection or a problem on the server side.
- How do I remove a failed Windows installation on Windows 10?
To remove a failed Windows installation, go to Windows Settings > Update & Security > Recovery. Now you will find the option to Go back to Windows 7 or 8.1 option. Click on the Get Started button to restore the previous Windows installation version.
- Can we directly install Windows from USB?
Wrap Up
So, that is how you can fix Windows install error 0x80070103. If you have any further queries, ask us and we shall revert soon. We are always eager to hear from you.
Leave a Reply