“How to rename a drive in Windows 10?” is one of the frequently asked questions in different forums. Naming the drives does help if you keep files in only in specific Drives. This way you can easily navigate to the different files on the computer.
In this article, we have discussed 3 ways you can change drive name and also how to rename drive letter in Windows 10.

You may also like to read this article on Windows 10 recovery partition.
Rename A Drive In Windows 10 Easily With 3 Simple Methods
Contents
You can use the following 3 methods to easily change the names of the drives on your PC.
Method 1: Use The Rename Option
The simplest trick to rename a drive is simply by using the Rename option if you have the administrative privileges, or you are the only user logged into Windows. To do this, follow the steps given below:
- Open This PC and right-click on the drive that you want to rename. A menu will pop-up on your screen.
- Select the Rename option from the pop-up menu.
- Now, type in the name you want, and press Enter.
- If you are trying to change the name of the system drive, then a dialogue should open on your screen.
Select the Yes option to change drive name.
This is the simplest method you can use to rename the drives.
Method 2: Rename From Disk Management
Another method you can use to rename the drives is by using the Disk Management. To do it, follow the steps given below:
- Right-click on the Windows button in the lower-left corner of the screen. A menu will pop-up on your screen.
- Select the Disk Management option.
- Right-click on the drive and select the Properties option.
- In the General tab, type in the name you want in in the free space at the top as shown in the image below.
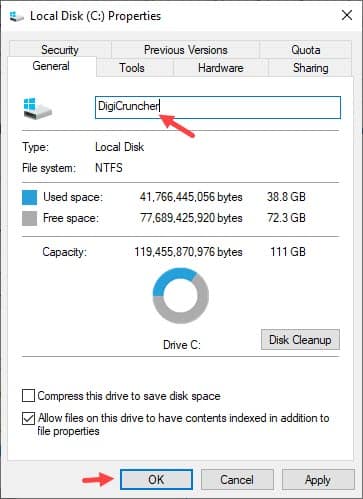
- Finally, click on Apply and OK to save the changes.
Method 3: Rename From The Command Prompt
If the above to methods don’t satisfy you, then you also try renaming from the Command Prompt. To do this, follow the steps given below:
- Open the Run utility by pressing the Windows + R keys on your keyboard.
- Type cmd and press the Ctrl + Shift + Enter to open the elevated Command Prompt.
- Type label “drive letter”: “drive name”, where in place of “drive letter” enter the actual letter of the drive like D: and enter the new name in place of “drive name”.
Example: label D: Digicruncher - Finally, press Enter to change the drive name.
Rename Drive Letter In Windows 10 Easily
You can also change the drive letter and not just the drive name. To do this, follow the steps given below:
- First, make sure that no files are open from the drive of which you want to change the letter.
- Now, open the Disk Manager again like in Method 2.
- Right-click on the Drive, which you want to change the letter.
- In the pop-up menu, select the Change Drive letter
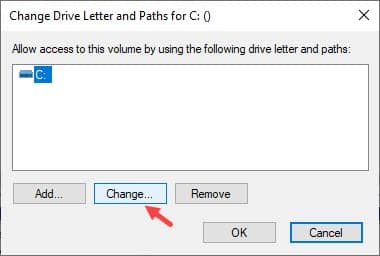
- Select the drive and click on the Change option.
- Click on the drop-down menu beside the Assign the following drive letter option. All the letters for A-Z will be listed. Choose the one you prefer.
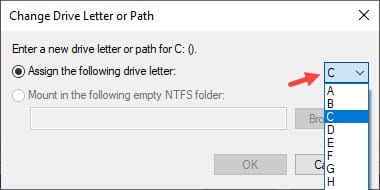
- Finally, click on OK to save the changes.
Now, the letter of the intended drive will be changed.
Wrapping Up
So, there you have it. Now you know how to rename a drive in Windows 10 and also how to rename the Drive letter. Leave your comments below if you have any confusion about the methods given above.
Leave a Reply